Friday 31 December 2010

Sewn Favourites from 2010

Here in Sydney we've had the 9pm fireworks, the midnight fireworks are approaching and 2010 is nearly over.  My resolutions for the new year are ready, so it's time to review 2010 and show you a couple of my never-been-blogged sewn favourites for the year. In no particular order then...

... let's start with this. This top was made on a whim when I saw and purchased some glorious fabric in a Tessuti fabric store - it's a textured Japanese cotton with a reasonable weight to it. The pattern is a mixture: I used the bodice and neckline from Vogue 1013 (a DKNY pattern, made up in the black dress shown here), and the puffy folded sleeves are from pattern 129 from the 09/2009 Burda magazine (adjusted up from petite size, with extra pleats folded in). This top is one of my favourite work tops and can be worn tucked in or out. 

 
Next up, a floppy but beloved first ever (and not quite Gucci-esque) handbag; made using a small piece of loose woven cotton from No Chintz in Sydney, with a layer of wadding then some interfaced thin cotton. The pattern for this came from Ric Rac's blog, but I had to have a shorter strap as I didn't have much fabric at all. If I make a bag again I'll know to use something stiffer than wadding.


Here's a "vintage" jersey t-shirt: just a grey knit, but made from a rather fetching vintage pattern - this success may be why I persist with making jersey versions of patterns for wovens... I love pleats in a knit, I love kimono shaped sleeves, and I love wearing this with whatever:


Advance pattern 4178 for a woven top and skirt

And here's the 2010 clothing that was most appreciated by someone else (my daughter in this case) - a birthday outfit of a pale pink Simplicity pattern 7211 pinafore with a pretty pink floral cotton blouse from a Japanese pattern book (style C, from the Girls Style Book shown below). This fabric was from Lincraft.  I know this outfit is a particular favourite because my daughter is still trying to wear it in the heat of our summer! 


Nothing very complex in there, but maybe that's why they worked out :-)

Happy new year and I hope that 2011 is great for sewing!

Thursday 30 December 2010

My Late 1980s to Mid 1990s Sewing Wishlist

Coming off my very recent post this may seem odd, but I have to confess to still appreciating some 1990s and 1980s styles.

I used to sew in a serious manner (eg no silly t-shirts) back in the late 1980s to mid 1990s, and there were some patterns I sewed back then that I would love to make again.  But to do so would require adjustments / sizing up, and more in some areas than in others.  Frankly I just don't have that much time.  So here's my top 5 of the late 1980s to mid 1990s patterns I wish I could find the time to make again in my current size:

I made the skirt in black linen blend, and the blouse in a fabulous textured grey silk
made in a floral poly-cotton for a party: I loved this dress
made in a red poly-cotton: another one I loved
much loved in navy handkerchief linen - given away after too much shrinkage
made in shorter length in burgandy velvet - some issues but lots of potential
So many sewing wishes, so little time!

V2879 (OOP) Dress-Test 'T' in Jersey

I picked this pattern up in a second hand store - I was interested in the square-neckline, short sleeves and shorter skirt of the green dress on the incognito blonde in the middle, and rather unimaginatively I was considering making it in ------ a pale green linen:


But it's quite an old pattern - from the 1980s I think - so after my bad experience with fit on a 1970s shirt I thought I'd better test it with a muslin first.  The skirt is quite full, so forget about a muslin for that - and I like wearable muslins, so I made it from a knit, lengthened the bodice by about 15 cm, and omitted the buttons down the front by cutting on a fold instead. 

This is the result - I'm really disappointed, so I'm calling this a failure - it looks so rubbish...


The fit is OK, but it needs shoulder pads (which I've included in the above pics). Maybe it's just a really boring pattern.  My messy stitching around the neckline doesn't help - but I was trying to make an improvement!  I think I'll hold off on making this dress for now - my pale green linen remains in the stash.

PS The shoulder pads included above are quite interesting; each has 2 narrow strips of velcro on the underside to attach around your bra straps. I came across these second hand but new in their packet.  Just imagine how useful they would've been in the 1980s - instant shoulder pads with everything! And they look so attractive just on their own, hanging off a bra in all their beige puffiness.  Shame the velcro is so scratchy - of course the only reason they won't be seeing lots of action around here LOL.

Tuesday 28 December 2010

Vogue 8486: Intended Christmas Dress (belatedly)


I hope you all had a lovely and relaxing Christmas - if you have small kids it probably wasn't that relaxing but hopefully was really fun!  We celebrated Christmas over two weeks: pre-Christmas celebrations with my younger brother and his family and my mum who was going o/s for Christmas with my middle brother and his family; Christmas Eve with my dad and his partner, her daughter and boyfriend and some close friends of my dad's and their family; and Christmas Day lunch with my partner's extended family.  On Christmas Day we were woken early as you'd expect, but it was because the cat had woken my son (she's a very naughty cat who delights in finding breakables to push off high surfaces in the night).   My kids were really chuffed that Santa and his reindeers had eaten their food and the reindeers made their customary mess with it; they were really excited that Santa gave them each the toy they'd asked for, and seemed to enjoy all the other things they were lucky enough to receive.  We adults enjoyed a delicious summery lunch that everyone had contributed to - oysters, antipasti, whole baked salmon, a glazed half ham, a gazillion salads (including the Thai-style prawn salad we made), .... summer pudding AND Christmas pudding!  The weather was also lovely for us and not too hot - unlike Perth.

Anyway, back to the real subject.  For a few days before Christmas I worked fast in small pieces of late-night free time to make a Christmas dress, as so many of you did.  But at the "finishing" stage (hems etc) on Christmas Eve, I realised that our Christmas Day lunch is more casual than the dress I'd been making.  I ended up wearing my linen ikat version of V1175, blogged here.  The intended Christmas Day dress, shown above in unfinished form, may end up as... a work dress?  I'm not sure.  Some of the people at my work dress pretty formally so it would be acceptable work attire.

The dress is the non-sleeved version of V8486, which is supposed to be made in a knit.  The changes I made were: no interfacing; fully lined with a second dress made out of turquoise lining; back slit omitted; and a floppy belt added. And of course woven fabric - a delicious silk satin bought only shortly before Christmas from Tessuti fabrics.   I am sure this would still be in stock - and they have a sale on now.


Below are some "details" pictures.  The grumpy looking pictures by the window show the fabric colours properly.


PS I made this dress earlier this year in a stripey loose knit for winter - but I will have to blog about this separately as I'm being called to play my part in a very involved prince and princess rescue game.

Thursday 16 December 2010

Quick Scoop-Neck T


I looked in my t-shirt drawer and there weren't as many as I thought... well not as many that I liked.  I should have made some sensible basic t-shirts for exercising in, but instead I mixed the Vogue 1013 DKNY top's bodice with the Vogue 1128 Anne Klein top's sleeves:


V1013 bodice, incl. back darts - but excl. back opening
V1128 sleeves, cap gathered as necessary
I omitted the V1013's opening in the back because I barely needed it even when I made this up in a woven fabric - but I left in the darts in the back because I love darts in knit fabrics for some odd reason. Note the darts aren't shown on the pattern's technical drawings. The bands I added around the sleeves and neckline gape a bit but make the t-shirt remind me of those old v-neck white t-shirts that went with 501s like a uniform many, many years ago...  Strangely, despite its imperfections I love this t-shirt.  I know it doesn't look like a brilliant fit but it's really comfortable!  Anyway, here are some pics of what details there are:

Sleeve close-up
Neckline close-up

And there's one of the darts

Monday 13 December 2010

Simplicity 2872: A Successful Tinkerbell


One of the things I like about Tinkerbell is that she doesn't wear pink - she wears green. Those of you who have / had small daughters will be familiar with the pink obsession...which can get tiring!

Because my daughter really wanted to dress up as Tinkerbell, and because the costumes I've seen in the shops are expensive and look like rubbish, I promised to make her one myself.  Although the perfect pattern (Simplicity 2872: Disney Fairies) and the right fabric (emerald green and light green party satin, and sparkle embellished blue tulle) were easily found and cheap, and although I started on this relatively promptly, this project has proceeded really slowly (read: months!). Basically I had assumed that a pattern for a kid's costume should be simple, and with no previous Simplicity experience assumed the pattern instructions would be short and sweet.

Turns out this Disney Fairies pattern gets mixed reactions at Pattern Review; certainly not entirely glowing recommendations. My own personal gripes with the pattern are that:
  1. there are too many pieces (22 in total, 10 of these for the Tinkerbell outfit - excluding wings);
  2. it's too complicated and time consuming for a kid's dress-up costume; and
  3. lining on kid's clothes should not be made from cheap tulle (it's scratchy) - but would you actually buy the more expensive soft tulle for the lining of a dress-up costume? Even if I would I think I prefer my satin lining.
So, having got that whinge off my chest I can move on to the positives. The instructions are detailed, with lots of illustrations that make everything pretty clear, and it's not a particularly hard pattern. Contrary to some sewers' experience, the sizing (sz 4, for a large 3 y.o.) was good for me.  Plentiful ironing along the way made a big difference to the finish of the dress - I'm happy with it, and so is my daughter. I didn't get it made in time for Halloween, but it was in time for today's childcare Christmas concert and party - hooray!

the dress without a child in it
and the bloomers that you won't see when the dress is worn

For anyone considering making this pattern, here are the modifications I'd suggest:
  • Cut linings from your outer fabric or something else soft, not cheap tulle.
  • Try the tulle skirt on top of the satin skirt instead of under it - much more comfortable. 
  • PRESS everything. Press in / after dress steps 3, 5, 6, 8 , 9, 11 and 12, in belt step 4 and in / after pants steps 1 and 3.
  • Replace the grommets and ribbons on the belt with something easy - I sewed on pieces of ribbon at the back so the belt could be tied in a bow rather than needing to be laced up (!!). And then my daughter said Tinkerbell doesn't have a belt so she won't wear it anyway.

Postscript:
Although I did get to see my daughter's short performance in this costume I didn't then get to stay for the party and meet Santa - I left my daughter with childcare staff to take my son to the only dentist's appointment we could get today after a bloody dental injury on the playground at school at lunchtime. And it was his second - the first dental accident on school grounds was on Friday! By the time I came back from the dentist Santa had been and gone and the party had wound to a close - and Miss Tinkerbell had gained lots of party food smears on her costume.  If anyone can tell me how I should wash the costume I'd be grateful, although I probably won't get to it straight away, because I am also feeling spacey and very sore-headed due to having walked into a tree this morning very hard. I guess it doesn't just happen in slapstick comedies!  Luckily I had already written this post beforehand. An early night now, fingers crossed for no more bumps or accidents tomorrow. 

    Saturday 11 December 2010

    Vogue 1098 Anne Klein Pants in Stretch


    I've been tending to make dresses lately, and before that it was tops and shirts, but in the interests of balancing my wardrobe it's time for a pair of trousers. Vogue 1098 (Anne Klein New York), which I kind of bought for the jacket, looked to be a flattering cut.


    Here's what the pattern pic showed:


    I made up a test pair in a very loud linen (a cheap find at Lincraft - at the time I thought I could use it for clothes for my daughter, but I don't think I could stand it even on her). In a size 12, I added about 10cm extra length to the legs, and in the waist /hips area I sewed deep into my extra-generously cut side seam allowance. The trousers basically fit, so FYI I've permitted myself less garish fabric for version 2, shown below. This is what the test pants look like without a waistband - please excuse my au naturel dishevelled state:


    While cutting out the pants again in a good quality black rayon /spandex /other man-mades fabric from Tessuti, I somehow misplaced the pattern instructions.  I searched through the insides of many, many pattern envelopes, but to no avail.  I really do not know how to make trousers without instruction, but luckily I just happened to have an excellent multi-media book about trouser construction: David Page Coffin's book "Making Trousers for Men & Women".  This book suggested a different order of construction than I've seen in other Vogue patterns (although I don't recall the detailed instructions for this pattern), but it seems pretty logical.  Basically, after cutting out and 'finishing' the main pieces (NOT the small detailed pieces, which you're instructed to cut out later in case you want to make some modifications), you proceed as follows:
    1. darts, pockets
    2. front opening ie zip front
    3. side seams, and finishing for front pockets
    4. waistbands (and any pleats) - sectioned waistband to allow for easy adjustments
    5. in-seams
    6. centre-back seam
    7. hems

    I think this will help ensures fit around the hips and waist early on, with room for adjustment in the centre back seam later if needed.  The book also has loads of great tips for zips, pockets and waistbands but I read these after cutting out my fabric pieces including separate fly facing and shield, so I wasn't able to sew with a cut-on fly extension or try a cut-on waistband as suggested.

    Now of course a cut-on fly extension is less bulky than one that's sewn on (yes, that makes sense), but it also turns out that Sandra Betzina's famous basted-seam approach to sewing in a flat, fly-front zip assumes your fly extension is cut-on!  Disaster?  Actually, no; you can easily adjust the method for the sewn on fly facings and shield that your regular pattern tells you to cut out.  I don't know if anyone reading this would be interested to see the details of applying this method to a cut-on fly, and I suspect most of you are better sewers than I, so unless someone screams out for the info I'll omit it.

    This is the fly - a solid metal one  - and you can see that from the outside it looks reasonably neat. The inside is a bit messy, I know, but only YOU are going to see that:


    spot the error ...

    I then basically followed the order of construction given above. Side seams, in-seams, and centre back seam.  Compared to the fly this is easy stuff, but I had to redo my side and centre back seams several times. Initially the pants were too loose on me because I hadn't factored in the stretch factor, then I took them in until they felt just right, then I read someone blogging on the perils of making stretch pants too loose so I took them in again, then they were too tight, and then I unstitched like mad and hopefully got them back enough. Phew.

    David Page Coffin suggests that it's good to divide the waistbands at centre back so that the pants can easily be adjusted if you change girth. Again, how sensible! So I didn't use the waistband pattern piece, but instead cut out waistband pieces to match the fitted waistline. Actually I cut out a waistband in 4 pieces (and matching lining in 4 pieces) so there is heaps of room for me to grow or shrink and be able to adjust my pants to fit... but I know this is overkill, and my waistband is not that great. Hems last of all - finished on the train to work this morning. The old bloke sitting next to me didn't look too impressed.

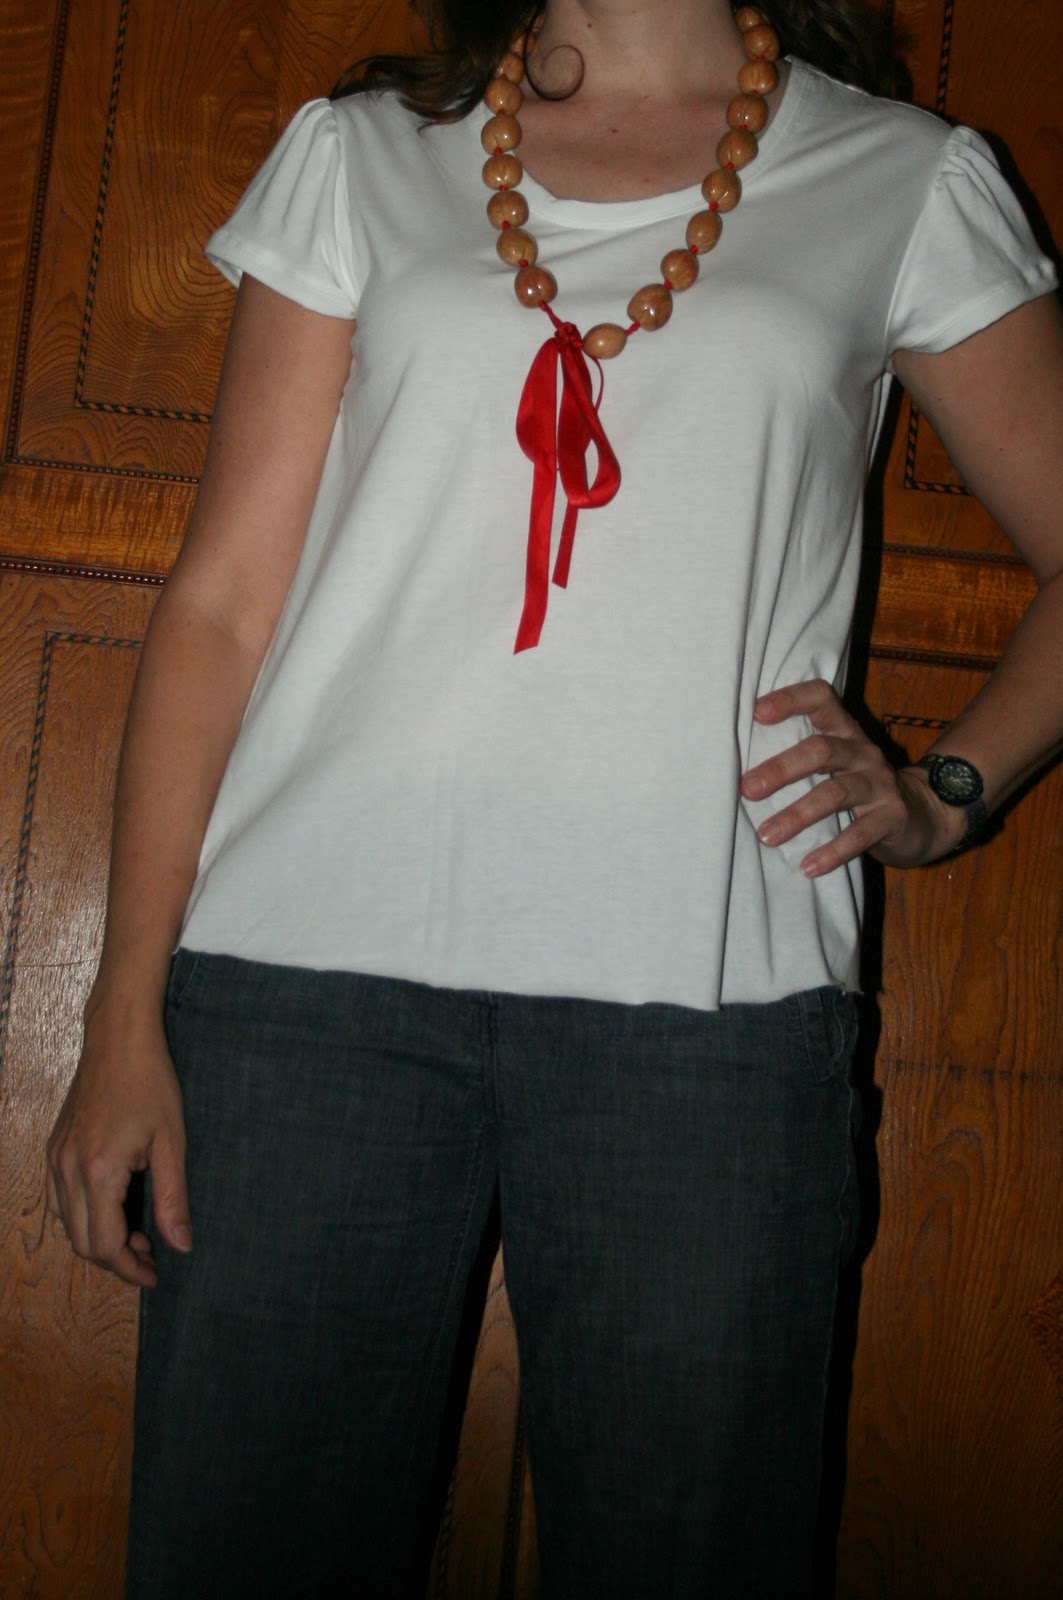
    And here are some more 'tried them on' views:

    Gee that jacket fits badly - but I didn't make it!

    I spy a Pilates mat!


    The lighting in my house is really poor but I think the trousers have ended up too tight. Maybe the fabric will stretch, and maybe going to the gym will make a little difference in the right places.  Unfortunately too I've ended up with no fabric between the underside of the zip and my person (the error) - clearly I shouldn't have basted the facings to the upper edge of the pants and then sewn the waistband on top of that; but I just can't get myself interested in fixing it so the left side facing sits under the zip. Hopefully the zip will be friendly and not bite me. I do like the fact that for once I have trousers that are long enough with heels - "A Pip, A Ray", as my daughter says - and am already planning the next pair: in a heavy navy linen, and not so tight.
    Related Posts Plugin for WordPress, Blogger...