Showing posts with label Anne Klein. Show all posts

Monday, 9 May 2016

Summer's End Top + Pants

I've whipped up a top and some black work pants - and I'm feeling really happy with them both.

The pullover top is sewn from an 80s pattern (Vogue 8313) and some vintage fabric (quite possibly from the same era).  For all that it's an old style it doesn't look particularly dated to me... and yet it's pure 80s.  In fact my mum had a top with very similar lines to this one when I was growing up, though hers was made from white linen with navy trim inset around the neckline (and no buttons), and had a matching skirt - much more of a classic look than this :).


I found the buttons in my stash - wasn't I lucky to get such a good colour match! 

I modified the pattern slightly to narrow the neckline and to make the buttons decorative rather than functional; I didn't think my loose weave fabric - a lightweight hemp perhaps? - would have stood up to buttoning, and I don't usually have any problems getting pullover tops on. The pattern also called for top stitching to hold the facings in place around the neckline, but I opted instead for lots of 'invisible' hand stitching under the buttoned corners and wherever else I could hide a few stitches...  I love this "no stitches" look and wish I'd thought of it when I was sewing the sleeve hems. 

The top is intended to be a little more cropped than mine but I wanted it to cover the waistline of whatever I wore it with, so I added a few centimetres to the length and cut the front and back with the selvedge in place of a hem.  I can *just* tuck it in too when I wear it with high waisted shorts:


I should have realised such a loose fabric would be slightly transparent - I will have to bear that in mind next time I wear it...


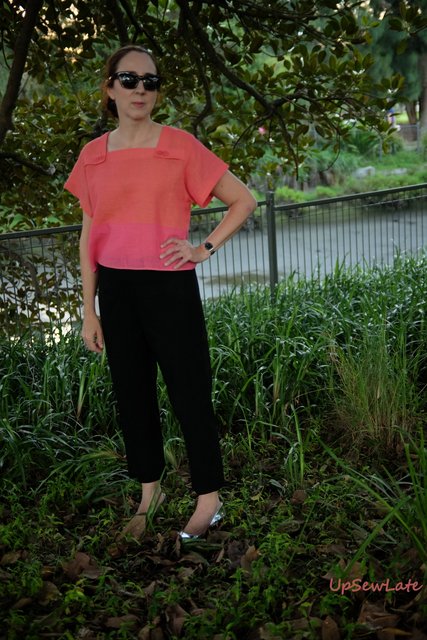
And the black pants are the pants from Vogue 1264 by Anne Klein, described on the pattern envelope as "semi-fitted pants with tapered leg has side invisible zipper" and reviewed here on PatternReview. They're basically just cigarette pants - no pockets, no frills!


Black is so hard to photograph!  

This pattern is a really good basic pants pattern - simple to sew with an invisible side zip and waist darts, and giving a surprisingly decent fit right out of the envelope. My only intentional adjustment from a straight size 14 was to taper the pattern to a size 16 waist, which turns out to be a bit loose on me and makes my pants end up sitting lower than my waistline and makes the pants legs look longer on me than they should (I normally lengthen Vogue pants legs by at least 5 centimetres). 


I also forgot to follow the instructions, and that led to my unintended omission of the cute side slits that should be happening just above my ankles. I'll definitely have to include them next time - they're very easy to sew. and with a nice deep hem they should have enough weight to stay in place and not flop askew.  


I've lightened the next photo so you can see the fit in the back of the pants with my top hoicked up. The fit isn't perfect, but it's a million times less saggy under the backside than all my RTW work pants and would probably look even closer to "spot on" in a drapey wool crepe (these pants are sewn from a stretch cotton):


The pants have a plain facing at the waist and no waistband, and I think this is good for those of us (like me) with a short waist - though I guess it may not work for those who need a belt to keep pants in place. Although I've sewn my pants up with too loose a waist, my impression is that the pattern is also a good starting point for those of us with flat-ish backsides (like me) - the crotch curve looks relatively shallow compared to some pants patterns I've tried.

Extra room for ice cream, right?


Next up I'm hoping to show you a winter dress that's turned out to be more "va-va-voom" than planned (I have no idea whether or not it is going to look alright in the daylight and in photos, but it's looking OK in the weak late-night light...), and then a cute but seasonally inappropriate jacket.

These photos with their varying backgrounds were all taken at Bicentennial Park on the foreshores of Rozelle Bay a couple of weeks ago (thank you mum!) with the exception of the shorts photo (thank you tripod).  I hope this doesn't feel like an excess of photos!


Thanks for reading

Gabrielle xx


Tuesday, 18 June 2013

Reddy, Steady, Go!

Is there anyone out there who really has pants fitting sussed?*

* If so please, please, please chip in and tell me how to fix these pants!  


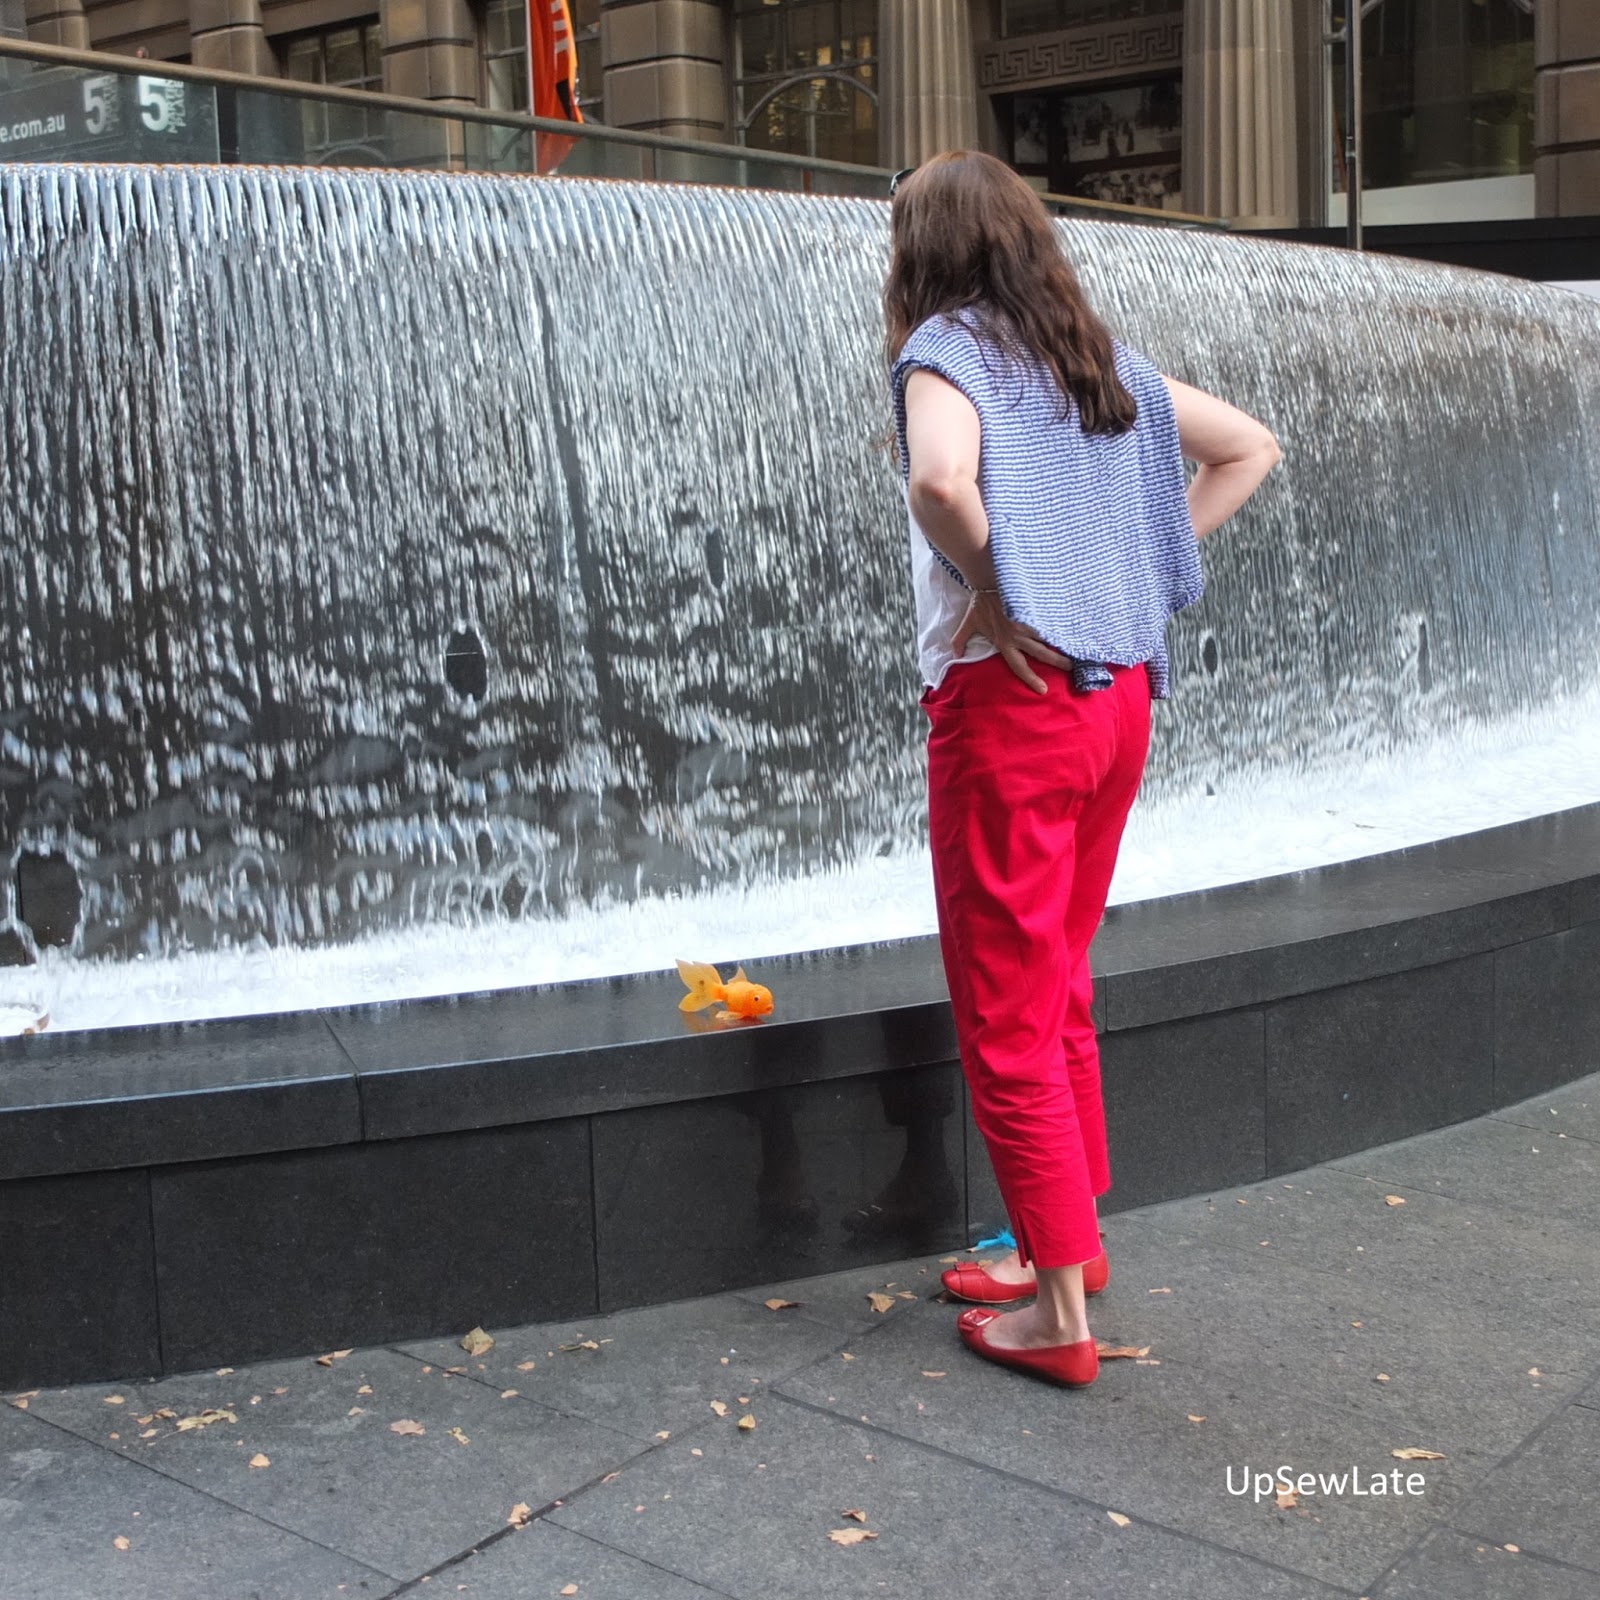
These red pants were made in time for Me Made May, but by the end of May the pants were feeling a little less than awesome (sorry pants, not your fault. If I need to eat more chips to fill you out I will, promise).

Although the pants looked OK to me from the front, my photos showed me there was some excess fabric in the back. And now that I've noticed, it's really bugging me :(


I have made three pairs of pants that fit well (here, here and here)... but all three were all made from the same pattern. And now that I'm using a new pattern, I'm thinking those pants fitting 'skills' were pure luck :). 
 

My new-ish red pants, made just in time for Me Made May, use Vogue 1293, an Anne Klein pattern for "Semi-fitted, tapered pants ...[with] contour waistband, carriers, side front pockets, fly front zipper, hem slit, and narrow hem."  The suggested fabrics are Linen, Crepe, and Dupioni, but I used a lovely stretch cotton from Tessuti fabrics (bought last year). Oops!


I muslined the pants in a vile pale blue shiny stretch fabric (no, there are no appalling photos). There was a truckload of excess fabric in the front (perhaps necessary for non-stretch fabric) so I removed a triangular wedge, widest at CF and tapering to nothing at the sides.  I adjusted the pocket pieces to take out this wedge too. I removed a smidgen of length from the waist at the centre back to make the waistband stay level all the way around, and removed some width from the side seams to make them taper. 


Then I sewed them up in my lovely red fabric, with organza strips stabilising the pocket openings. The pocket bags are cute polka dot rayon, but I've misplaced the photos. I love how neat the fly looks, even if I do say so myself...


When I wore these new pants in early May I thought they fitted me really well, and I was really pleased to be part of the red pants trend. The photos make it very clear there's still work to be done, but interestingly (and GOOD news) the fit is a million times better than that of my two favourite pairs of RTW pants:

Exhibit A - look at those folds of fabric!!


and Exhibit B - look at the unintentional harem effect!
 

With all this room for extra luggage, do I even need a handbag?  

Hmm, but seriously, I would like to improve my pants fitting skills - I want to make this pattern again in an even louder fabric, but I'm holding off till I know how to correct the problems. If you have some advice - nothing nasty, mind - I would really appreciate hearing from you!

Thank you!

- Gabrielle x

Monday, 25 March 2013

Cosy Dress: Vogue 1338

Here's my latest completed project - a new Anne Klein for Vogue jersey dress. I like it very much, and I think it makes a great dress for winter.


Winter? In March? Of course not! Blue skies and an uncovered BBQ; believe me, winter feels a long way off.  It's not winter, but it IS autumn - a Ridiculously Hot Autumn, aka Feels Like Summer is Supposed to Feel. Unlike the summer just past, which was much more ridiculously hot than autumn.


It's been 30C+ (that's 86F+) for days and days and days now. Perfect for the beach. Absolutely sweltering if you're fool enough to stand under the sun dressed in swathes of dark coloured jersey, doubled over on your chest and bunched for extra warmth on your arms.

Grin and bear it, ye foolish sewist of cosy clothes in hot weather.
                  Hence the foolish smile and proud bearing  ;->.


Pretty odd to make such a cosy dress in such warm weather, but the logic got lost when I followed my whim ("I want to make a flattering but simple little jersey dress I can pop on in this warm weather") over to the pattern stash and focussed on jersey + dress.  Be warned; these are the perils of a lack of planning.

Look yonder, it's a plane carrying patterns to Australia!
I didn't change this pattern much - simple changes to accommodate my slight pear-ish-ness and a slight lack of fabric, and then a couple of minor "personal taste" changes.

The pattern envelope back says "NOTE: No provisions provided [sic] for above waist adjustment. Purchased belt."  Although above waist adjustments are possible if you need to widen the dress at the waist (grade up to the next size, as I did), unless you're prepared to lose the interesting cut-in-one, foldover drape design, I don't think you could lengthen the bodice without scaling up the width of the rest of the bodice. So if you're a longer in the torso than the standard Vogue sizing this is probably not the best pattern for you...  I don't think a purchased belt has anything to do with the above waist adjustments you can't make but (note) my belt is also purchased. Silly!


This pattern demands fabric 150cm wide (60"), but if you have enough yardage you can get away with a slightly lesser width by giving your sleeves an additional seam. I have a seam below my elbow on both sleeves at the point where the elastic for the ruched part of the sleeve is supposed to start - but I decided to leave the elastic off and instead sewed the lower sleeves a little narrower.  You don't need to do this on the back bodice / sleeve pattern piece, but I wanted the back of the sleeves to match the front.


And the other little change I made was to use a shiny black bias binding on the back neckline instead of a self-fabric back neck facing - in past stretch dresses I've found the back neckline can grow over time, and I wanted to curtail this tendency.


Cold weather, I'm ready!


A big thank you to my patient camera holder, who never complains and rarely drops the camera:


And I hope to be reporting back here soon - my Elisalex is taking shape, but I'm running late for Faye's Essential Tops Sew-a-long...

See you!
Gabrielle


Wednesday, 6 February 2013

Vogue 1098 -> Green Shorts

Alas, the boiling hot weather has disappeared too soon - when my shorts are finally done!

 -


I used V1098 yet again, because as I now know, not all Vogue trouser patterns are shaped the same - and I think these are a a pretty good fit.  This is my fifth time using this pattern: I've used it to make pinstripe linen trousers; grey wool trousers; black mystery fabric trousers; and a turquoise cashmere jacket.  I have so got my money's worth from this pattern.

With these shorts so similar except in length to all those earlier trousers I don't have much to say!


The fit is quite snug in the rear, but I intentionally made these up a little smaller than usual this time around because the pinstripe linen trousers have gotten significantly looser after wearing.


My vintage button stash included some buttons that coordinated really well. The button holes aren't perfect but they're what my machine does. Oh and that curve in the waistband is from my pulling the button up for the photo; in real life the waistbands are straight and aligned.


This time around I added side pockets using the Vogue Basics pattern that I had originally planned to use. You can see one of them bulging open in the photo above :-0


The pocket openings are reinforced with tacking stitches, which you probably can't see even in the side view... nice deep (5cm) hems in case I decide they need to be longer. And the photos moved inside because the nextdoor neighbours came out onto their very nearby balcony :-(.  Oh no - caught in the act, looking like such a poser!


I took some time over the fly to try to make it look neat and flat, but by the time I got to finishing the waistband I just wanted to get the shorts finished. So both the waistband and hems are machine rather than hand stitched.


Fabric from The Fabric Shop - a medium weight linen.  Speaking of which, if you're in Sydney this weekend, are you coming to the meetup?


Tuesday, 16 October 2012

Classic Linen...

Linen is a classic look, isn't it, and so is navy with cream... perhaps a bit boring for some tastes, but definiteley useful in the me-made wardrobe. So here is a new maybe combination but more likely separation of linen pants and linen-cotton mix jersey top:


Quite hard to photograph together with the top so white bright and the pants so inky dark!


The top is made from V1310, the relatively recent Chado Ralph Rucci pattern (the one with the photo of a severe looking model in a column-like burgandy skirt and loose white top). After my recent ooh-this-feels-too-tight issues in a "semi-fitted" Vogue size 12-graded-to-14 dress, the ultra loose fit of this (also "semi-fitted") size 14 Vogue top was unexpected, although I guess part of that may be down to my fabrics.

tucked up hem

free hem
The top is cut on the bias, and the pattern calls for a bias-cut self-lining, but that would have been too hot - besides, I only had a single metre of this fabric, and it had turned itself from a neat rectangle of fabric to a wonky trapezium in the wash. So facings is all I could do.

Being cut on the bias, my neckline was very keen to stretch out. I tamed it with narrow transparent elastic, the sort I usually sew into the shoulder seams of knit tops, and made it very slightly gathered. I topstitched the facings in place with a sliver of facing showing all the way around to give the neckline a decorative edge, but I don't think you can really see it...

spot the serger tension error!

Time: About 2-3 hours

Cost: $12 all up: fabric about $12 on sale at Lincraft; sewing and serger thread $0 (already used in other projects); pattern $0 (second use); and elastic $0 (leftovers).

*****************


The pants have been lying around as an UFO in my sewing area for ages...  I'm sure they were originally ironed and carefully draped somewhere for attention "soon", but by the time I got back to them they were a scrunched up mess. A happy surprise amongst the crumples - the fly was finished, top stitched, and even nicely basted together to wait for the waistband to get sewn on. When I tried them on I remembered why they had become a UFO - they got too tight midway through the sewing! They should hopefully get a bit looser in the near future... if I get myself out of this chair and do some exercise :-)


No, but seriously, that's the best looking view of the pants! And the colour is about right.

With my camera sitting on a chair on the coffee table in the middle of this room, I am getting some leg foreshortening happening and I do not like it:


Anyway, you can see that they nearly fit me already (and I only did the getting out of the chair part so far!) and that the stripe matching is OK.  I had to change tops because my camera wasn't coping.

I've made these pants before (here in grey wool and here in black stretchy stuff) because the pattern (V1098, an Anne Klein pants and jacket pattern - ooh and I made the jacket in yummy turquoise cashmere a while back) seems to generally fit, and is one that's easily taken out or run in along the side seams. And I've got to the point now where I just grade the waistband up or down to fit the width I've sewn the pants :-).

Here you can see the details: belt carriers, a neat fly, waistband drafted to fit and cut to match the stripes as well as possible on the curve:


And the sign apparently means Beware of the Dog!

Time: I don't know - too long!
Cost: About $30: fabric a lovely big remnant from Tessuti - call it $25; sewing thread $3; pattern $0 (fourth use); 2 buttons $0 (part of a vintage buttons gift); and zip $2 from a little local haberdashery.

*****************

Has anyone else been having troubles with Blogger lately?  I've been struggling to sign in for about a month (this is a known problem in the Blogger forums but the solutions haven't worked for me to date, so I'm using a strange workaround) - but worse still, over the past week I've found I can't reply to comments! Please accept my sincere apologies for what certainly may look like rudeness. On the subject of replies though I read in a Blogger forum that many people reply to comments by emailing the commenter directly - is that right? Is that what works?

Anyway, thank you very much for reading my ramblings, and if you do comment I will TRY to reply.. .

Thursday, 16 February 2012

Colour Shock! New Jacket, Pants and Top


 Me: Come on, tell me the truth - do my legs look big in these?  

You: Well...


Me: What if I stand like this? More natural?

You: Hmmm - well let's focus on something else. What about that jacket?


Me:  OK, here's my jacket - d'you like it?

You: Actually the jacket's kind of big too, isn't it... AND loud. 

       Erm maybe you could wear the jacket with something black?

Me: But don't you like it with the pants?  


Me: Look, it's got these cool little side splits.


Me: And I can do these sort of karate moves really comfortably!

 You: Well it's not for everyone, is it. 

        But obviously you're very happy...  


Me (sulking): Well I'm not happy now! I can tell you hate it all! 

         Do you know how long this bloody took me??????? 

You: Look, it's probably fine for Australia. 

And the t-shirt's OK - obviously nothing to it though.

       Not many people would dress like that 'round here though...


i

Me:  Do you really mean that? That it's FINE? 

You: I'm not going to lie. It's OK. OK for you

         I like that painting though. Did one of your kids do it?

************************************************************************

Here's the lowdown - costs, timings, patterns. 


Trousers
Cost: $24.20

Time: Approx 3h - very straightforward and quick.


The 2 metres of orange linen fabric for the trousers came from The Fabric Shop on sale, reduced from $20 to $12/ metre. It's a very heavyweight linen, and feels cool and soft against the skin.

The zip and buttons are vintage. The zip was 20 cents at the second hand store ages ago (I have a bit of a zipper stash) - you can't see its (red) fabric colour, but I thought that the gold metal teeth would look OK with the vintage style of pants.  The buttons are much, much older - these come from an amazing button stash that my dad's partner recently passed on to me, and look to have already seen a lot of use before my trousers.


I used my rather favourite old Ralph Lauren Vogue pattern, which I've promised to make into navy linen beach pajamas :-)


I guess you can see these orange trousers as a test run for sizing...

Linen gives a lot more than calico, so I found I had to take these in a bit from my muslin size, and then I still had some excess width at the front so I was able to reinstate a couple of pleats that were included in the original pattern.

I also added about 10cm in length to the muslin to give myself plenty of room for hems. When I made this pattern originally (early 90s I guess?) I found my linen shrank a lot, most noticeably in length. I'm covered for that!


Jacket

Cost: $50

Time: 4.5 - 5h initially (incl about 40mins to cut out), + a further 1.5 hours to adjust and finish. 


The fabric for the jacket came from The Fabric Shop, a 2 metre piece bought at $20/ metre at the same time as the orange linen for the trousers. It's a lovely heavyweight linen, and feels like top quality stuff. I already had lots of partially used reels of the right colour thread - from this DKNY dress, this UFO jacket, etc....

Back in the day I made the skirt and top from this Anne Klein pattern (V1325, well and truly OOP) in a size 10 but never got to the jacket. I assumed I'd need at least a 12 now, so I snaffled up a second hand copy ages ago - $10 or less, bingo.

I'm happy to report this jacket is really easy to make - unlined, and no buttons or closures - and it has has interesting cuffs, set in sleeves and lovely simple lines.

However, I should have thought about 80s sizing. The jacket is described as "very loose-fitting", which translated into modern parlance means BLOODY HUGE.

The dropped shoulders seem to demand huge shoulder pads (I didn't give in), and the 7/8 cuffed sleeves which looked so elegant on the pattern envelope are truly voluminous and long.


Here's where the "7/8 sleeves with cuffs" ended on my long arms:


I unpicked the cuffs and side seams, and took these up by about 6cm to get to a better look.

The sleeves were also much wider than they looked on the pattern envelope - one possibility (of course) is that the sweet little Vogue model is actually a giant.  I tapered in the sleeves with a long pencil-drawn triangle that took them in by 5cm at the seam by the cuff to nothing under the arm (where I couldn't begin to think of how to make the set in sleeve narrower without making a new jacket body). So all up they're now about 10cm narrower at the cuff:


T-shirt
Cost: $12 max
Time: 45 mins

The fabric for this t-shirt came from Lincraft - about $12/m, and I used a 1m piece. And leftover thread.

For a pattern I used my own "famous" self-drafted kimono sleeve t-shirt, previously seen here, but left the neckline high.  I cut this out super-fast at about 11.30pm on Saturday night and then sewed 2 of the seams till just after midnight. The other two seams got whizzed through after breakfast on Sunday - ie total of about 45 minutes to make. No edges were hemmed in making this garment.  Nothing was done slowly here.

I pattern matched the stripes as usual (well, less carefully), BUT as I'd cut the fabric out a bit wonky or the stripes weren't straight or something, the shoulders are not equal heights ie the neckline is now odd.

If you like kimono sleeve t-shirts, they're really simple to make yourself - AND if you make your own, you can have it loose / tight in the places you want! 


So all up, for the outfit - well, that can be homework :-)


See you!
- Gabrielle


Related Posts Plugin for WordPress, Blogger...