Showing posts with label jersey. Show all posts

Tuesday, 27 December 2016

StyleArc Alannah T-Shirt

Hooray for summer holidays! I have a significant backlog of unblogged sewing but I've got time off work and the evening light is fabulous, so the other evening, while Mr UpSewLate was at the local dog park with puppy and kids, I took the opportunity to race around the garden snapping pictures of myself in four of the tops I've made recently.  This top is the one I snapped last, and I was getting weary of my own forced smiles, so when the family came home and my daughter offered to take over with the camera I was extremely relieved.


I bought this paper pattern when I visited StyleArc's HQ on the Saturday of Melbourne Frocktails weekend (still impressed that they would rock into work on a Saturday to open up their office and show us around, let alone sell us patterns at a huge discount!). Not all patterns were available in all sizes, so although I think of myself as a size 12 in tops and a 14 in bottoms, I picked up a couple of patterns that were a size larger or smaller, and this was one of them. This is the Alannah t-shirt in a size 10, and while it's a little snug across the bust in my cotton jersey from Spotlight I think it would be a good fit in a viscose stretch fabric.  


I'm happy to report that the Alannah t-shirt pattern is a very straightforward and quick sew without sacrificing shape: the sleeve is not symmetric between front and back (thank goodness!), back and front aren't identical, and the pattern nips in slightly at waist level. You could sew this top entirely on the sewing machine, or do the whole thing on an overlocker and cover stitch machine. Mine was sewn predominantly on my overlocker, with just the hems done on my sewing machine.   

The only deviation I made from the instructions (which are brief, but not at all tricky) was to skip the tape in the shoulder seams. I do use clear elastic in the shoulder seams (and neckline, and anywhere else I think needs it)) when I'm sewing with drapey or heavy knits, but this cotton jersey didn't seem to warrant it - and the proof is in the pudding; my shoulder seams haven't stretched out at all. 


I might need a few more of these, I reckon... 

Happy holidays!


See you soon


- Gabrielle xx

Sunday, 17 July 2016

Burda 9439 Kids Tops

Arghhh this post is massively late - it's two kids tops from OVER A YEAR AGO!!


Let me jump straight into it then... 

I find Burda pattern sizing to be really good for my kids - the width and ease are good on my kids, and there's always a good range of "workhorse" styles around.  The two tops here were both made using Burda 9439, a multi-size (are they all?) paper pattern for 6 variants on a t-shirt. The fact that the patterns include lines for so many ages - 3 to 12 in this case - means it's easy to make adjustments if your child is tall or short for their age, or has a stockier or slimmer build. 

The artwork on the envelope suggests the pattern is a mostly girls' one, but views B, E and F all look like they'd be perfectly acceptable to most boys. 


First up, I made a blue t-shirt for my son using view F.  At the time he was nearly 11; I cut the size 11 width-wise with the length of the size 12, the largest size in the pattern.  Both my kids are tall for their age, so while their width measurements are close to what Burda expects for their age, their height measurements generally take them up a size or two. 


He really liked the top, but I should have added more length to it - he grew significantly taller very quickly (apparently kids do that!) and the top didn't get as much wear as I would have liked. Unfortunately I didn't have enough fabric to make it longer, or even enough fabric to cut the front in one piece (yup, that band on the front is a fabric limitations indicator).

Anyway, while it fit him it was apparently very comfortable, with the fabric (a stretch viscose) cool and soft to the touch - I should make him more tops in this fabric.


Around the same time I also whipped up the long sleeved variant, view E, for my daughter.  She needed a warm top so I used a small piece of fleecy cotton jersey for the body (I think some people call this fabric French terry?) and some rib knit left over from another top for the sleeves and neckline.

My daughter was 8 at the time and I sewed her top as a straight size 9 - it looks too big all over in these photos, but the fabric shrank in width in the wash and she also grew suddenly taller, so the fit ended up being perfect despite my not having sewn quite the right size!


So despite my poor planning, this top had a lot of wear and became last year's winter favourite - comfortable and cosy, and plain enough to go with most other clothes.


This sort of pattern is so easy to make that once you've used it a few times the instructions become superfluous - all you really need is the decent drafting provided by the pattern.  Having said that, I have to admit I no longer rely on the proscribed neckband length these days though, because the length needed varies depending on the stretchiness of the particular fabric!

So easy, so quick - why haven't I made my kids more of these tops this year?


Back soon with some grown up sewing :)


- Gabrielle xx

Tuesday, 11 November 2014

Crazy Bunnies on the Loose: V8877

I'm getting so behind with posting what I've been sewing that I think I'm going to need to cut back on my verbiage... hmm and also get less fussy with my photos! Let's give it a try :)

So here's another easy top I made soon after getting back to Sydney - it's big and loose, and it's MUCH better than I expected!

UpSewLate: disregard the floor please, it's V8877 on the loose

Fabric
This cool, crazy bunny fabric came from Tessuti's remnant table last year. It's got bunnies, birds and what look like possums on branches, and now I've made the top I can see the odd tank floating past at random - quite odd!  

Initially I planned to make this fabric into an adult t-shirt, then it was going to be a child's dress (but my daughter hated the fabric), then finally after time away from the stash it was back on my adult t-shirt ideas list.  Phew. And I actually like the way it's turned out, after all that indecision.

UpSewLate: V8877, tucked in
Obviously these photos were taken before the floors got washed! We had just had a built-in wardrobe installed after getting the ceilings and cornices replastered, so there was plaster dust everywhere.  I was taking advantage of our having moved all the furniture out of the room - oh, and of the family being out too - but it didn't even occur to me that the dusty floor was going to feature in my photos. Priorities, priorities!  


Pattern
The pattern is one I muslined earlier this year in a lightweight cotton voile, Vogue 8877 (view A).  In a lightweight woven the pattern fitted me badly with tension in the bust area, and I really couldn't see how to adjust it even though the pattern is loose fitting. Anyway, I hated the muslin fabric, so no great loss, and if I make this again it will not be in a voile.

This pattern looks so much better in a drapey knit fabric - I wish I could show you the improvement, but I hated the muslin so much I cut it up for scrap fabric.

UpSewLate: shoulder line, seam lines on the front of V8877

Fitting
The pattern IS recommended for a variety of fabrics from drapey wovens (challis, crepe etc) to jersey. As I mentioned above, the pattern didn't work for me in a non-drapey woven (cotton voile), but worked really well in a knit. That's without any fitting adjustments; both versions were made in a straight size M (12-14).

So based on my experience I'd suggest you at least verify your size by measuring the pattern pieces if you want to make it in a woven - you may need to go up a size, or figure out how to make an FBA.

UpSewLate: and shoulder line, seam lines on the back of V8877

I wouldn't have thought it, but this curved shoulder shape with no arm scye seems to make my mini shoulders look normal-sized.  


Pattern Adjustments
As you can see above, I added a centre back seam in the body pattern piece - purely because I didn't have enough fabric to cut the back piece on the fold. And otherwise, my only changes were to the details. Instead of finishing the neckline with bias binding (I'm not good at that!) I turned the fabric over to the inside, encasing some clear elastic under the fold, before stitching the neckline with a twin needle. I sewed all the seams with an overlocker and finished the hems with the twin needle straight stitch on my normal sewing machine.

Hey, that was so quick to write!


See you soon
- Gabrielle xx

Saturday, 28 June 2014

Mad Jaywalking

The Tessuti Fabrics Jaywalk competition? Yes, I entered too, and this is what I made in a mad, crazy weekend rush:


All very bright and striking with the orange backdrop, but below are my "official" entry pictures, taken a little earlier in my lunch break on the Tuesday of the competition deadline - in which you can see the dress just a little better, though still not that well:


That's front, side and back sorted then, right? Oh I know, you can't see the dress very well - but honestly I have to blame the photographer (shhh, that's me).  I think I need to do a basic camera course, maybe even the same course several times over - does anyone have any recommendations for a short course in Sydney?


I'll show you the details bit by bit, since evidently I can't show you the details on me!

First of all, the pattern is this McCall's beauty from the 1950s:


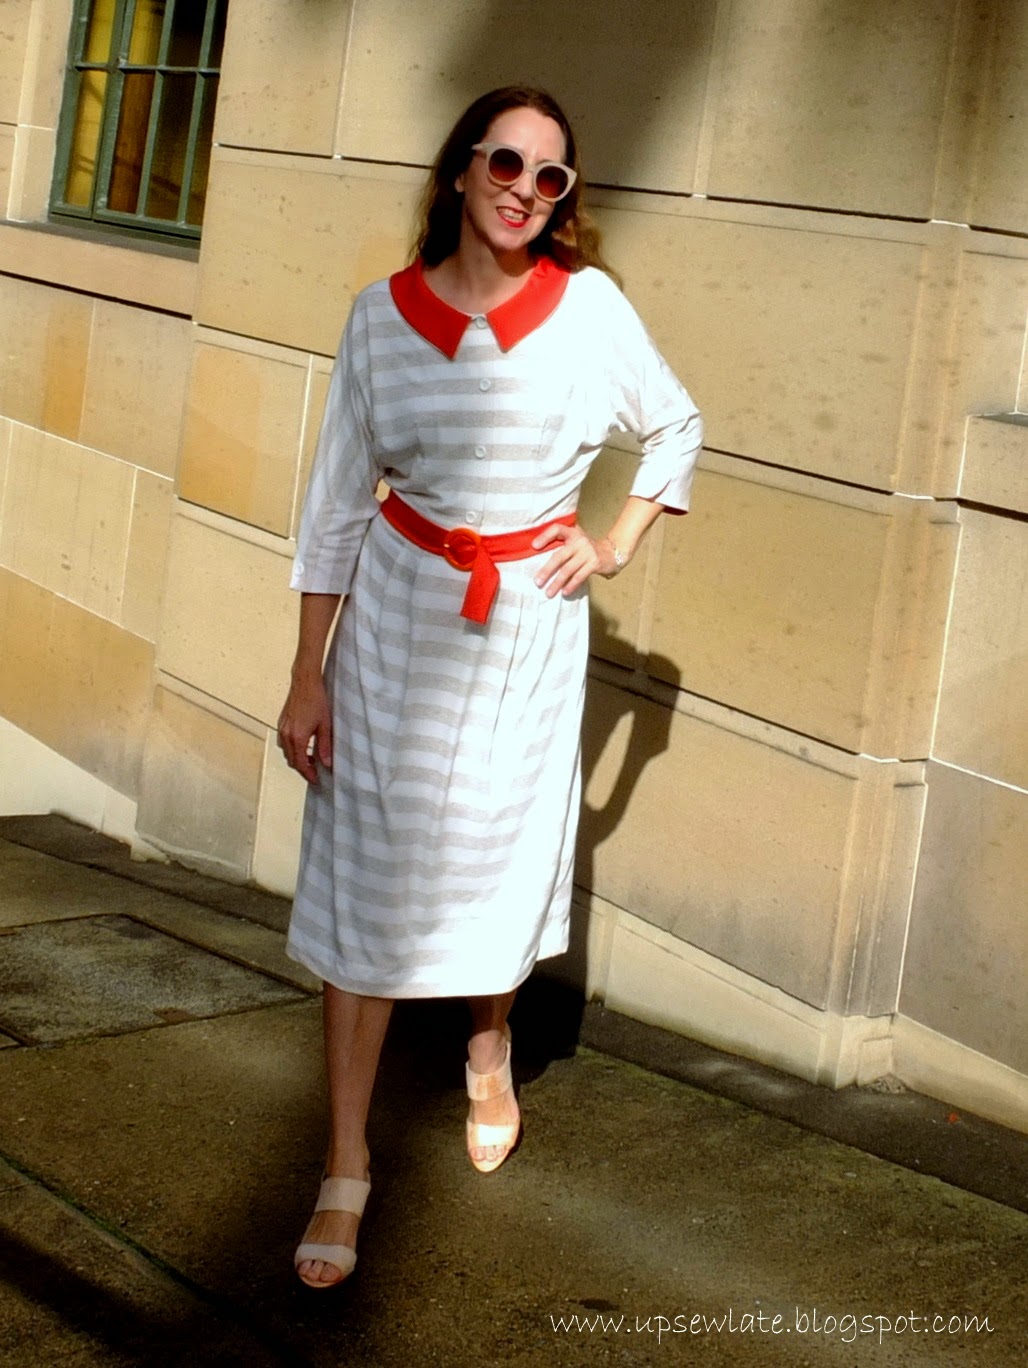
I chose this pattern after a lot of thought - I know it seems a crazy choice for a competition involving stripey stretch fabric, but as I didn't expect to win I wanted to make something that I would really like. When I played with the Jaywalk fabric I had in mind a picture of a vintage shirt dress in muted stripes, and all (d1-3) those (d4-10) selfies (d11-18) in (d19-25) May (d26-31) just amplified my love of the "narrow bottoms + loose top" silhouette. Where's the fun in sewing something you don't like? The red dress on the pattern envelope looked like THAT kind of silhouette :-), though my skirt hasn't worked out anywhere near the illustrated shape. So I used the stretch striped Jaywalk jersey to make something not recommended for stripes, and perhaps not so suited to stretch fabrics - but it's a dress I wore to work the day after completing, and that I'm sure I'll keep wearing. {Breathe out.}

I don't have much experience with proper vintage patterns, so I did a lot of paper measurements before any cutting. Interestingly I was able to sew the pattern (in a vintage size 16 - and I'm about a size 12 in the Big 4 these days) with minimal adjustments, although arguably the fit I've achieved is too loose - or perhaps more suited to a woven incarnation of the dress.  According to the vintage pattern envelope I should have been a size 14 in the bust (and I probably should have been wearing a bullet bra!) and a few sizes up in the waist and hips; the bust is a bit loose and there was quite a nice amount of ease at the waist and hips.  


The pattern was classed as easy back in the day, and it's really not particularly tricky for an experienced sewist though there are quite a few details. It's simply a belted shirt dress, with an invisible zip in the side seam, a buttoned bodice front (it's a proper 2-piece shirt front, but as there's also a side zip I didn't make my buttons functional), and buttoned triple-darted sleeves.  I tried not to take any short cuts, and I cut out and sewed the whole dress to the best of my ability - what more can you do?

The orange fabric you see is a stretch cotton, also from Tessuti Fabrics. I was initially going to make the collar with the orange fabric underneath, but on trying the bodice both ways I found I really preferred having the orange upper-most - apparently having the loud orange on display makes the muted Jaywalk colours easier for me to wear :).


Both the belt buckle and the buttons are vintage, picked up ages ago at a second hand store - and I still have heaps of the buttons left!  When I got up to making the belt I was running out of time, so I tried to wing it and insert a long piece of buckram that I'd cut to size into the sewn belt tube. Unfortunately it proved impossible to insert the buckram without it creasing really badly and making the belt look a mess, so I now have a soft belt :). The buckle is a vintage one that I cut the fabric to fit, and I've just double stitched a row of those little "o" shapes with my machine to make buckle holes. I have made belts before and made them properly, so next time I'll have to check one of my sewing bibles as to the correct method!  

And back to the subject of collars, my experience is that precise cutting out makes a huge difference to the look of a garment, but particularly with collars, where a little asymmetry or deviation from the drawn curve is so noticeable. Collar points are noticeable too - mine aren't that good.

I pinned and pressed the collar so as to have the Jaywalk fabric peeking out from under the orange collar, giving the effect of piping. You can see in the next photo that the effect of this is that on the neckline, the orange fabric hangs past the Jaywalk fabric.


The seams are nearly all sewn with a twin needle straight stitch (lengthened) and finished with an overlocker. The shoulder and arm seam, continuing to the cuff, is stabilised with lightweight ribbon rather than clear elastic, as the seam doesn't need any give:


Here's the invisible zip in the side seam - to sew this in I started by interfacing the seam allowances, then basted the zip in with my regular machine foot and a long stitch length (and lots of pins and pencil markings to help me match the stripes). I finished with the invisible zipper foot and a regular straight stitch. I think it worked out well:  


The cuffs are faced with the same (stretch cotton) fabric as used for the contrast collar and belt, and are under stitched as well as catch stitched to the seam allowance to keep them from rolling out. I did the same with the collar but didn't take photos of it! 


In the next photo you can see the sleeve pleats - which are a bit pointless in a soft, stretchy fabric!


I added a waist stay with the aim of helping to support the weight of the skirt fabric and prevent it from pulling on the bodice, though I'm not sure how well it's working:


And of course there's some stripe matching. Side seams, shoulder seams, arm seams, and skirt panels. The skirt front has soft folds that align with the bodice darts, and the back skirt is made from 4 separate panels that align with the centre back seam, with very slight bodice pleats. I managed to match the stripes across the panels pretty well, though not perfectly:


So that's it!

There was a lot of sewing in this dress, all a mad, crazy rush the weekend before the competition deadline. Started late, finished late (the night before the due date), took photos in my lunch break on the due date, and sent my photos in a few minutes before crunch time. Crazy. And I have to admit (to myself mostly - you probably already knew) that sewing deadlines are just not fun.

Hopefully I'll be wearing this dress lots come Spring (and finding or making myself a dolman sleeved jacket to go on top).  I'm glad I made it, I'm happy with the care I took with it, and I'm super pleased to have used a lovely vintage pattern. Will I enter the comp next year though - and will you?


See you soon
Gabrielle xx


Tuesday, 11 March 2014

V8879 Work or Play: Keyboards and Angled Stripes

And here for your information, and perhaps even some viewing enjoyment, is Vogue 8879 for work (keyboards edition) and Vogue 8879 for play (angled stripes edition).

Here's the work version - made out of a delicious silk twill. It's such a gorgeous top!


The top is loose and boxy, with wide cuffs on the sleeves.  I do realise I'm showing you the back view first, but I think it's a lovely shape from the back, and really nice with narrow trousers.

I do feel awkward saying something I made is gorgeous, but LUCKILY it's OK this time. I didn't make this top - my mum did. One evening when she was visiting my place she mentioned there were a couple of tops in her car boot that she was going to leave in a charity bin; she'd made them but they were a big disappointment and didn't look good on... of course I was curious!  Can you believe this was one of them? (It's gorgeous in real life, trust me!).

From the side: it's very loose, which is ideal for sticky summer days and great for catching a breeze!


Turn around, would you!


It turns out this is a very practical shape. Being so loose makes it very comfortable in humid weather (like now), and I like that it doesn't need tucking in. Not tucked in means even more comfortable in the heat (and also means you won't notice that my pants are too big at the waist).  I also think it's a pretty stylish shape - I really like that the nicely sewn neckline band sticks out intentionally (cut on the straight, not the bias), and the oversized sleeves with a bit of fabric heft seem cool.

OK this is nearly a proper front view:


These photos were taken just before closing time in the grounds of one of Sydney's historical buildings, the Hyde Park Barracks - same place I took a photo last May :). It's a lovely photogenic spot and there weren't too many people about, just a few staff who politely checked I wasn't taking commercial photos. However, this time I noticed that the grounds are overlooked by office buildings. I hope the people working in there had their heads down :)


And here's the front view - I love, love, LOVE the sticking out sleeves:


Do you recognise the pattern?

Here's a link to the pattern, and to some reviews.

Vogue 8879 is a relatively recent pattern from the "Very Easy" range, released about a year ago. It's not one that instantly appealed to me - I had no idea it would look so good in a woven - but I did think it might work as a t-shirt basic. The silhouette is so simple that of course, the fabric is everything. 

This fabric is a silk twill from The Fabric Store in Surry Hills, and even though I know it doesn't have the right 3 / 2 pattern for the ebonies, it looks to me like stacked keyboards. The top was cropped significantly shorter than the pattern intended (variant C with the length of variant B) due to fabric limitations, but this length is just perfect for not tucking in (which is the way those of us with short bodies are supposed to play).

Interestingly, the pattern is not recommended for woven fabrics.  


I've been wearing this to work a lot, with these and other too-big black pants.I recently lost some weight around the middle (yay!), and half my wardrobe and all the pants are now too big (boo!).  I've been trying to make some new pants, but it's all ugly stuff ups so far and very discouraging. Just when I thought I knew what size I was, it changes...

When your pants are too big and your sewing efforts are failing, you might be tempted to look in a shop.  I trundled into Veronika Maine to sample their pants wares and try to work out my size (hmm it's the in-between size), and the staff started asking me about the top - "you got that here, didn't you"", "it's a Veronika Maine top, isn't it?" and scrunching up their eyes as they tried to remember which range it came from. It gave me such great pleasure to tell them my mum made it! 

And a quick summary of the sewing:

  • Made in a size 12-14 (M). In RTW Australian tops I'm a size 10-12, which would equate to a US 6-8 and I can't remember what size that is in the UK. 
  • Made from silk twill. The pattern is recommended for two-way stretch fabric, but it's a loose enough pattern to go with a woven.
  • Shortened due to lack of fabric.
  • Sleeve band ruching omitted


Let's move onto the second top, the angled stripes 'play' top.  This one too is a salvage job from mum's car boot - honestly, the stuff I find in there!

This is exactly the same variant of the same pattern, only sewn to full length and sewn from a stretch. It looks so different, doesn't it - very slouchy and relaxed.


This fabric is a beautiful cream jersey with angled blue stripes - I wish the angles were showing up a bit better in these photos. Again this fabric comes from The Fabric Store, and I think they also had it in a cream / red colourway.

 I'm looking very serious in these photos because I was keeping an eye out for movements from the neighbours' place - I just hate it when they catch me posing for blog photos!

Nothing much more to say - and even though I took a ton I haven't managed to get very nice photos of the top - so can I give you a glimpse of the greenery in my corner of suburbia?

I look like I'm having a terrible time climbing the hill here, but at least you can see the top in a front view. Somehow amongst all the photos I took, very few showed the front, and very few were not blown out or too dark.


When I tried to take photos of the back, I only got half of it - this is the best of the back views, sorry!

What you can see here though is that the neckline is quite low at the back. If you preferred you could pull it forward to make a lower front neckline, but for me the front is low enough as is. The sleeves are drop sleeves (again, the ruching was omitted), and the top falls to below hip length with a bit of a flared shape.


When I was a teenager, I had a friend who wore different coloured versions of exactly the same outfit to school all through the warm months, and then different coloured versions of another single outfit to school all through the cold months - like a uniform. 

I like this pattern so much I'm planning another in a happy pink for my wardrobe.  In fact I like it so much I'd like one in each of my favourite colours... but I really should have another go at the pants, shouldn't I!


See you soon

- Gabrielle x

Thursday, 17 October 2013

Boardwalk Dress

I assume most of you also read Kirsty's awesome blog, Top Notch... Do you remember back in July when she posted about her lovely Boardwalk fabric, and then when she sewed up a really elegant Japanese top from it? Well, I had some of the fabric too... but as usual, I took a looong time to decide what to do with mine.

I was initially thinking to make a Vivienne Westwood inspired dress, one with interesting draping and the stripes changing direction on the dress

...but I dillied and dallied over choosing / finding / drafting a pattern with the right draped areas

...and then some of my eBay "research" showed me the insides of one of my inspiration dresses, and OMG it was full of scaffolding to hold the draping in place

...and then the weather changed to summer (well, technically it's spring, but with temps bouncing up to 39C = 102F, temperature records breaking and bush fires slogging us early I'm no longer completely comfortable with the concept of 4 seasons. Ahhh climate change, I do so hate you!).

So in the interests of using my lovely fabric for something, I altered course - a quick pdf download pattern and a quick sew. Enter the Gabby dress from Tessuti Fabrics!


I have to say, it feels a bit weird to be a Gabrielle in a Gabby dress... Thank goodness I didn't botch it up, right?

This dress suits walking, twirling, acting like a loon - all the usual activities. Also guaranteed to be suitable for sedentary pursuits.


The pattern:
Tessuti's Gabby dress. I bought it as a print at home pdf - in fact, I don't think you can get the printed version any more as it's one of Tessuti's earliest patterns. I sewed the patttern in a size S which apparently represents a 10AU (and which for me equates to RTW size 12AU or 8US).

The fabric:
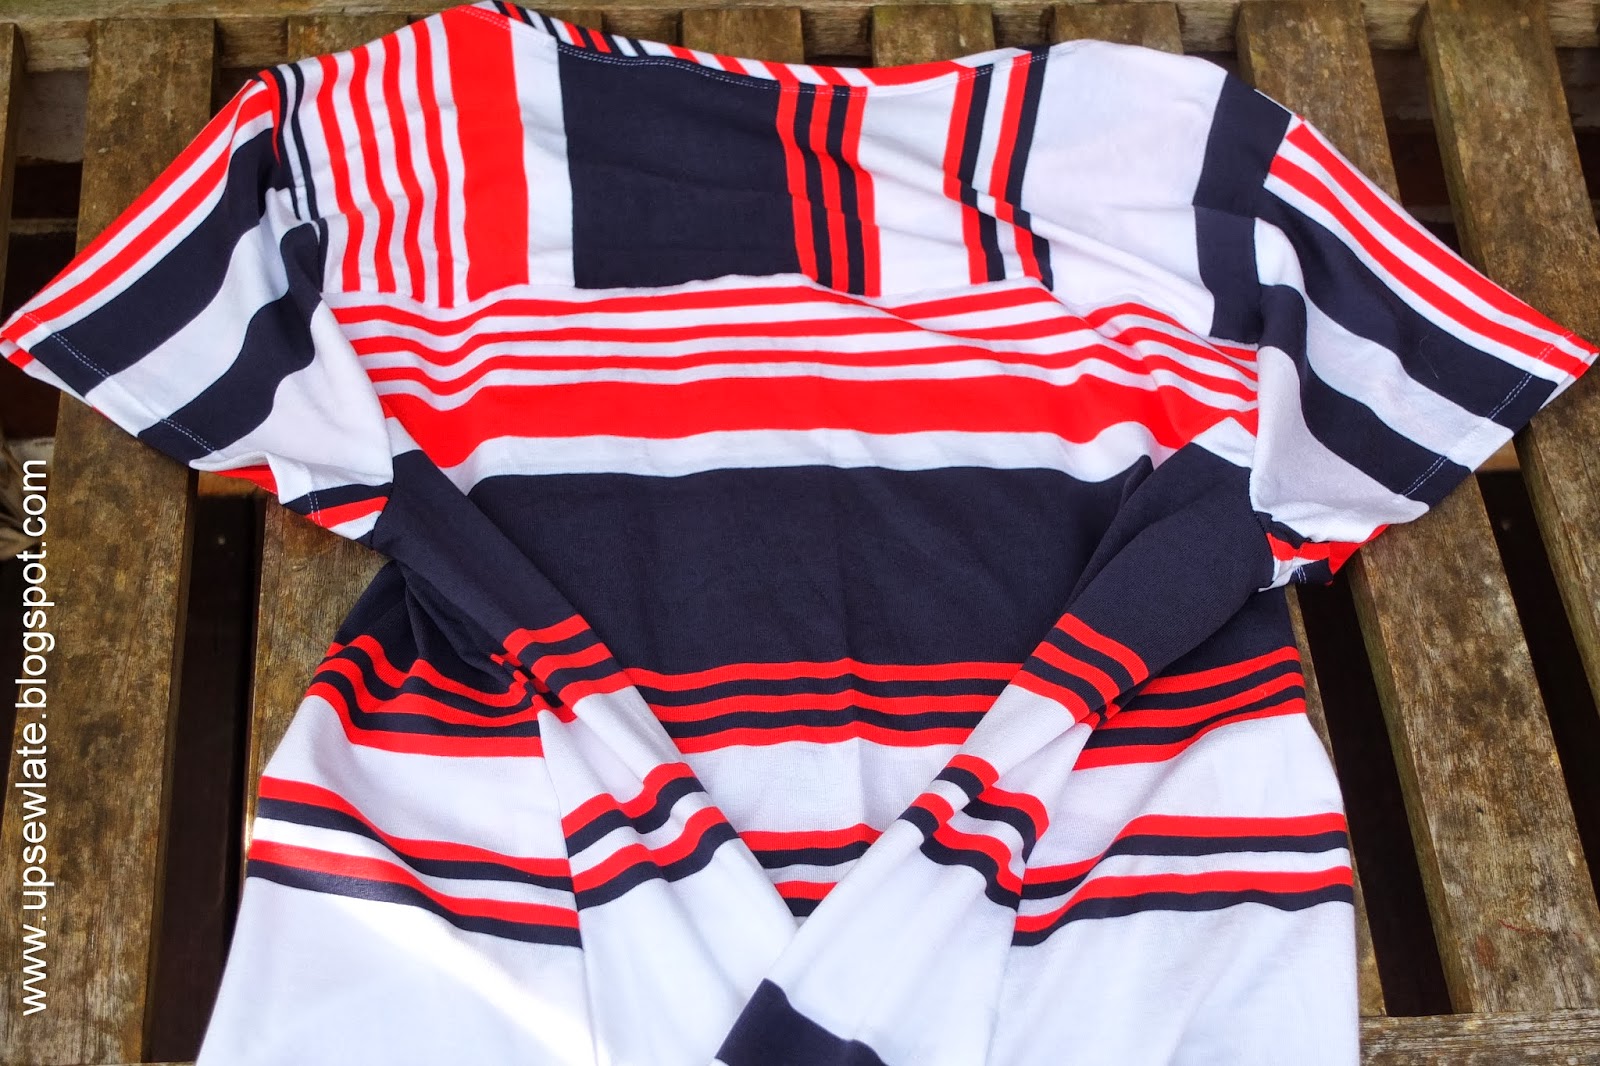
"Boardwalk" jersey in navy and red from Tessuti fabrics - a lovely generous remnant that I snaffled up quick smart.

Cost:
$6 for the pattern, and the fabric (a remnant) cost me $20, so $26 all up! (Needle and thread were already used and from the stash).

Modifications: 
To be honest, I only glanced at the instructions for this dress - it's a really easy make. So my few modifications are more about the way I cut out the dress.

I wanted to lengthen the dress by a couple of inches and couldn't fit those extra inches on my limited fabric length (1.8m), so the both back and front are pieced, with the upper bodice sections cut at a right angle to the rest. I thought it'd be better to have the piecing in a relatively stationary part of the dress, far from the swishy skirt end. Having looked at my photos though, I'm not sure those extra inches were needed - especially as I'm not hemming the skirt! A trim may be imminent.

There's another annoying mistake in the dress, one that I can't easily fix with my scissors... can you guess?

Don't worry, I'm going to tell you what it is - but not till the end :^)


First let's have some close ups - this dress doesn't have any fancy details, but I can at least show you the fabric and the twin needle stitching:

Upper front:

Upper back:


 Sleeve:


Neckline:


Now in my last post I was worrying about fit - and I had some great advice in the comments - but fit is not in the least problematic with this dress. In fact if a relaxed fit appeals to you, I have to tell you this dress can fit from size 6 years up!


And using a small model also allows me to show you my mistake!

I didn't measure as accurately as I should have, so even though the front and back were placed on the fabric in the same direction (the stripes are repeating but directional), the stripes don't line up on the side seams as I meant them to, grrr. Very annoying! At least there's a high swish factor! 


See you soon

- Gabrielle x
Related Posts Plugin for WordPress, Blogger...