Showing posts with label UpSewLate. Show all posts

Saturday, 29 December 2018

Lois Dress #1

Here's a recent make - and it's something I'm actually proud of!


This is the Lois dress by Tessuti patterns, and it's a pattern I bought relatively promptly after loving the pattern photos - but then sat on for ages. Same story for this lovely fabric from The Fabric Store - when I saw this fabric up sewn up quickly by a few social media friends (@clever_tinker for one) I rushed to Surry Hills to get some, and then brought it home and stashed it. 

Maybe for 2019 I should try a bit harder to sew the patterns and fabrics I like earlier rather than later? What a ridiculous problem to have ;o.

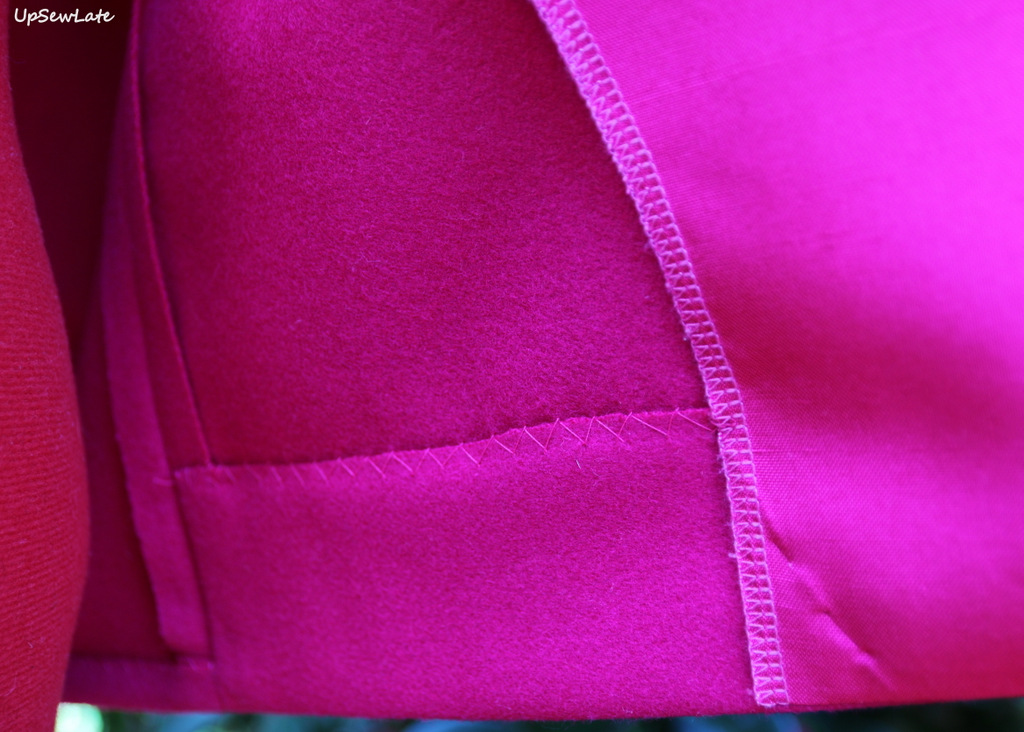
Here's a quick close-up for a better view of the fabric and style lines - and FYI the fabric is a slinky polyester woven with a satiny back:


The dress is quite low cut, which I think makes this more of a special occasion dress than a work or everyday dress - I've nearly finished version number 2 and have plans for a couple more, but there's nothing wrong with a wardrobe full of special occasion dresses, is there?

Hmm... after reviewing the photos I decided it was actually a tad too low cut - so I've now sewn the lowest 2cm of the v-neck together on the inside of the dress, which makes it just the right depth on me for a low cut dress with complete bra coverage, and also makes the bust fit a smidge less loose.


By virtue of a couple of silly mistakes I sewed this up a size smaller than intended. I thought I was making the size 12, my size according to the pattern instructions, but I accidentally cut a size 10 for the bodice pieces and then cut out the skirt pieces poorly, necessitating wide seam allowances that took it down a size too. Luckily this has turned out to be just the right size.  I wouldn't necessarily advise following my lead, but I would recommend basting your cut out pieces together to check the fit before sewing in your zip within the side dart / side bodice seam - if you do this you might also discover (like me, hooray!) that you don't even need the zip!

I should also mention that I have an extra CF seam in my skirt because my fabric was narrower than the recommended width and I just couldn't fit the width of the skirt front and sides across my fabric.  This hasn't particularly affected the dress apart from making the CF bust intersection a bit bulky, but it did bump up the fabric requirement for the dress.  I also lengthened the skirt pieces about 2 inches, and next time around am lengthening it a little more.


There's a step in the instructions (step 9) that asks you to ease the front skirt side seams into the back skirt side seams, but I couldn't think why you'd want to do that*, so I just sewed the seams normally and then cut off the resulting extra length in the front skirt. 

If you've sewn the Lois dress and followed this step, I would love to know how the easing step worked out - did it do something interesting to the skirt drape, or help the skirt skim over hips and butt?


Hmm and the only other change I made was to ignore the recommended steps to stabilise the neckline and waist with tearaway Vilene.

I've tried using tearaway Vilene before but haven't enjoyed using it - so instead I cut the relevant pattern pieces from a lightweight iron-in interfacing, and this worked pretty well.  Before I started sewing the dress I was concerned that the v-neckline would gape, but on top of the tearaway Vilene the pattern uses a clever binding method to stabilise the neckline, and there's absolutely no risk of it stretching out.

This dress was intended to be my Christmas Day dress, but as it turned out I didn't need a Christmas Day dress - my kids both got sick on Christmas Eve and through Christmas Day - but perhaps I can wear it for New Year's Eve instead.

Finally here's the back view, looking quite old fashioned I reckon!


Thank you very much to those of you who replied to my last blog post - it seems that YES, there are still blog readers around! I still enjoy reading blogs too, but wasn't sure how many of us there were... I suspect that there are lots of people who intend to blog but just don't get around to it very often - it's obviously much more time consuming than instagram or facebook, but if you've got verbal diarrhea (ha, that's me!) those media can be a bit frustrating.

So - I'm going to try to keep blogging, and I need to build back up my own list of blogs to read.  If you're still (or newly) blogging I would love to know where; please feel very welcome to leave your blog address in the comments :).

Thanks for reading and have a very happy new year

- Gabrielle x

Sunday, 9 December 2018

Striped Linen Lacey

Does anyone write blog posts anymore? 

Does anyone read them?


I made this dress over a year ago - it's a StyleArc Lacey dress sewn up in a gorgeous striped linen from Tessuti fabrics - and it's one that gets a LOT of wear in summer.  The fabric was meant to be for a collared shirt for my son, but he doesn't ever choose to wear collared shirts, besides which he's been growing so fast that it felt crazy not to wait for all the growing to stop.

Hmmmm... come to think of it, he's now taller than me, so there may be a couple of years before the next growth spurt... (is that the way teenage boys grow? catch up to mum first, then a few years later catch up to dad?)

Whatever, we can call it selfish sewing ;).  I have a very forgiving son. He takes pretty decent photos too.


The Lacey dress is listed as being suitable for knit, jersey, rayon or silk fabric - in other words you want stretchy or drapey. If you choose linen you may end up with something a bit Scandi retro reminiscent, and a quick internet search ("sasha doll striped blue dress") will take you to the dress I think I must have accidentally copied.  I haven't become blond or doll-like, but the dress makes me feel good, so some subconscious desires have obviously now been fulfilled!


As usual, I should tell you about the pattern, right? 

It's a very easy sew and a forgiving fit (ie just check the waist measurement and if that's big enough to get your shoulders through you'll be fine). The shoulders are dropped and the sleeves are then basically cut on, and the skirt is simply gathered. Because there's a "feature" panel on the front and back bodices, this is a pattern you could go totally Beccy Home Eccy on - or mock pinafore - but hopefully not.  I only made very basic simple modifications in my version: extra length as usual in the skirt, and skipped the sleeve cuffs. 


These photos were taken at a beach not too far from Byron in January this year. Just to the right of the breakwater is an area where you can watch dolphins surf. We didn't see too many - one couple catching waves to the shore, swimming back out, then catching the waves in again and again - but even watching two dolphins was pretty cool.


 I can't wait to get back to the beach - but preferably a quiet one like this one!


I'll be back!


See you anon
- Gabrielle xx
Easy slip-on dress with an extended shoulder, square line bodice and slightly gathered skirt.

Friday, 4 August 2017

To Work: Vintage Calvin Klein


Ta daaaa!  Yep, it's another top...


This one is sewn from a vintage pattern from my 80s/90s pattern collection (which is NOT a "carefully curated collection", though seriously, what even does that phrase mean? Does it just mean "a group of things I like"??). The pattern looks pretty boring in the envelope photos, but it's a designer pattern, which I find usually guarantees good bones, and the back of the envelope shows three very different tops, one of which (this one) only needs a metre of fabric.

The pattern is described as follows:

Loose-fitting pullover top or wrap blouse has cap or full-length sleeves. A and B mock bands, A: buttoned shoulder and sleeves closing. B: dropped shoulders and side-buttoned closing. C: extended shoulders, front pleated into self-lined yoke with forward shoulder seams and two-piece sleeves with buttoned cuffs shown pushed up.

I have a few of Calvin Klein's top patterns from the 70s, 80s and 90s and they seem to have quite a consistent, minimalist aesthetic, but this pattern is from 1986 - even though it has no shoulder pads. Vogue magazine anticipated the 1990s Calvin Klein designs would inspire Raf Simons' 2017 Calvin Klein collection (article and links to collections here), so maybe this is nearly fashionable?? Probably not, haha!

Anyway, these next photos of the pattern come from an etsy shop (linked) that had the pattern for sale as at the time of writing, but I can see it's available in lots of other online shops too if you like the look of it.


So obviously I made view A, the one that takes only a metre of fabric, and I left off the lovely buttoned shoulder detail - with my drapey silk twill I was worried I'd mess up, and the top gets on and off without any closures anyway.


This little top is intended to slot into my work wardrobe - black pants and skirts mixed with more interesting tops and jumpers - and though it looks summery with its fluttery cap sleeves, I think it's going to suit winter too in my current, very warm office.


These pants by the way are RTW, but if you could see them in person you might notice they're quite similar to Vogue 8909, with a loose fit (looser than the Hudson pants) and elasticized waist and ankles.  I'd make a pair except I already have a pair!

Vogue 8909 pants
Not Vogue 8909 pants, but a similar style

Because I left off the shoulder and sleeve buttoning closure this was a very straightforward top to sew.  The fabric, a gorgeous Italian silk twill from Tessuti Fabrics (sorry but it was purchased ages ago so I doubt it'd still be in stock) was a bit shifty to sew so that made things a little slower, but it was still only the matter of a few hours.

I used French seams on the shoulders and side seams and a rolled hem on the sleeves, and I should have but didn't use Lena's gelatine trick for shifty fabrics (here's Lena's original tip blogged in 2011, and here's the link to the 2012 Threads article inspired by Lena's blog post).  The rolled hem is wonky over the French seams, so perhaps French seams weren't such a good idea - that seam area was such a lot bulkier than the rest of the hem.

And I'm not sure if you can see this in the first of the detailed photos below, but I also used Debbie's trick for neat interfaced facings with no messy edges.


One of the nice things about a pattern like this is that it's really easily adjusted up or down a size.  My copy of this pattern was a size 10, but by widening the neckline and adding to the width of the top (including sleeve length) my top was effectively made as a size 12.


Not smug but happy - and that's all!


Happy sewing

- Gabrielle xx

Monday, 24 July 2017

Vogue 8877 in an Unnatural Animal Print

This print is not the sort of print I would normally wear, and these are not the sort of colours I'd normally wear either, but when I came across the fabric in the remnant bin of The Fabric Store on a visit with Nic, I found it strangely irresistible.  I may be making a heinous style error (who cares!) but I love it, and I think it's going to "go"- or at least "pop" in a way I find appealing - with lots and lots of the duller characters in my wardrobe :). 


Speaking of the duller characters, in these photos I'm wearing my new top with a grey merino dress (Vogue 1338, blogged here), and I'd just taken off an aubergine boiled wool jacket (Vogue 8930, blogged here) - Vogue trifecta for the win!  I feel too self conscious in the grey merino dress by itself, but I realised today I'd be perfectly comfortable and cosy wearing it with an extra layer. 

Here's Vogue 1338, photographed a few years ago:


and Vogue 8930 looks like this on:


What's with the hands on hips all the time, hey?


This top is view C of the Vogue 8877 sewn from a single fabric, sewn in a size Medium (12-14) and with a narrowed neckline. As I've mentioned before, this pattern is intended for wovens but can also be sewn with stretch fabrics.  The dropped shoulders and curved bust seam are potential fitting challenges, and the first time I sewed the top (from a cotton lawn, never blogged) I thought the fit was a disaster.  Version number two was a t-shirt (loved it, and the fit was of course more forgiving in a stretch fabric), version three was made from linen - no fit issues that time around for some reason, and version four was a merino wool jumper. 

Version two, the crazy bunnies t-shirt:


Version three in white linen:


Version four as a merino travel jumper:


This time around my fabric is a white cotton waffle weave with purple, yellow and grey splotches printed on one side. The fabric doesn't really drape, so Vogue 8877 wasn't the ideal pattern - but I wanted to make something oversized and sweatshirt-related and V8877 seemed like a decent representation of that idea. 

To be honest the only hint of sweatshirt I've really managed is that ribbed neckband!  It's a bit subtle, isn't it! 


And speaking of unnoticeable, that curved bust seam isn't even visible in this print, is it - it would have been a good idea to pick it out with some piping, but the idea didn't occur to me till I saw these photos.  


So this is version 5. Apart from the rib neckline, the only change I made this time was to play around with the hemline.  Again, I don't think you can really see it, but I cut into the length of the front bodice and curved the sides down to the (original length) back. I included a really deep hem this time too with what I thought might be noticeable black top stitching but it just blends into the print. Who'd have thought? Turns out subtle doesn't work with fake animal print


I'll leave you with a couple more photos of the new top - I can't think of anything more to say about it! 


Happy sewing, and see you soon!


- Gabrielle x

Saturday, 8 July 2017

Guy Laroche Top (Vogue 1450)


Vogue 1450 by Guy Laroche has been waiting in my filing cabinet for a few years... I love the Guy Laroche Vogue patterns, but they often look too "Fashion" when they're first released for me to contemplate them in my wardrobe.  I'm not sure if it's that the designer looks gradually filter down to the high street, or if staring at the designer patterns for a few years makes them eventually look more normal, but I've now made the top and the skirt is on the shortest of my "to sew" lists (the physical version of the list, where fabric is matched with patterns and piled next to my sewing machine - still no guarantee it'll be made though).


This top was designed for summer, but I thought it would look great in a cashmere-wool blend. Possibly that thought was triggered by the fact that I had a nice little cashmere-wool remnant in the stash, but does that even matter? My remnant was pretty short - just 0.7 metres long but 155 centimetre wide - but it looked to me as though the top could be squeezed out of that limited yardage despite the pattern's stated 1.8 metre fabric requirements.


I measured myself and checked the finished dimensions, and went down a size to a 10. I couldn't fit the length of the fronts on my 0.7 metres, so I also cropped the top by an inch or two.

It turns out that the 10 fits when I'm wearing the same lack of layers as when I measured myself.


In all these photos I'm wearing a warm singlet and a high-waisted skirt, and in some I'm also wearing a long-sleeved merino wool top, just because it's cold here at the moment.  With extra layers on, the top is definitely a bit snugger than I'd hoped, and I haven't tried it without layers... I think I need to have another go at making it in the correct size and length, as I suspect I'll love the larger version more than this one.  Bigger is better!


The Sewing Details
Pattern = Vogue 1450 by Guy Laroche:
Very loose-fitting top has asymmetrical snap closing, extended shoulder forming cap sleeves and bias (lining) binding finishing seams and facings. 

Fabric = wool-cashmere mix, a remnant from Tessuti fabrics, along with a small piece of magically coordinating silk also from Tessuti fabrics

So, although this looks like quite a simple loose top, the design is stellar. There's a curve to the shoulder that sits beautifully when worn, and the armholes are perfection: low enough for layering but not so low as to reveal much, but also a great shape. Can you see too the front half of the armhole is a different shape to the back half? The front is slightly lower cut than the back and follows a different curve - and that means a much better fit than the common symmetric armhole, with no excess fabric getting folded under my arm as I swing it forward.  


There are these lovely darts in the back of the top too - no partying in the back, but some interest for sure!  These darts are replicated in the lining to the top. Since I'd bought insufficient lining I rotated the darts into a new horizontal seam line at the same height as the darts - but I don't seem to have a photo of this. 

Anyway, check out my dart alignment in the wool! (I had to have three attempts at the centre back seam before I was happy with their alignment, so a bit of basking is permissible isn't it?)


The top is supposed to be sewn with three large snaps and two buttons, but I got cold feet about the buttonholes, so my top has five large snaps. I'm super slow and not the neatest of hand stitchers, but I love the control you get with hand stitching. With the snaps I decided to start from the bottom and work my way up.  The hemlines really need to align, but at the neckline there's a crossover that would definitely mask a bit of length discrepancy if required. For the left hand side, I sewed the snaps to the wool (and not the lining), using the snap half that has an indentation (I think this may be upside down, but it seemed like this orientation would cause less of a bump to show through when the top was fastened. 


On the right hand side I sewed the snaps to the lining, but before doing so I cut out some small squares of wool that I positioned under the snaps as I sewed them in. The snaps are quite strong, and I didn't think the silk lining on its own would be any kind of match for them - with a wool backing the lining has a chance of surviving!  From the photos on the pattern envelope I assume the snaps aren't supposed to attach to both layers of fabric, though perhaps the designer garment was just sewn by someone with incredible, invisible hand stitching? In any case, sewing them to just one of the layers means a bit of movement can happen without creating too many creases on the outside (and any creases you do see in my top are therefore more likely to be related to my wearing too many layers and wearing the wrong size!). 


The pattern has you use a bias binding seam finish using your lining fabric but I didn't really have any spare lining fabric, besides which my lining was too heavy, so my lining seam edges are overlocked and my wool edges have been left raw after neatening them.  


I'm trying hard now to think what could possibly be improved in this pattern - and the only thing I can come up with is having separate lining and outer pieces, with the lining pieces slightly smaller to ensure it didn't show around the edges... not a big deal with wool as the outer layer as it stretches a little when steamed, but I can imagine this being annoying in a fabric with less give. And other than that, nothing!


Thanks for reading!

See you soon


- Gabrielle xx
Related Posts Plugin for WordPress, Blogger...