Showing posts with label summer. Show all posts

Saturday, 29 December 2018

Lois Dress #1

Here's a recent make - and it's something I'm actually proud of!


This is the Lois dress by Tessuti patterns, and it's a pattern I bought relatively promptly after loving the pattern photos - but then sat on for ages. Same story for this lovely fabric from The Fabric Store - when I saw this fabric up sewn up quickly by a few social media friends (@clever_tinker for one) I rushed to Surry Hills to get some, and then brought it home and stashed it. 

Maybe for 2019 I should try a bit harder to sew the patterns and fabrics I like earlier rather than later? What a ridiculous problem to have ;o.

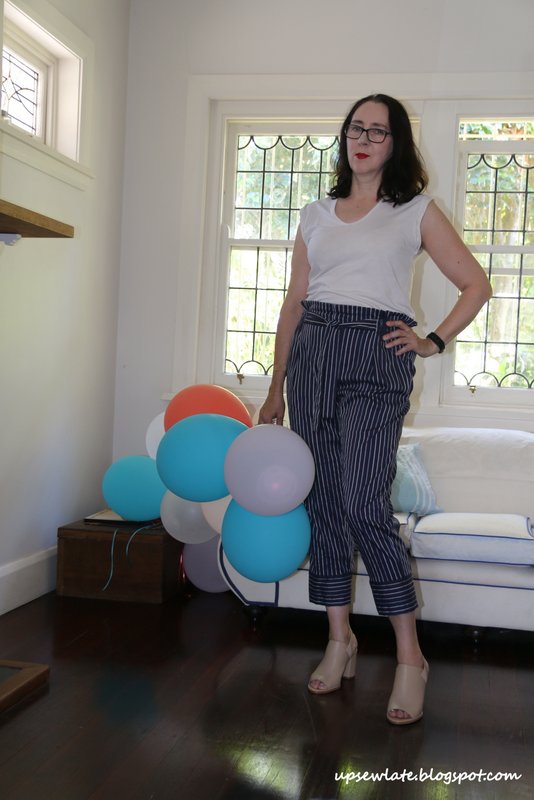
Here's a quick close-up for a better view of the fabric and style lines - and FYI the fabric is a slinky polyester woven with a satiny back:


The dress is quite low cut, which I think makes this more of a special occasion dress than a work or everyday dress - I've nearly finished version number 2 and have plans for a couple more, but there's nothing wrong with a wardrobe full of special occasion dresses, is there?

Hmm... after reviewing the photos I decided it was actually a tad too low cut - so I've now sewn the lowest 2cm of the v-neck together on the inside of the dress, which makes it just the right depth on me for a low cut dress with complete bra coverage, and also makes the bust fit a smidge less loose.


By virtue of a couple of silly mistakes I sewed this up a size smaller than intended. I thought I was making the size 12, my size according to the pattern instructions, but I accidentally cut a size 10 for the bodice pieces and then cut out the skirt pieces poorly, necessitating wide seam allowances that took it down a size too. Luckily this has turned out to be just the right size.  I wouldn't necessarily advise following my lead, but I would recommend basting your cut out pieces together to check the fit before sewing in your zip within the side dart / side bodice seam - if you do this you might also discover (like me, hooray!) that you don't even need the zip!

I should also mention that I have an extra CF seam in my skirt because my fabric was narrower than the recommended width and I just couldn't fit the width of the skirt front and sides across my fabric.  This hasn't particularly affected the dress apart from making the CF bust intersection a bit bulky, but it did bump up the fabric requirement for the dress.  I also lengthened the skirt pieces about 2 inches, and next time around am lengthening it a little more.


There's a step in the instructions (step 9) that asks you to ease the front skirt side seams into the back skirt side seams, but I couldn't think why you'd want to do that*, so I just sewed the seams normally and then cut off the resulting extra length in the front skirt. 

If you've sewn the Lois dress and followed this step, I would love to know how the easing step worked out - did it do something interesting to the skirt drape, or help the skirt skim over hips and butt?


Hmm and the only other change I made was to ignore the recommended steps to stabilise the neckline and waist with tearaway Vilene.

I've tried using tearaway Vilene before but haven't enjoyed using it - so instead I cut the relevant pattern pieces from a lightweight iron-in interfacing, and this worked pretty well.  Before I started sewing the dress I was concerned that the v-neckline would gape, but on top of the tearaway Vilene the pattern uses a clever binding method to stabilise the neckline, and there's absolutely no risk of it stretching out.

This dress was intended to be my Christmas Day dress, but as it turned out I didn't need a Christmas Day dress - my kids both got sick on Christmas Eve and through Christmas Day - but perhaps I can wear it for New Year's Eve instead.

Finally here's the back view, looking quite old fashioned I reckon!


Thank you very much to those of you who replied to my last blog post - it seems that YES, there are still blog readers around! I still enjoy reading blogs too, but wasn't sure how many of us there were... I suspect that there are lots of people who intend to blog but just don't get around to it very often - it's obviously much more time consuming than instagram or facebook, but if you've got verbal diarrhea (ha, that's me!) those media can be a bit frustrating.

So - I'm going to try to keep blogging, and I need to build back up my own list of blogs to read.  If you're still (or newly) blogging I would love to know where; please feel very welcome to leave your blog address in the comments :).

Thanks for reading and have a very happy new year

- Gabrielle x

Sunday, 9 December 2018

Striped Linen Lacey

Does anyone write blog posts anymore? 

Does anyone read them?


I made this dress over a year ago - it's a StyleArc Lacey dress sewn up in a gorgeous striped linen from Tessuti fabrics - and it's one that gets a LOT of wear in summer.  The fabric was meant to be for a collared shirt for my son, but he doesn't ever choose to wear collared shirts, besides which he's been growing so fast that it felt crazy not to wait for all the growing to stop.

Hmmmm... come to think of it, he's now taller than me, so there may be a couple of years before the next growth spurt... (is that the way teenage boys grow? catch up to mum first, then a few years later catch up to dad?)

Whatever, we can call it selfish sewing ;).  I have a very forgiving son. He takes pretty decent photos too.


The Lacey dress is listed as being suitable for knit, jersey, rayon or silk fabric - in other words you want stretchy or drapey. If you choose linen you may end up with something a bit Scandi retro reminiscent, and a quick internet search ("sasha doll striped blue dress") will take you to the dress I think I must have accidentally copied.  I haven't become blond or doll-like, but the dress makes me feel good, so some subconscious desires have obviously now been fulfilled!


As usual, I should tell you about the pattern, right? 

It's a very easy sew and a forgiving fit (ie just check the waist measurement and if that's big enough to get your shoulders through you'll be fine). The shoulders are dropped and the sleeves are then basically cut on, and the skirt is simply gathered. Because there's a "feature" panel on the front and back bodices, this is a pattern you could go totally Beccy Home Eccy on - or mock pinafore - but hopefully not.  I only made very basic simple modifications in my version: extra length as usual in the skirt, and skipped the sleeve cuffs. 


These photos were taken at a beach not too far from Byron in January this year. Just to the right of the breakwater is an area where you can watch dolphins surf. We didn't see too many - one couple catching waves to the shore, swimming back out, then catching the waves in again and again - but even watching two dolphins was pretty cool.


 I can't wait to get back to the beach - but preferably a quiet one like this one!


I'll be back!


See you anon
- Gabrielle xx
Easy slip-on dress with an extended shoulder, square line bodice and slightly gathered skirt.

Saturday, 9 December 2017

StyleArc Tully Pants

I only meant to step away from the blog for a week or two while work was insane, but somehow that turned into a few months - oops!

Anyway, I'm back now, and I've got a backlog of sewing to share.  I'm keen to get everything blogged by the end of the year, so please excuse my too quickly edited writing and photos - and let's start with these Style Arc Tully pants:


This fabric BTW came from Jen's glorious stash - she has an amazing eye for op shop fabric! It's shirting weight with a bit of stretch, and I suspect its composition is a blend as it didn't respond well to a hot iron. 

The balloons in all these photos are left over from my recent birthday party - seemed a shame to pop them all, so although I've taken them down I'm leaving them around the house for now :). They also make good props for people who've forgotten how to take blog photos...


I liked the look of this pattern when I saw it as a new release on Instagram, but I was a bit concerned that the paper bag waist and bow on the tummy might not look great on my rectangular shape. And to be honest this is not the most flattering style of pants I've ever worn, but I like that they're different to all the other pants in my wardrobe.  Actually I think a few frills on the shoulders or bust might help - or alternatively a strong sleeve could do the trick (I'll try that next time!). 


The pattern is a straightforward one to make because the pants have no closures: no zips or buttons whatsoever! Basically you need the pants to be wide enough at the waist to get on over your hips, and then you bring in that extra width with elastic - easy. The distinctive ties on the front are decorative, and slot neatly into pleats.


The elastic is only supposed to be set in around the sides and back of the pants (ie not over the tummy) but I set it in all the way around, stitching the elastic in place under the ties so it doesn't gather on the tummy.  

Oh - and I should mention the pockets! The pockets are very comfortable:


I believe Style Arc drafts for a women 168 cm tall and I'm about 5 cm taller than that, but my body is a little short for my height and my limbs a little long, so these pants feel a bit short :(.  I sewed a rather narrow hem on the cuff, but it I'd still like another 5 cm or so in length, and preferably added higher in the leg, so next time I make these I'll be chopping up the main leg pattern piece and inserting about 7cm of length there. 


OK, one back view for my sewing friends:


I've seen a few fashionable women wearing this style lately in the CBD, in both stripes and block colours, and if I can find the time I'd really like to make these pants again in a block colour.  The style is also really comfortable to wear, and the pants are a much easier sew than they might look. 

That's it for now! 

I'll be back soon with another quick post - till then, happy sewing!


- Gabrielle xx


Tuesday, 2 May 2017

D&G Sundress: Vogue 8974

There was an icy wind blowing down the street the other night as I walked home from the station, trying very hard to imagine being warm. Despite the sunshine in these photos, Sydney weather has turned the corner, and the evenings have a bite to them.

I thought about this summer dress, waiting to be blogged, but frankly it didn't warm me up at all...


...all it did was remind me I needed to get cracking and write the blog post!!


The dress is Vogue 8974 which I imagine you've already seen blogged here and here, or in one of its many other blogged incarnations.  I started sewing this dress back in 2015 (!!), tweaking a muslin till the fit was perfect, but when I applied my adjusted pattern to the good fabric (Dolce & Gabbana textured cotton from Tessuti Fabrics - and no, pretty sure they don't have any more of it), the fit was completely off, and much looser than in my muslin.

I focused on aligning the centre front and back chevrons, then put the dress aside till the following summer.


In 2016 I got thinner, and when I came back to this dress the fit was even looser.

I sewed the main seams, set in an invisible zip in lieu of side snaps, moved the shoulder straps to line up the stripes (oops, a cutting out misalignment) and then spent hours and hours pinning and re-pinning the dress to take in all the saggy areas.

And then I put it aside again, wary of committing to so many adjustments.


I got it out AGAIN a few months ago, and hooray, I'd gained lots of weight and the dress now fit me perfectly!  #silverlining


Unfortunately by the time I'd finished up all the hand stitching on the inside of the dress (sewing opened seams flat, attaching facings to seams,sewing up the hem... ) I'd gained yet more weight, so in these photos you are not seeing that wonderful moment of perfect fit; you're seeing my "this is slightly too tight but I'm smiling anyway" version of fit :(.  Bugger.  

At this rate though I am hopeful it could fit brilliantly next summer ... or the one after?


Pattern

Vogue 8974 is a nice little pattern - the dress has interesting lines, a fit and flare profile that's a bit different from the usual, and I think it looks good on a variety of figures. It's a fun one to use with a striped fabric, and it's not super hard to sew.  The pattern includes instructions for side snaps to fasten the left side of the dress, but this is easily swapped for a zip, and you can also omit the belt if you don't happen to have belt-making paraphernalia to hand.


I haven't tried the little unlined jacket pattern that comes with the dress but I think it looks pretty sweet too. I was originally thinking to make a matching jacket with the piece of fabric I have left over from the dress, but then that might just be stripe overkill.

If I make the jacket, or make the dress again, there is one point I'd like to change: I'd add interfacing. How modern, right?  The pattern only shows the belt being interfaced, and while I noticed this vintage feature in time to retrospectively interface the dress facings, the upper edges of the bodice and the side seams, I wish I'd noticed before sewing the strap tubes.


Fit / Size

Arghh. Well, fit is the real challenge with this dress pattern. I found it was a bit of work to adjust the bodice to fit nicely, with darts in the right place, straps laying flat (I didn't quite achieve that - I needed a fitting friend for the back) AND side bodice not too low or high under the arms. You might be lucky and the dress might fit you out of the envelope, but I think it'd be realistic to go into sewing this dress expecting lots of try-ons and adjustments as you go.  For the record my dress is mostly a size 12-14, but ranges from size 10 above the bust to size 18 at the waist.


Modifications

I made a few "modernification" modifications to the pattern:
  • An invisible zip instead of side snaps - I'm too lazy for side snaps! 
  • Front straps without buttons (couldn't think of what sort of buttons I'd want)
  • Moved the front straps to align the stripes (they shouldn't be set back from the "V" but should continue its line), and next time I'd angle the back straps to make them sit flush against my back
  • Used my overlocker instead of turning under and stitching down seam allowances on the facings
  • Used interfacing on bodice edges, side seams and facings
  • Added height to the bodice as when the dart was in the right place the bodice cut looked too low 
  • Skipped the belt in favour of showing off the chevrons at the waistline


From memory I think I also changed the grainlines of the pattern - I really, really wanted those chevrons down the front and back, but that meant cutting the centre front (CF) and centre back (CB) seams on the bias.  I intended for the chevrons from the bodice and the skirt to meet at the waist in a double ended point, but I mustn't have measured carefully enough when I was cutting out, and that double point doesn't quite work out.


MIA

On a completely different topic, in case you were wondering where I went between February and April... I went nowhere; life just got crazily stressful, both at work and at home.

The full time job I mentioned towards the end of this post grew a couple of months ago when my colleague in the team left the company for an amazing overseas role, and I've been stretched trying to cover both our roles ever since.  We've recently been interviewing to fill the position, which was going to report to me (yay, a manager job!), and I was hopeful we'd be making a job offer in the next few days, but on Thursday night I was given the bad news that my Department has decided to save money by not filling any vacant positions for the rest of this FY.   I'm not sure what I'm going to do now, but I know I'm not prepared to kill myself for another 6+ months doing two jobs.

On the home front things are going nicely at the moment, but that's after a couple of pretty intense months with my daughter spending a few weeks in hospital, my son starting high school, the cat developing severe allergies, and my dad and his partner both in and out of hospital for surgery and tests. My daughter is hopefully having a preventative operation in a few weeks, and dad's having more surgery next week, but hopefully after that the health worries will ease off.

So - that's why I was MIA! I used to think sewing was my form of relaxation, a contrast to the frustrations and stresses of work and family life, but it turns out that when the stress is ramped up I just don't have the mental bandwidth to sew.


#VintagePledge2017

And back to the sewing... Marie of A Stitching Odyssey has been running the Vintage Pattern Pledge since 2014, and I joined in last year (somewhat unsuccessfully, you could argue) and the year before.

Here's all I managed last year against my vintage pledge:

Vintage Vogue skirt
Vintage DVF dress

This year I'll be having another go at pushing myself to sew from my vintage patterns - and I'm delighted that after three attempts this dress finally counts towards my pledge!

During 2017, I, Gabrielle of Up Sew Late, will sew up or finish sewing at least four of my vintage or reproduction sewing patterns. 


I'll try to blog again soon - I've got swimmers, frocktails dresses and a couple more tops to share with you as soon as I can get my photos in order :).


Happy sewing

Gabrielle xx

Friday, 27 January 2017

Inari 2: Adjusting the Sleeves

Way back when (well here...) I blogged an Inari dress I was feeling equivocal about. It was made from a medium weight cotton, and despite the pattern's fabric suggestions ("light to medium weight fabric, inelastic or with stretch") the fabric just felt wrong for the dress and exacerbated sleeve fit issues that would probably have been less noticeable in a knit fabric.

Ever since, I've been meaning to re-make the Inari with a modified sleeve, but also to re-make the Inari in a knit fabric without modifying the sleeve, to see how the sleeve felt when the stretch of the fabric took on the role of accommodating arm motion. What I've finally got around to is a hybrid re-make; the Inari dress with a modified sleeve, in a knit fabric.

Spoiler alert: this one's a keeper:


I put this modification off for a long time, but it's actually super easy.  I took a couple of photos to illustrate how I applied a different sleeve (the sleeve and arm scye from Simplicity 1366), but I'll also describe the process in words of course.

So first of all I cut out the sleeves from Simplicity 1366, with the only change being a reduction in sleeve length. I measured the length of the Inari sleeve (based on that short straight seam under the armpit) and folded up the S1366 sleeve to a matching length.

Below you can see the difference in the two sleeve shapes. The Inari has a much higher sleeve cap, and I figured that since I was flattening this out in the S1366 sleeve (and also since the S1366 sleeve sits on a slightly dropped shoulder) I could forget about the curved hemline - the total sleeve length from the shoulder point should be very similar. Here are the shortened S1366 and Inari sleeves laid on top of each other (I have the Inari front sleeve sitting on top of the S1366 back sleeve):


If you change a sleeve so radically, you of course need to change the arm scye it'll be sewn into. To do this I aligned my Inari and S1366 front and back pattern pieces along the shoulder line, with the grain line arrows parallel to each other.  Since S1366 makes a pretty loose top (a couple of centimetres wider than the Inari in the sizes I've made) I didn't align the pattern pieces on Centre Front or Back, but instead had the pattern pieces matching on width at the underarm - and this means I didn't have to change the side seams of the dress at all.  You can see below that the biggest impact of this change is that the arm scye is raised significantly - ie the sleeve now sits closer into the underarm:


This process is super easy to do, but it does rely on your having a pattern that fits the way you like. The two areas I'm fussy about when I do this are (1) the shoulder line - I want to keep the shape of the shoulder line from the pattern that fits me, and if it's very different from the shoulder line of the pattern I'm adapting I'll spend a bit of time working out the point at which the two shoulder lines should meet (near the neckline vs near the arm), and (2) the grainline - the grainline of the pattern that fits reaaly has to be parallel to the grainline of the pattern being modified. But I'm sure most of you already know this and more!

I kept the Inari sleeve cuffs (but because I sewed the dress with my own order of construction I can't turn the cuffs back the way the pattern intends):


And I used the neckband intended for knit versions of the dress:


Happily even with my sleeve changes the dress still looks like an Inari - and I can finally join the Inari fan club! Happy happy days...


And what's more, I managed to eke this dress out of 1.1 1.5 metres of 150 cm wide fabric (!!) and now have only the tiniest scraps leftover - that makes me even happier! 


Now with my previous Inari I talked a bit about mitred self-faced hems, but if you look at the examples in my "how to" for this sort of finish, you'll see that it's more commonly used with woven fabrics (stretch wovens included).  My very stretchy viscose (an Italian viscose/ lycra from Tessuti fabrics which looks to be sold out in their online shop - but this link takes you to their other printed jerseys) didn't feel like it would support the weight of a mitred self-faced hem without the dress stretching out, so I used the narrow hem finish suggested in the pattern this time around. And because my fabric was a bit shifty, I used steam-a-seam to keep the vertical and horizontal hem edges nice and straight:


The corners DO sometimes flick out in motion:


but mostly they're well behaved:


Thank you to my lovely daughter for taking these terrific photos for me (and some gorgeous floral close-ups)!


And I'll see you soon!


- Gabrielle xx

Related Posts Plugin for WordPress, Blogger...