Monday, 24 July 2017

Vogue 8877 in an Unnatural Animal Print

This print is not the sort of print I would normally wear, and these are not the sort of colours I'd normally wear either, but when I came across the fabric in the remnant bin of The Fabric Store on a visit with Nic, I found it strangely irresistible.  I may be making a heinous style error (who cares!) but I love it, and I think it's going to "go"- or at least "pop" in a way I find appealing - with lots and lots of the duller characters in my wardrobe :). 


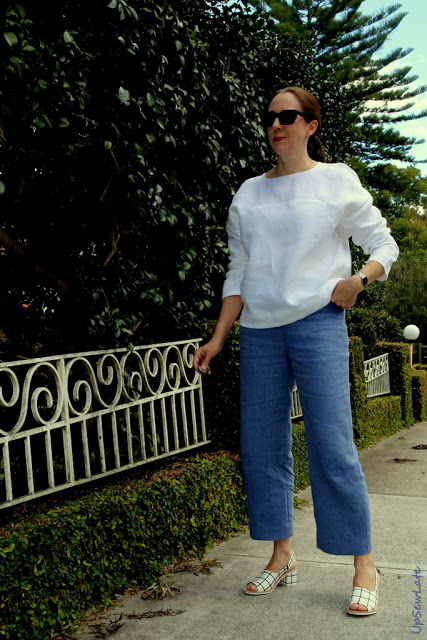
Speaking of the duller characters, in these photos I'm wearing my new top with a grey merino dress (Vogue 1338, blogged here), and I'd just taken off an aubergine boiled wool jacket (Vogue 8930, blogged here) - Vogue trifecta for the win!  I feel too self conscious in the grey merino dress by itself, but I realised today I'd be perfectly comfortable and cosy wearing it with an extra layer. 

Here's Vogue 1338, photographed a few years ago:


and Vogue 8930 looks like this on:


What's with the hands on hips all the time, hey?


This top is view C of the Vogue 8877 sewn from a single fabric, sewn in a size Medium (12-14) and with a narrowed neckline. As I've mentioned before, this pattern is intended for wovens but can also be sewn with stretch fabrics.  The dropped shoulders and curved bust seam are potential fitting challenges, and the first time I sewed the top (from a cotton lawn, never blogged) I thought the fit was a disaster.  Version number two was a t-shirt (loved it, and the fit was of course more forgiving in a stretch fabric), version three was made from linen - no fit issues that time around for some reason, and version four was a merino wool jumper. 

Version two, the crazy bunnies t-shirt:


Version three in white linen:


Version four as a merino travel jumper:


This time around my fabric is a white cotton waffle weave with purple, yellow and grey splotches printed on one side. The fabric doesn't really drape, so Vogue 8877 wasn't the ideal pattern - but I wanted to make something oversized and sweatshirt-related and V8877 seemed like a decent representation of that idea. 

To be honest the only hint of sweatshirt I've really managed is that ribbed neckband!  It's a bit subtle, isn't it! 


And speaking of unnoticeable, that curved bust seam isn't even visible in this print, is it - it would have been a good idea to pick it out with some piping, but the idea didn't occur to me till I saw these photos.  


So this is version 5. Apart from the rib neckline, the only change I made this time was to play around with the hemline.  Again, I don't think you can really see it, but I cut into the length of the front bodice and curved the sides down to the (original length) back. I included a really deep hem this time too with what I thought might be noticeable black top stitching but it just blends into the print. Who'd have thought? Turns out subtle doesn't work with fake animal print


I'll leave you with a couple more photos of the new top - I can't think of anything more to say about it! 


Happy sewing, and see you soon!


- Gabrielle x

Saturday, 15 July 2017

I Will Follow (McCall's 7542)

Well I won't usually.  Usually I'll apply my utmost self-discipline to avoid following the social media trends, because I reckon I'm usually tempted to follow only because everyone else is (peer pressure, yes, the force is strong), and that's not a good enough reason really :).


However, this time around the trend was a pattern (McCall's 7542) that looked to tick a lot of boxes for me:
  • Great sleeves: tick
  • More than one variation I'd like to wear: tick
  • Easy without looking like fast fashion: tick
  • Mashable with other patterns: tick
  • Different from other patterns I own: tick


This time around (I'll definitely use this pattern again, even if only for the sleeves) I sewed a variant on option E, which is the option with lower bubble sleeves gathered into the upper sleeve with an exposed seam (no idea of the correct terminology, sorry!). In my version the border between upper and lower sleeves is a regular seam, and that lower sleeve isn't a bubble but a single layer of fabric.

As you'll see I used a couple of fabrics for this top.  I had small and rather lovely piece of geometric wool from The Fabric Store, and it wasn't quite enough for the top, so I coupled it with a small remnant of black ponti for the back of the top.  I love this geometric fabric so much - and it reminds me of a beloved geometric silk from The Fabric Store that I sewed into a summer top a couple of year sago (post here).  The top only needs a single button, so the small purple button comes from my button stash. I think this particular button was inherited from my mother-in-law, who used to wear quite a bit of purple.


I sewed this top in a size 14 - a size bigger than I'd sew in a Vogue designer pattern - because I suspected the McCall's sizing might be more consistent with the Vogue basics line, and I'm more of a 14 than a 12 there.  It's still looking a little tight in these photos, but I expect the fit will be looser when my thyroid levels get back to normal. 


A few people have mentioned the top length in their reviews, and this is something to be aware of before you cut your top out: as well as being quite fitted, it's short!  My version of the top is cut out in the longer of two lengths, but it's not that long. Before whipping this up from a special fabric I'd really recommend measuring the bodice and sleeve widths and lengths. The fact that I've used a stretchy fabric for the back of my top effectively gives me more width, but my lower sleeve is nearly twice the drafted length of the bubble - the original would have hit me at just below elbow length. 


All up, this one's a fun and versatile pattern - highly recommended, and I look forward to trying the trumpet or tulip sleeves soon.  For more examples of this pattern sewn up have a look at Alex's striped viscose version here, Kabunta's blue and pink versions here, Carmen's teal tulip-sleeved version here, and Erika's pale pink accordion pleat sleeved version here.  And there are loads more on Pattern Review of course :).


Ahhh I love geometric fabric...  


See you soon!

- Gabrielle x

PS apparently it's become just about impossible to comment on my blog lately - I'm so sorry if you've been trying to do so.  I do have Disqus installed, so this should be working, but apparently it's become twitchy. Short of uninstalling Disqus and losing lots of lovely interactions, do you know of a good solution for Blogger?  For now, I'm contactable via email (corbettgabrielle .at. gmail .dot. com) and through the bloglovin comments system. Thanks in advance! 

PPS I just went over to the Disqus site and had another go at fixing things - and for now it seems to be working. If you're having similar issues, I logged in to the Disqus site and then under the Settings menu selected Installation.  My Disqus widget looked OK, so I moved on to step 2 (import Blogger comments to Disqus) and then cicked on the button for a one-time import followed by clicking to sync comments. Can you please let me know if things go pear-shaped again? Thanks!


Saturday, 8 July 2017

Guy Laroche Top (Vogue 1450)


Vogue 1450 by Guy Laroche has been waiting in my filing cabinet for a few years... I love the Guy Laroche Vogue patterns, but they often look too "Fashion" when they're first released for me to contemplate them in my wardrobe.  I'm not sure if it's that the designer looks gradually filter down to the high street, or if staring at the designer patterns for a few years makes them eventually look more normal, but I've now made the top and the skirt is on the shortest of my "to sew" lists (the physical version of the list, where fabric is matched with patterns and piled next to my sewing machine - still no guarantee it'll be made though).


This top was designed for summer, but I thought it would look great in a cashmere-wool blend. Possibly that thought was triggered by the fact that I had a nice little cashmere-wool remnant in the stash, but does that even matter? My remnant was pretty short - just 0.7 metres long but 155 centimetre wide - but it looked to me as though the top could be squeezed out of that limited yardage despite the pattern's stated 1.8 metre fabric requirements.


I measured myself and checked the finished dimensions, and went down a size to a 10. I couldn't fit the length of the fronts on my 0.7 metres, so I also cropped the top by an inch or two.

It turns out that the 10 fits when I'm wearing the same lack of layers as when I measured myself.


In all these photos I'm wearing a warm singlet and a high-waisted skirt, and in some I'm also wearing a long-sleeved merino wool top, just because it's cold here at the moment.  With extra layers on, the top is definitely a bit snugger than I'd hoped, and I haven't tried it without layers... I think I need to have another go at making it in the correct size and length, as I suspect I'll love the larger version more than this one.  Bigger is better!


The Sewing Details
Pattern = Vogue 1450 by Guy Laroche:
Very loose-fitting top has asymmetrical snap closing, extended shoulder forming cap sleeves and bias (lining) binding finishing seams and facings. 

Fabric = wool-cashmere mix, a remnant from Tessuti fabrics, along with a small piece of magically coordinating silk also from Tessuti fabrics

So, although this looks like quite a simple loose top, the design is stellar. There's a curve to the shoulder that sits beautifully when worn, and the armholes are perfection: low enough for layering but not so low as to reveal much, but also a great shape. Can you see too the front half of the armhole is a different shape to the back half? The front is slightly lower cut than the back and follows a different curve - and that means a much better fit than the common symmetric armhole, with no excess fabric getting folded under my arm as I swing it forward.  


There are these lovely darts in the back of the top too - no partying in the back, but some interest for sure!  These darts are replicated in the lining to the top. Since I'd bought insufficient lining I rotated the darts into a new horizontal seam line at the same height as the darts - but I don't seem to have a photo of this. 

Anyway, check out my dart alignment in the wool! (I had to have three attempts at the centre back seam before I was happy with their alignment, so a bit of basking is permissible isn't it?)


The top is supposed to be sewn with three large snaps and two buttons, but I got cold feet about the buttonholes, so my top has five large snaps. I'm super slow and not the neatest of hand stitchers, but I love the control you get with hand stitching. With the snaps I decided to start from the bottom and work my way up.  The hemlines really need to align, but at the neckline there's a crossover that would definitely mask a bit of length discrepancy if required. For the left hand side, I sewed the snaps to the wool (and not the lining), using the snap half that has an indentation (I think this may be upside down, but it seemed like this orientation would cause less of a bump to show through when the top was fastened. 


On the right hand side I sewed the snaps to the lining, but before doing so I cut out some small squares of wool that I positioned under the snaps as I sewed them in. The snaps are quite strong, and I didn't think the silk lining on its own would be any kind of match for them - with a wool backing the lining has a chance of surviving!  From the photos on the pattern envelope I assume the snaps aren't supposed to attach to both layers of fabric, though perhaps the designer garment was just sewn by someone with incredible, invisible hand stitching? In any case, sewing them to just one of the layers means a bit of movement can happen without creating too many creases on the outside (and any creases you do see in my top are therefore more likely to be related to my wearing too many layers and wearing the wrong size!). 


The pattern has you use a bias binding seam finish using your lining fabric but I didn't really have any spare lining fabric, besides which my lining was too heavy, so my lining seam edges are overlocked and my wool edges have been left raw after neatening them.  


I'm trying hard now to think what could possibly be improved in this pattern - and the only thing I can come up with is having separate lining and outer pieces, with the lining pieces slightly smaller to ensure it didn't show around the edges... not a big deal with wool as the outer layer as it stretches a little when steamed, but I can imagine this being annoying in a fabric with less give. And other than that, nothing!


Thanks for reading!

See you soon


- Gabrielle xx

Sunday, 2 July 2017

Vogue 1392 for Melbourne Frocktails

The dress I have to share with you is one I'm proud of (carefully planned and successful pattern matching, and a dress that really looks the way I'd intended), the event it was created for was a LOT of fun (Melbourne Frocktails, October 2016), and in fact just thinking about this dress reminds me of the awesome weekend I had with wonderful Melbourne sewing friends.

I don't know why it's taken me so long to post this dress!


Posing before Frocktails with the very charming Nicole of The Somnolent Dachshund

The dress is Vogue 1392, a Kay Unger designer pattern, described on the back of the pattern envelope as follows:

Lined dress has close-fitting, bones, bias front bodice extending into back band, no shoulder seams, concealed, elasticized shoulder straps and ribbon hangers, front pleated skirt, side pockets, attached petticoat, and invisible back zipper.


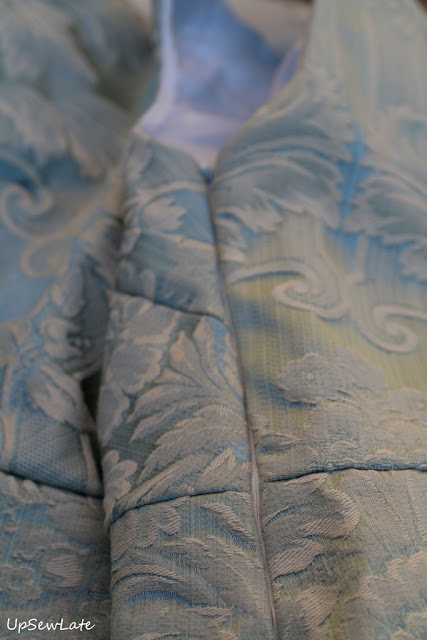
The dress is really tricky to photograph - even for the professional photographer at the event - I guess because my brocade fabric is so pale and shimmery.  I've darkened all of these professional photos to make it easier to see the fabric, and later in this post are some photos I took in shadow that I think give you a better idea of the fabric colour without the shimmer.

My original idea was actually to sew this dress in either a hot pink designer silk or a vibrant orange silk-cotton, but I wanted to check the fit first - and I'd found a roll of brocade on the nature strip, as you do (apparently my neighbours changed their minds about their curtains).  So I cut out the skirt in this brocade and combined it with some leftover stripey teal and cream upholstery fabric for the bodice, made a few adjustments for fit, and... realised I rather liked the brocade.  I quite like the stripes too...


And that's how it became a brocade dress!


Cutting and Sewing

Although this isn't a complex pattern (it's rated Easy), the dress took a reasonable amount of work, comprising as it does a boned lining and a petticoat and in my case a truck-load of pattern matching.


Pattern matched brocade on the back of Vogue 1392

The pattern matching was of course the first step - I don't have a cutting table, so I basically laid the fabric out over every bit of floor I could claim in the study, decided which way was "up", and then got to work on the priority areas. For the skirt I placed vertical lines at the centre back waistline, with more lines angling outwards lower on the skirt backs, and vertical lines on the front waist darts, with hip-like curves about half way down the skirt fronts. 

For the bodice I wanted strong lines to wrap over the shoulder straps parallel to the neckline, and wanted the shoulder straps to look as though they "grew" out of the centre front.  

Although I do sometimes fuss over side seams too, in this instance the fabric was too complex for me - I just couldn't do any more than make the sides symmetric. 

I'm not super speedy at pattern matching, and my knees don't enjoy scrambling around to move the pattern pieces again and again, but for me this part of sewing is really worth labouring over - I get so much satisfaction from a nicely placed (and matched) print!


Dress front, Vogue 1392 in brocade
Dress back, Vogue 1392 in brocade

Once the fabric was cut out the sewing was pretty straightforward. I made a few changes along the way (summarised below), but all the steps in the pattern were logical and easy to understand.  I hadn't ever sewn boning onto lining fabric before, so that was a worry, but it turns out not to be at all tricky :).

Modifications:

  • Ignored the grainline recommendation for the bodice fronts so I could get the pattern layout I wanted
  • Lengthened the skirt pieces by about 8 centimetres (I'm about 8 cm taller than the drafted height for Vogue patterns)
  • Skipped the step of fusing interfacing to the bodice front and back pieces because my fabric already had plenty of body
  • Moved the invisible zip from centre back to the side seam as I was concerned that the thickness of my brocade would make it tough to get that zip looking truly invisible (I was right)


  • Skipped the boning in the side seams of the bodice, though looking at the photos now I think I should have left these in. The bodice is crumpling a little at the side seams and boning would have helped it keep its shape. I might see if I can add this in retrospectively!  I did leave the boning in place on the bodice front linings (and it wasn't nearly as tricky to execute as I'd expected):
Oops, the waist seam in the lining should be facing in towards the wrong side of the brocade
  • Skipped the side pockets - I just wanted smooth side seams
  • Removed the elasticized shoulder straps after sewing them in - they didn't seem to make any difference, perhaps because I'd done my bodice fitting without factoring them in
  • Skipped the ribbon hangers as I thought they'd show


Challenges:

The pattern matching was a challenge of course (d'oh), compounded by stretched out selvedges (grrr!), but there was another challenge: the neckline!  I trimmed those neckline seams aggressively, under-stitched them assiduously, and pressed them hard, and yet the lining persisted in peeking out. I think the huge difference in weight and flexibility of the two fabrics (hmm upholstery-weight brocade vs flimsy lining) is the problem here - are there any other tricks you know of for keeping the lining on the inside? I did think about pick stitching the neckline but ran out of time before Frocktails (and then just couldn't be bothered afterwards), but I'd like to sort it out before I wear the dress again.


Conclusion:

I don't think my choice of colours and fabric were ideal (too pale on me, and probably too thick for a dress), but if you happen to have a smallish amount of fancy fabric, Vogue 1392 may be the one for you.  There are so few patterns for cocktail dresses that don't require crazy amounts of fabric, but with this pattern you only need around 1.5 metres depending on the size you sew.  Even without swathes of fabric, this dress with its boning and elasticized shoulders and layers of lining and organza feels very upmarket. A big tick from me!


Next up I am going to TRY to get some photos of my exciting new Guy Laroche (Vogue 1450) top - and I'm tempted to make the matching skirt, though I suspect as is it'd be another in the not-suitable-for-work series...


See you soon!


- Gabrielle xx

Related Posts Plugin for WordPress, Blogger...