Showing posts with label Melbourne. Show all posts

Sunday, 2 July 2017

Vogue 1392 for Melbourne Frocktails

The dress I have to share with you is one I'm proud of (carefully planned and successful pattern matching, and a dress that really looks the way I'd intended), the event it was created for was a LOT of fun (Melbourne Frocktails, October 2016), and in fact just thinking about this dress reminds me of the awesome weekend I had with wonderful Melbourne sewing friends.

I don't know why it's taken me so long to post this dress!


Posing before Frocktails with the very charming Nicole of The Somnolent Dachshund

The dress is Vogue 1392, a Kay Unger designer pattern, described on the back of the pattern envelope as follows:

Lined dress has close-fitting, bones, bias front bodice extending into back band, no shoulder seams, concealed, elasticized shoulder straps and ribbon hangers, front pleated skirt, side pockets, attached petticoat, and invisible back zipper.


The dress is really tricky to photograph - even for the professional photographer at the event - I guess because my brocade fabric is so pale and shimmery.  I've darkened all of these professional photos to make it easier to see the fabric, and later in this post are some photos I took in shadow that I think give you a better idea of the fabric colour without the shimmer.

My original idea was actually to sew this dress in either a hot pink designer silk or a vibrant orange silk-cotton, but I wanted to check the fit first - and I'd found a roll of brocade on the nature strip, as you do (apparently my neighbours changed their minds about their curtains).  So I cut out the skirt in this brocade and combined it with some leftover stripey teal and cream upholstery fabric for the bodice, made a few adjustments for fit, and... realised I rather liked the brocade.  I quite like the stripes too...


And that's how it became a brocade dress!


Cutting and Sewing

Although this isn't a complex pattern (it's rated Easy), the dress took a reasonable amount of work, comprising as it does a boned lining and a petticoat and in my case a truck-load of pattern matching.


Pattern matched brocade on the back of Vogue 1392

The pattern matching was of course the first step - I don't have a cutting table, so I basically laid the fabric out over every bit of floor I could claim in the study, decided which way was "up", and then got to work on the priority areas. For the skirt I placed vertical lines at the centre back waistline, with more lines angling outwards lower on the skirt backs, and vertical lines on the front waist darts, with hip-like curves about half way down the skirt fronts. 

For the bodice I wanted strong lines to wrap over the shoulder straps parallel to the neckline, and wanted the shoulder straps to look as though they "grew" out of the centre front.  

Although I do sometimes fuss over side seams too, in this instance the fabric was too complex for me - I just couldn't do any more than make the sides symmetric. 

I'm not super speedy at pattern matching, and my knees don't enjoy scrambling around to move the pattern pieces again and again, but for me this part of sewing is really worth labouring over - I get so much satisfaction from a nicely placed (and matched) print!


Dress front, Vogue 1392 in brocade
Dress back, Vogue 1392 in brocade

Once the fabric was cut out the sewing was pretty straightforward. I made a few changes along the way (summarised below), but all the steps in the pattern were logical and easy to understand.  I hadn't ever sewn boning onto lining fabric before, so that was a worry, but it turns out not to be at all tricky :).

Modifications:

  • Ignored the grainline recommendation for the bodice fronts so I could get the pattern layout I wanted
  • Lengthened the skirt pieces by about 8 centimetres (I'm about 8 cm taller than the drafted height for Vogue patterns)
  • Skipped the step of fusing interfacing to the bodice front and back pieces because my fabric already had plenty of body
  • Moved the invisible zip from centre back to the side seam as I was concerned that the thickness of my brocade would make it tough to get that zip looking truly invisible (I was right)


  • Skipped the boning in the side seams of the bodice, though looking at the photos now I think I should have left these in. The bodice is crumpling a little at the side seams and boning would have helped it keep its shape. I might see if I can add this in retrospectively!  I did leave the boning in place on the bodice front linings (and it wasn't nearly as tricky to execute as I'd expected):
Oops, the waist seam in the lining should be facing in towards the wrong side of the brocade
  • Skipped the side pockets - I just wanted smooth side seams
  • Removed the elasticized shoulder straps after sewing them in - they didn't seem to make any difference, perhaps because I'd done my bodice fitting without factoring them in
  • Skipped the ribbon hangers as I thought they'd show


Challenges:

The pattern matching was a challenge of course (d'oh), compounded by stretched out selvedges (grrr!), but there was another challenge: the neckline!  I trimmed those neckline seams aggressively, under-stitched them assiduously, and pressed them hard, and yet the lining persisted in peeking out. I think the huge difference in weight and flexibility of the two fabrics (hmm upholstery-weight brocade vs flimsy lining) is the problem here - are there any other tricks you know of for keeping the lining on the inside? I did think about pick stitching the neckline but ran out of time before Frocktails (and then just couldn't be bothered afterwards), but I'd like to sort it out before I wear the dress again.


Conclusion:

I don't think my choice of colours and fabric were ideal (too pale on me, and probably too thick for a dress), but if you happen to have a smallish amount of fancy fabric, Vogue 1392 may be the one for you.  There are so few patterns for cocktail dresses that don't require crazy amounts of fabric, but with this pattern you only need around 1.5 metres depending on the size you sew.  Even without swathes of fabric, this dress with its boning and elasticized shoulders and layers of lining and organza feels very upmarket. A big tick from me!


Next up I am going to TRY to get some photos of my exciting new Guy Laroche (Vogue 1450) top - and I'm tempted to make the matching skirt, though I suspect as is it'd be another in the not-suitable-for-work series...


See you soon!


- Gabrielle xx

Saturday, 10 October 2015

My Frocktails Cape

Finally, let me tell you about my frocktails cape!


Yes, this wonderful, draping floral coral thing of beauty... I'm making an exception today; that gushing can stay.  Seriously, it's my favourite garment ever made.  I absolutely L.O.V.E. this cape.

Apologies in advance, but there are going to be lots of photos in this post.


Not the hardest thing I've ever made, but the best I can recall making - made with care from start to finish, and looks just like I hoped it would.  It's so rare for me not to make at least one irreversible stuff-up!


My cape story started with a random fabric find; a small and beautiful half price remnant at Tessuti Fabrics in Chatswood.  When I last looked for the fabric in-store there was still some, but I don't know if there would still be.  I haven't found this fabric in Tessuti's online store, so if you're lusting after some it's probably best to just call them. 

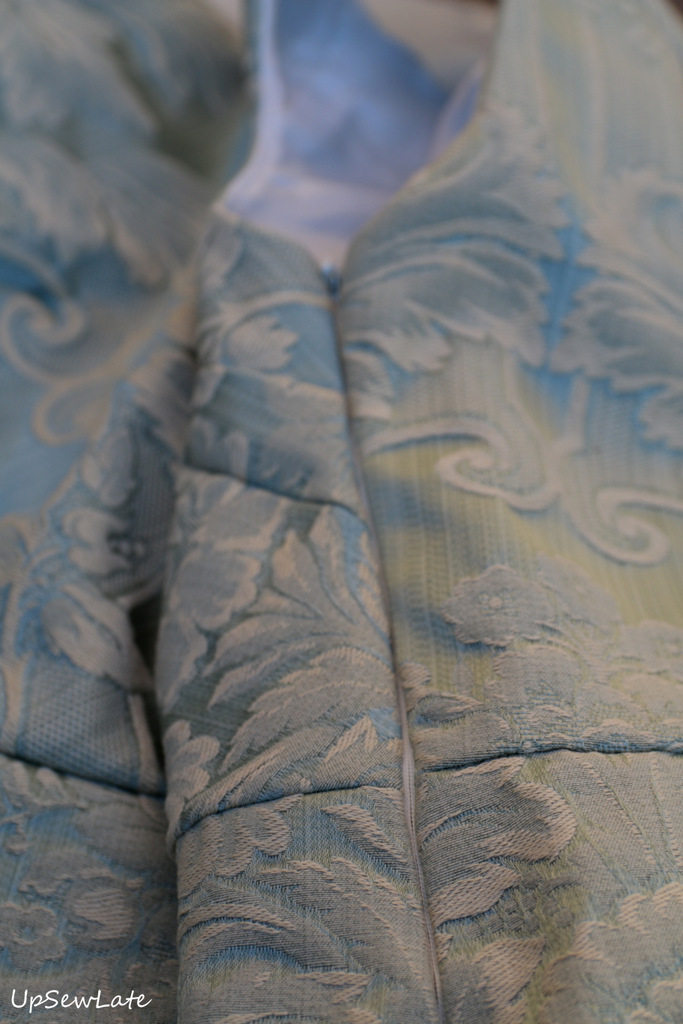
The fabric is a woven viscose, medium weight and terrifically drapey with a loose weave that's prone to fraying. That coral colour is one of my favourites, and the fabric looks amazing on both the right side and the wrong side where the colours of the woven pattern are inverted.  Each panel is nearly 2 metres long, with the white flowers growing inwards from each end of the panel cut and a section of coral colour between the tops of the two plantings. My 90 cm remnant was just a little smaller than a half panel, but it had me thinking of 40s-style dresses for winter so I bought another full panel too. 

The fabric came home with me, and was subjected to lots of my admiration over a period of weeks. 

And then frocktails drew nearer and nearer.  I made most of my frocktails dress, and then it came time to make sewing decisions for an outer layer.  I wanted to use a pattern and fabric from my stash (qiuckly narrowed down to this fabric, of course), and I wanted to be able to accommodate my dress sleeves without crushing them. Surprisingly that still left me with several choices in the very wide sleeved jacket and cape departments.  Laying out the fabric on the floor and measuring the floral heights and widths from the two panel ends, it seemed that a medium length, not too flared cape that was made from several panels would allow me to have the flowers climbing up nice and straight from all around the hemline, with a plainer coral fabric at the top of the cape. 


Frocktails Cape - front flat view
Frocktails Cape - back flat view

Vogue 7231 from the 1960s fit the bill perfectly.  Judging by the pattern illustrations it had a lovely shape and some attractive, slightly curved seams, one of the variations was designed to hit just above knee length, and its panels looked about the right width to fit my flowers without pruning them too much.  


Vogue 7231 on Etsy

The photo above comes from Etsy (unfortunately now sold); my copy of the pattern came from a second hand store in a size 14.


The pattern as drafted has a back inverted pleat and a martingale belt, but as I wanted the cape to be all about the fabric I removed these elements and made a back pattern piece that was cut on the fold. More time on my knees shuffling pieces of pattern tissue on fabric confirmed this modified version of the pattern would fit nicely on my fabric - IF the pattern fit me!

Obviously removing a pleat in the back removes some wearing ease, and I suspected a 1960s size 14 might be equivalent to a modern-day size 10, so I sacrificed some gingham to a muslin - and was absolutely relieved :).  The cape sewn to knee length looked fine, the shoulders fit well, the neckline sat in a comfortable position (some vintage necklines are VERY high), and the body of the cape fit me, though it felt a little too fitted.  Based on this fit, I left the shoulders and neckline alone but added ease in the panel seams of the cape (ie all the vertical seams except those at centre front), starting at around shoulder level.

Frocktails Cape with some extra ease


Now at this point, when I could very well have cut out my cape, I stopped the practical work and let Google lead me astray.  My pattern instructions were very simple, and I was worried they might be dumbed down, so I started searching for cape construction and jacket tailoring tips online.

Everything I read seemed to tell me I needed to underline my fabric as well as line it, so I popped back to Tessuti Fabrics for supplies, and was very lucky to catch Colette before she dashed out for lunch.  Colette advised me that underlining would take away the lovely drape of the fabric (of course!!), and that a layer of interfacing and a lining would be plenty. I mentally breathed a sigh of relief - so much less work!  And then even though Tessuti's had some plastic buttons that were the right size and style and nearly the right colour for my fabric, Colette suggested I get fabric covered buttons made up at a little specialist button shop in Newtown, All Buttons Great and Small.


The cape fabric drapes beautifully, even after it's been interfaced and lined

Back home I serged the cut edges of my fabric, warm machine washed and line dried it, ironed it and then block fused all of it to make it more stable before I cut out my pattern pieces.  I hadn't ever block fused a whole panel of fabric before - and with a small domestic iron and ironing board in a small room it's slow and painful - but I think it's very good practice to fuse the interfacing to the fabric before cutting out the pattern pieces, so I'll definitely do it in the future.

And then I spent a few hours on my knees moving pattern pieces around on my fabric to try to fit everything in without chopping up the flowers, and with the aim of getting a feeling of symmetry, or at least balance, in the cape.  I know most people hate the cutting out stage, and the painstaking layout work is a really slow part of the cutting out stage, but when I mess up the pattern layout I tend to hate the finished garment - for me it's very much worth the pain, and lets me do things like including a single bloom on one side of the collar :).

Frocktails cape: print placement

To add ease to the cape I just adjusted the angle of the panel lines so as to add about an inch at the fullest part on each side (except centre front) of the panels at the hemline, tapering away to nothing at around shoulder level.

With my pattern pieces all cut out on the Sunday before Frocktails, I caught a train to Newtown the very next day on my lunch break with a bag full of interfaced fabric scraps. All Buttons Great and Small made up my buttons on the spot, and the resulting buttons looked perfect - just the right style and colour, and they even threw in an extra (slightly imperfect button) for free.


Beautiful fabric covered buttons for my frocktails cape

With such perfect looking buttons, I was worried my machine's button holes wouldn't be up to scratch - in fact, I wasn't sure my buttonhole attachment would cope with the large buttons - so I decided to outsource this step too. 

Normally I mark my buttonhole placement with pins at either end of the horizontal, but that often results in buttonholes that are only very nearly parallel.  This time around I used more pins and rulers and lots of measurements before marking the buttonhole placement on my fabric with a washable pen (and yes, the marks came out later without a problem). 

I was cutting it fine by now, with only a matter of days until frocktails, but I remembered reading this post about the Quick Buttonhole Service in Alexandria.  Monday evening was a mad rush of sewing - the main seams, facings and collar, and lots of basting to hold the outer and facing layers in place - and on Tuesday I rushed out to Alexandria at lunch with my cape and a sample button.  Mick wasn't able to do my buttonholes till Thursday, so I used Tuesday and Wednesday evenings to finish my dress, cut out and sew together the cape lining pieces and prepare some welts for the cape, 

And look, my buttonholes are perfect too! Perfectly straight, all the same length and inset from the edge of the opening, and all very neat.  


Buttons in their buttonholes


Two evenings to go... Sewing the cape facings to the lining pieces was straightforward, and the collar fit perfectly (it's a simple camp collar, which is why I wear it with the top button open).  I pressed the cape carefully to check that everything was hanging well without any seams puckering, and then it was time for the cape's welt pockets.

But two evenings before a big event is a bit late to try to work out something you haven't tried before...  Up until this point I'd intended to skip all the top stitching suggested in the pattern (for a cleaner look and less stress!) but to include the welts and pockets in my cape.   I could see how I'd sew the welts to the openings in the cape, but I couldn't understand how to attach pockets behind the welts that would also let my hands move in and out of the cape, and when I got to this step I discovered my pattern was missing  the critical last page of instructions. (I can see now that the welts were to be sewn on from just behind the openings and the pockets were to sit forward of the openings, between lining and outer fabric.)  Argh! I took the easy approach and skipped the welts and the pockets.


At this point it became clear that I should have added another layer of interfacing to the cape opening where it had extra stress from buttons and buttonholes - the fabric was looking too "worked" around the buttonholes. On the buttonhole side I cut pieces of interfacing of about 4 inches in width to fit above, between and below the buttonholes, and then pressed in this extra layer of interfacing retrospectively - it was a very fiddly and irritating job, but well worth it for the improved look of the fabric. It was an easier job to then add the same width of interfacing to the button side of the opening, where I hadn't yet sewn on the buttons, and then to add strips of interfacing around the fabric at the hand openings in the body of the cape. 

Nearly done!

Hand stitching the lining to the outer fabric at the slit openings was easy when the fabric was pressed and pinned, sewing on the buttons was straightforward with lots of pins to help with my button placement, and I was able to bag 90% of the lining using my machine, with just a short length to hand stitch.


Small hand stitches on the hand openings
A bagged lining on my frocktails cape

A careful press, and all done! 


I've heard people say they couldn't possible wear a cape; that capes are impractical and that they just don't work, but I found mine a delight to wear.  Obviously I couldn't wear a shoulder bag over it, but it worked well with an evening clutch, and it did a much better job than a regular jacket in not crushing my silk organza dress sleeves.  I like too how a cape makes what you're wearing underneath - even the shape of what you're wearing underneath - a surprise.  I don't think I need another of this type of cape in my wardrobe, but I'm tempted to sew up a more modern cape, like Vogue 1322: 

Vogue 1322

As you may have guessed, I took these photos at the same time (and place) as the photos of my frocktails dress.  I think they've turned out really well, much better than photos in my garden or on my balcony, but they were a bit of an effort - I really need to find a quieter place for photos!

With Gillian's Better Pictures Project in mind (and specifically the ideas of taking photos out and about, and more is more), let me tell you about taking these pictures.

First of all it although I took these photos many weeks ago, we were having a bit of an unseasonal heatwave. It was a really hot afternoon; too hot for a warm dress let alone a cape on top - my flushed cheeks are partly the result of the heat, but mostly the result of bucketloads of embarrassment (more on that later).

I had a "location" in mind for these photos, a short drive away from home with easy parking, so that's where I set up my camera and tripod.  It just didn't photograph as well as I'd imagined though; my camera's photo review function showed me it was too bright and contrasty and any photos I took there were overexposed. What's more, people kept walking through the space, on their way to and from a big apartment block!  So I packed up my stuff and tried another spot nearby which I remembered as having consistent shade and interesting geometric backdrops, set back from the road in a quiet square.  I was taking some test photos to determine which angle would look best when the entire family of a good friend of my son's walked by and waved hello (oh, embarrassment!). Very soon after they'd left a security guard appeared and told me I had to move on immediately, and that I was not allowed to take photos there (oh, mortification!).  I felt so embarrassed at this point that I really didn't want to stay in the area and take photos, but I'd been promising myself all week that I'd take the photos that day, so I swallowed my pride and walked around the corner to a road with some nice walled sections of footpath.  The road was much busier than usual as it had become a temporary bus route while the nearby train line was being repaired, all those buses were driving slowly due to a couple of small roundabouts, and across the road was a high-rise apartment block with plenty of spectators, I mean residents. At least the light was good!


I took a LOT of photos in this position.  At first I was so embarrassed that I looked cranky in the photos, but after a while I got used to the people watching from their balconies and the passersby staring, and decided I should just laugh at myself for being such a spectacle.  Hence the smiles and the flushed cheeks :). All up with three attempted locations, a little travel time and pauses between larger groups of passersby the exercise took me an hour, a lot longer that photos in my garden take - but I got photos that I think are good enough to represent how much I love my cape.


Well, that's a long blog post, and a lot of pictures - I'd better stop!  Thanks for reading (or just looking at the pictures), and see you soon!


- Gabrielle xx

Sunday, 23 August 2015

Jungle Top (V1454)

I think Jungle January just arrived in Sydney...


On the Saturday of the Frocktails weekend, I met up with Christie (Clever Tinker) and Rachel (RachelSews) to get a tram from the city out to Fitzroy to visit Clear It and The Fabric Store. And then a bit later on we met up with Sarah (FabricTragic), who'd offered to drive Christie and Rachel out to Darn Cheap Fabrics in Heidelberg.  Having seen so many lovely pieces of DCF fabric blogged as clothes by Lara (Thornberry) I was very keen to tag along, and Sarah was absolutely fine with it :).


Deep gulp of air. Darn Cheap Fabrics - wow.

I don't know if that weekend was a special one, but DCF was incredibly full of fabrics I wanted.  It was tough to choose just a few... They had Dolce & Gabbana silk organzas and silks and crepe de chines, they had the famous pineapple print, they had crazy pinocchio fabric, they had jungle print polyester...

I bought the jungle print, some grown up looking cream and blue silk cotton, a 3 metre length of fake pearls and some stretchy gold stuff for a dress up party, and a couple of D&G silks (red and white polka dot silk chiffon, another silk chiffon featuring squirrels and other critters on a blue background, and some pretty floral silk organza).

Breathe out.

So back in Sydney, full of sewing inspiration after a night of decadent and desirable frocks, I got cracking - cheapest fabric first, of course! And this DKNY top pattern, Vogue 1454 from the Spring/Summer 15 pattern range, is what I sewed up:


It's a boxy, loose-fitting, pullover top with no closures or fastenings. There are side slits that are just the right height if you want to use your pockets without flashing your stomach, and there's a back flounce or peplum which is longer than the front - I like it very much, and I want to make it in a solid colour like the original :).

In the next picture you can see how the side slit works out, as well as the length difference between front and back:


That back flounce is sewn on in a curve, like sewing just the back half of a circle skirt, and makes for smooth, graceful lines on what some like to call a "butt canopy":


I like the length of the front on me - it's hip length, and long enough to cover my stomach even when I lift my arms! 


Now you've seen what the top looks like sewn up, let's talk about the sewing details.


I sewed a straight size 12, and the result is a top that's very loose and boxy - however, the top is described on the pattern envelope as being "very loose-fitting". To date I've found the Vogue designer patterns to be a bit more roomy than the Vogue basics, so if you've yet to try out a designer pattern that's something you might want to bear in mind - the difference is probably less than a full size though. 

The pattern comes together very easily, with the hardest part being the narrow hems around the split  - and of course they'd be super easy with the sort of fabric that irons crisply - and I was able to knock the top together over two late evening bursts of sewing.

In terms of fabric yardage, this pattern is also a winner. The pattern envelope suggests you'll need 1.4 metres of 150cm wide fabric; I had 1.5 metres of this width. For a size 12 I was able to cut the pattern out with two quarter folds to the centre of my 150cm width, and although I did need about 1.4 metres of length I've now got a decent rectangle of fabric left over - maybe enough for a simple bag lining. 


And if you're wondering how close the pattern is to the original designer garment, I'd say very!

I spent a bit of time searching this top out among past seasons of Donna Karan and DKNY, and it looks to have come from the DKNY Spring 2014 collection - which doesn't seem that long ago to me because we haven't yet had Spring 2015 here in Australia!  Here it is on the runway:


It looks the same as the pattern to me, though perhaps a bit larger - though I'm not sure if that's just because the models are very thin under the tops? Here's a back view of the top as shown on a retail website:


All the DKNY versions of the top look to be made from crisp cotton, and on the retail sites it was listed as 97% cotton and 3% elastane - I think I want my next version of this top to be cotton too! 


Final thoughts? Well obviously I love the pattern, but I'm not sure I love this fabric on me - I don't mind its polyester-ness, but I'm not convinced this is *my* green. On the positive side, I may be on my way to a Jungle print conversion...  


Up next I'm planning to blog my frocktails outfit. The weather was stunning yesterday so I went out for blog photos, embarrassed myself horribly (I even ran into the whole family of a good friend of my son's, arghh!) BUT I think the photos are going to be alright.


See you soon

- Gabrielle xx

Sunday, 16 August 2015

Print Charming

In the weeks leading up to Melbourne Frocktails I had grand delusions of sewing myself a whole new casual wardrobe to wear while in Melbourne - some denim culottes, a cool top, a skirt in a great print and a vintage swing jacket. Of course there wasn't time for all that sewing, but I did manage one thing on that list: a cool top which I wore all day on Saturday before the party.


I think the colours are pretty true in the above photo - I don't normally like butterflies but the flowers and lovely orange, teal and pink are right up my alley!


I bought this fabric from Tessuti's Chatswood store a couple of months ago, within about a day of seeing someone in Melbourne post their purchase of the fabric on Instagram. Instagram is just terrible for making you realise there's a fabric you need, but it can also get you on the case quickly before a fabric sells out :).  This fabric is a digital print ponti, and it came in two colourways - both sold out very quickly so unfortunately I doubt you'd still be able to get it anywhere.

I only bought about a metre as from memory it was quite expensive - I think it's an Italian fabric, and it is a beautiful quality, but I don't like spending too much on stretch fabrics for some reason! Anyway, I soon had buyer's remorse and wished I'd bought more - I would really have liked to be able to make something like Kirsty's dress.


Oh well, with my little metre it had to be a top or a skirt... I thought I'd get more wear from the fabric as a top, given I spend my weekends in jeans and weekdays in a fairly conservative office, plus the colours seemed pretty good on me when I held the fabric up against myself, so a top is what it became!

I can see in these close up shots that the top had wiggled to one side - oops :). When it's not moving off to the side the shoulders actually fit very nicely!


And what pattern is it, you ask? Well this is very boring, but for a basic top, these days I seem to be using the same pattern over and over... and that staple pattern is Vogue 8916. I've made the top pattern before both as a t-shirt (my Splat! top) and with lengthened sleeves as a sort of sweatshirt (this pink / striped top).  It's very simple, but I really like the fit - it's about a million times better than the Papercut's raglan-sleeve Undercover hood on me!


As usual I sewed a size 14 in this pattern as it runs a bit smaller than the Vogue designer patterns. I cut the body to hip length according to a bit of tape measurement work (shorter than the pattern) and lengthened the sleeves based on my arm length. The neck band is a simple addition; a rectangle of fabric folded in half lengthwise, and pinned to fit to the neckline with the excess length trimmed away at a small centre back seam.


I think I have the fabric at 90 degrees to the right way up, but the fabric stretches in both directions so this direction feels fine on. And this orientation allowed me to place the flowers and butterflies where I wanted - an orange flower with a starring role in the front, pink flowers on the shoulders, and butterflies positioned to be less noticeable on the front. I know there are butterflies up high on the back, but as I can't see them they won't creep me out :).


In terms of sewing techniques, this was dead simple - I used a straight stitch on all the seams (yes, heresy, I know, but I think a straight stitch works perfectly well on a stretch seam so long as that seam isn't under stress!) and then used the overlocker to tidy everything up. The hems are top stitched with a single line of coordinating teal straight stitching at a stitch length of 3. Easy peasy!


I've come back from Frocktails incredibly inspired to sew and blog - in terms of sewing, the denim culottes are still on my radar but they're now competing with some really fun fabrics from Darn Cheap Fabrics and a couple of Named pdf patterns I bought in their recent sale. Where to start!!! And blogging - well I still need to get photos of my frockails dress and cape (sorry, I had too much on this weekend!) but I've also got a bit of a backlog of basics to blog (maybe consolidated in a single post so I don't bore you to tears) and a new top made over a couple of evenings last week with some of that Darn Cheap Fabric...


See you soon!

- Gabrielle xx

Related Posts Plugin for WordPress, Blogger...