
After a ridiculous amount of procrastination and many substitution projects, I started making these Papercut pleated pants a couple of months ago. I'd been delighted to win the pattern last year in a giveaway held last year by the very lovely Juliette (yes, all giveaway holders are lovely, but she seems particularly lovely) of the Crazy Gypsy Chronicles; I was mad keen on pleated pants - still am - and desperate to get the pleated look as seen on the cool pattern envelope.


It's a gorgeous package: recycled paper, cool graphics and photography, and a clearly drawn and instructed pattern. The pattern is described as "A pleated pant with a slim fit leg, wide shaped waistband, fly front opening, back darts and side pockets" and that's exactly what I wanted - I wanted pants just like the ones on the pattern envelope!
There was a problem. You know how the sizing of these pants is really huge, and everyone has to take the pants in by 2 sizes to get down to the size they intended to make? Yes? Well apparently that problem got fixed! I had no idea. Unfortunately pattern companies don't do version control, so when you buy a pattern you can't tell if you're getting the pattern that everyone reviewed last year or an improved version...
[Hmm, why don't pattern companies use version control? Wouldn't it make sense? And wouldn't it be great for the pattern buyers of the future to be able to tell whether they're getting the limited edition first print run, or the original release, or the revised and improved version?]


Anyway, suffice to say having read all the reviews I could find, and having checked out all related photos, I very deliberately cut the pants out 2 sizes smaller than my measured size. They looked small, but many had gone before me, so I was utterly confident I was on the right path.
Until I couldn't even get them on!


And so a design feature was born of necessity.
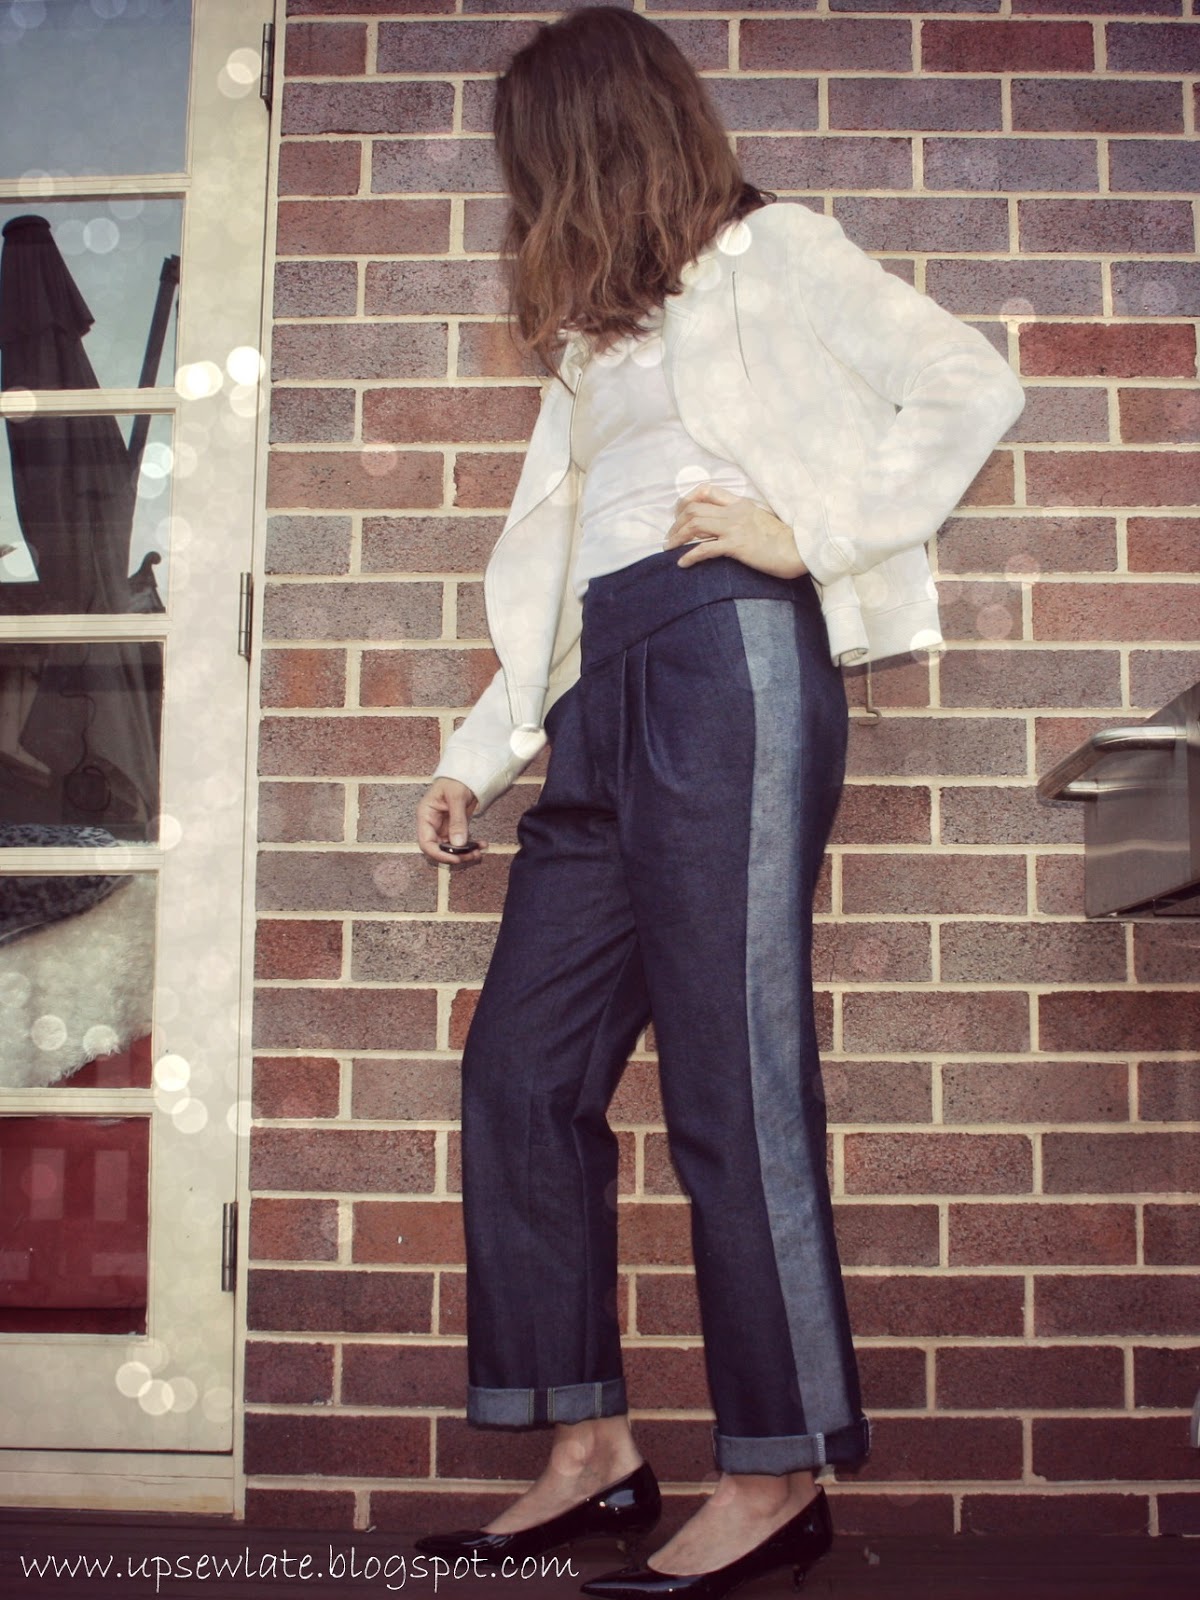
I'd cut the pants out of my good denim (bought from Minerva fabrics last year - and boy was the delivery from the UK speedy!), and there was no back up plan (arghhh, I need to learn a few tricks from risk management). So I measured the extra width to grade UP 2 sizes at the hips, and upper inner thighs. I had enough length of fabric for 2 continuous rectangular strips for my outer leg seams (this is just the reverse side of the denim), and I pieced some smaller pieces of fabric to make continuous narrow rectangular strips for the inner leg seams (same side of the denim so as to keep this extra detail less noticeable).
I like how the contrast strips on the side seams bring the pockets in from the side; they feel like they're perfectly placed for my hands in this position.


It's entirely my own fault - with that extra width, the pants have ended up too wide at the ankles. As I'm sure you know, legs are more of an upside down skittle shape than a rectangle, so if you're adding width to grade up a leg size, you shouldn't grade up by the same amount at the hip as you do at the ankle.
Overall the fit is pretty good for "out of the envelope" - the compensations I made took the pattern back from an XXS (!!) to about an S, which is the size that corresponds to my waist and hip measurements, and the excess lower leg width is largely (hehe) my own doing. There is some pulling from the back - the fit on my backside feels too snug compared to the loose comfort of those pleats in the front - but then again I wasn't able to add width at the crotch seam to grade up this part of the pattern. The leg length is OK for my height (about 5'8" with a short body), though I don't have enough length for a deep cuff.

Hopefully some time in the magic wardrobe will make me love them more?
Thanks for reading and see you soon!
- Gabrielle x
PS A few of my Instagram friends have been waiting a long time for this blog post - thank you for your patience guys!
- Gabrielle x
PS A few of my Instagram friends have been waiting a long time for this blog post - thank you for your patience guys!

They look fantastic in the photos. I think the wider leg would look super cool with a pair of brogues and a crisp white button up. It is such a shame about the lack of notification of sizing changes - I too rely on reviews of a pattern and especially when they are written by sewists who are about my size. I'm actually about to make these again in a medium weight viscose blend. Hope you make them again - they certainly suit you!
ReplyDeleteThey look fabulous, & I wouldn't have said the "design feature" was anything but! I don't have a problem with the turn-ups having the reversed contrast, it's quite fun. these pants have been on my list for a while, this might just be the push I needed to buy the pattern!
ReplyDeleteThanks Sofue, I feel quite silly saying I don't like them when I know they look fine in the photos - but they honestly feel like the fit is off :( and the width of the lower leg feels too, too much, like with a big wind I might take off! If only I'd used the correct size to start with... Wouldn't versions be useful - for ALL pattern companies!
ReplyDeleteThanks Rachel, the photos are deceptive! That's a great idea though, I didn't really know how to wear them; I'll try that before I put them away in the magic wardrobe. Yes, exactly - you do look out for people your size to confirm what size to sew, so if the sizes change all that homework becomes a bit of a waste of time!
ReplyDeleteI'll look forward to seeing yours - your original pair were one of my inspiration pairs even though I don't think you were completely enamored with them at the time. It really is a nice pattern, and should be lovely in something drapey. I will make another pair but probably not for a little while!
What a pity about the sizing, and will be interested to see if you like them better with Rachel's suggestion.
ReplyDeleteWhat a shame you don't love them because the photos do make them look good on. I remember my pair being just enormous so I'm sorry if I led you also on a bad steer. Completely agree with version control.
ReplyDeleteThey do look great in the photos and being the completely boring person that I am my first thought was 'wouldn't they look great in black too'. At least you know the style works for you and the correct size to use next time.
ReplyDeleteI think it's an ingenious solution. After so many years of flat front pants do you think it will take some getting used to the pleats and volume at the front? Maybe that's why you're not completely sold on them?
ReplyDeleteWow what a save! Gabrielle you really persisted. I'm so impressed! These pants look so good considering they needed "saving". I am obsessed with pleated pants but unfortunately on my pear shape there is seriously nothing less flattering. Ask me how I know. You however rock the pleated pant. Oh and you'll be proud of me. I visited Tessuti yesterday, spent about half an hour chatting with the very lovely Colette and came away with everything needed for my Libby skirt. I am prepped and ready to go. Yay me!
ReplyDeleteYour idea about version control is a good point. This would be great so you know you're either getting an up to date version or the version that had 'x' issue.
ReplyDeleteYou do have the height to wear this style easily ie, still look great. And you really do take great photos.
Total bummer about the pants. Hopefully the trip to that famed magic wardrobe will work because as everyone else has said your photography is magic and they look great. Now where do I buy that magic wardrobe .
ReplyDeleteOK I'm giving them another try today with a button up shirt and pullover and chunky flat shoes... Will see how they go, maybe this'll work!! Thank you for the idea!
ReplyDeleteThank you Anne, I'm really enjoying the stripe down the side but not the extra width I have given myself - how silly, especially when people already take the lower legs in on this pattern! It really is a lovely pattern, so if you like the style you should go for it!
ReplyDeleteI know - I'm still annoyed about it! I'm trying Rachel's suggestion out today - one last chance before they have time out in the magic wardrobe!
ReplyDeleteThanks Kirsty, I swear some weird love-fest was going on between the inanimate objects - I'm sure they don't look that good IRL! No, you didn't lead me wrong at all, absolutely everyone was definitely saying they were about 2 sizes too big! Hmm maybe I should email Papercut and suggest version control rather then just whinging on my blog...
ReplyDeleteThanks Robyn, that's not boring, everything looks good in black! Yes, next time around should work when I use the right size... These would be really good on you - in black ;) - though you might need to lengthen them a couple of inches?
ReplyDeleteThanks Kristy, a bit odd but it works I think :). You may be right - maybe a big part if it it IS the fact that they're so different to what I'm used to! I guess having the extra volume at the front but just the usually volume at the back must make pants feel different... I'm giving them another try today, but they are still feeling really weird!
ReplyDeleteThanks Jillian, that's because I really, really wanted my pair of pleated denim pants! (normally I'd just give up and chuck the half made thing in my huge wip box). But you do look great in the normal flat front pants you know!
ReplyDeleteI'm very glad to hear that - yay, go Jillian! Colette is lovely to talk to, isn't she :). I hope you can find time for your Libby skirt soon - what fabric have you got lined up?
Wouldn't it be useful! I'm not only thinking of indie patterns here, as a couple of times I've heard of sewists finding errors or omissions in Big 4 patterns, letting the company know, and the issue then being corrected in the next print. Which means when you're reading about the pattern in PR you have to factor in whether the sewist making the garment bought their pattern before or after the fix! Tricky...
ReplyDeleteThanks Maria :). My camera was definitely liking these pants, regardless of my misgivings - maybe it's trying to flatter me so I don't replace it ?
I know, it was really annoying! Hopefully next time around will be smooth sailing... Thank you, I don't know what was going on with the camera to make it take such flattering pics - I guess sometimes we get lucky with the light and the camera angle and whatever else coming together well? Ha, the magic wardrobe - mine doesn't have very strong powers, so it takes quite a while for it to work... But wouldn't a truly magic wardrobe be useful - I'd love if it do mending and alterations for me, for one thing!
ReplyDeleteI've become such a fan of PaperCut patterns. Love the details of your trousers.
ReplyDeleteI kind of like the width at the hem, like a cool old style Hollywood glamour actress type of pant.
ReplyDeleteThe style looks good on you, so if you did decide to make them again am sure they will become favourites.