Showing posts with label pleats. Show all posts

Saturday, 20 February 2016

Weekend Chambray (Vogue 8993)

So... after about a month of indecision, I've decided to Just. Wear. It.

"It" being this dress, of course, which I've had ironed and ready to go for all that time, and which looks much better than I expected - if a little old fashioned - in these photos my daughter took for me the other evening.


Here's the dress: Vogue 8993, view B, in full length mode:


View B is midi length - which is to say mid-way between knee and ankle. The pattern envelope gives the finished garment's back length from the base of the neck to the skirt hem for view B as 126 cm (49.5") in the size 14.  I'm about 5'8" tall and when I held the pattern tissue against myself the skirt looked to be the length I wanted, so I didn't adjust it at all.

View A is the same dress, lopped to just below knee length; a couple of inches longer than this:


which I suspect makes for a more attractive garment from behind!

Speaking of which, isn't this back view plain? Even twirling didn't help!  I feel like the back needs some of those front skirt pleats, though I guess that would mean using substantially more fabric...


Hmm, perhaps that plainness wouldn't be noticeable in a busy print... but as you can see, I used a very plain blue fabric, a stretch chambray fabric from The Fabric Store.

On the positive side, with a plain fabric you can see the seam lines clearly, and marvel at the alignment of princess seams and skirt pleats or darts. That is, I can marvel - that alignment took a bit of effort!


I'm very happy with the way the front bodice fits in the upper chest - I haven't added any darts but I did make some adjustments to the fit as I went.  The collar wasn't tricky to sew, though I had to adjust mine after fitting the upper bodice, but I found it tricky to sew the lined v-neck neatly.  My tendency is to be too cautious and not sew close enough to the point; I had to do this part of the dress in a couple of passes to get my stitches right up to the point.


However, I can see I've got wrinkles at the sides of the bodice and some extra fabric under the bust too.  It may be that the bodice is a bit long, but Vogue pattern bodices are usually the right length on me; more likely is that when sewing the lining to the outer at the waist seam I've accidentally made the lining a bit short.

And those armholes, described as "cut in" on the pattern envelope, are also "cut down" (not mentioned on the pattern envelope).  I'm sure it's the style, but I don't particularly like low cut underarms!


When I was fitting the bodice I noticed I had excess fabric in the upper back, probably relating to bad posture, so I pin fit darts from the neckline to take out the fullness. The bodice is fully lined in cotton voile, and on the lining I've used pleats instead of darts in the upper back as I wanted to give the non-stretch lining some ease given that the dress outer fabric is a stretch woven.


You can see in that photo above that I used long strips of interfacing on the seamline before sewing in my invisible zip - they help so much when your fabric has a bit of stretch!

The dress has pockets in the side seams, with the pocket bags sewn into the waist seam to anchor them and reduce stretching out where the side seam would otherwise take all the tension from pocket use,    


And there's heaps of room for striding about, given those deep front pleats and the "A" shape of the skirt:


I love these shoes! They're just from Nine West, not expensive. I bought them late last year thinking they'd go with something else I was making (not finished yet, but it's a similar length), and I really like them with this dress. I've barely worn them yet, which is why they look so unblemished!

Overall. this dress seems nicer on than I expected based on trying it on as I sewed it.  I love the neckline, and I really like the length and width of the skirt. I'm not ready to make the "yay or nay" call just yet though, because I'm not 100% sure, and when I'm not sure I often make the wrong call (like with this Inari dress that I said I liked, and which I now dislike intensely, and these mustard pants that I thought were a terrible fit, but which fit me much better than my RTW pants).


Pattern: Vogue 8993, view B

Size: size 12 bodice, size 14 skirt, both taken in

Fabric: Stretch chambray from The Fabric Store, and coordinating blue cotton voile to line the bodice.  Interfacing from Tessuti fabrics.

Modifications: None other than adding darts in the upper back for fit. Oh and using an invisible rather than a regular zip.

Future changes:  Next time around I would raise the armhole and make the bodice looser.  I might also raise the skirt to about knee length, and fabric yardage permitting I think I'd add a couple of deep pleats in the back. And I might add belt loops. as I think this style of dress would suit a narrow belt.


This next photo is just silly, I know! Taking photos while you joke around with someone is so much more fun than just using the remote :).


Thanks for reading, and see you soon!


- Gabrielle xx


Thursday, 10 July 2014

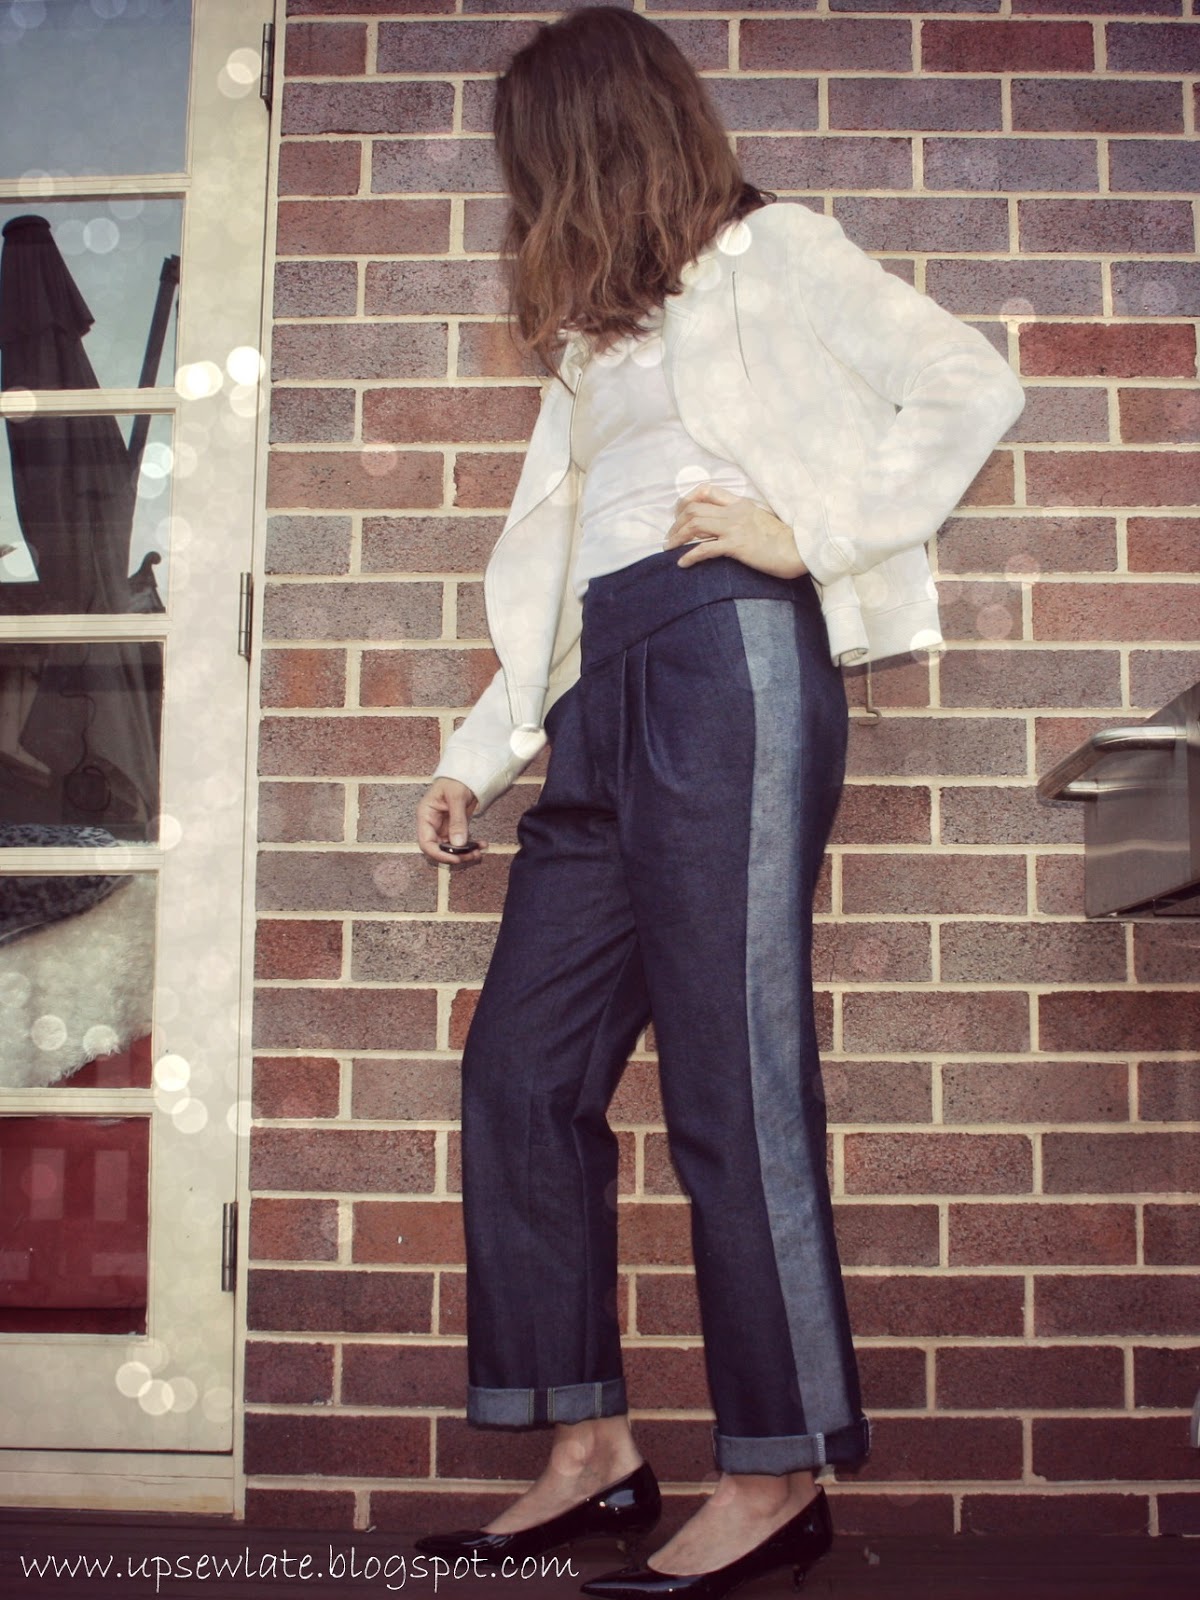
The Denim Detail: Papercut Patterns Pleated Pants


After a ridiculous amount of procrastination and many substitution projects, I started making these Papercut pleated pants a couple of months ago.  I'd been delighted to win the pattern last year in a giveaway held last year by the very lovely Juliette (yes, all giveaway holders are lovely, but she seems particularly lovely) of the Crazy Gypsy Chronicles; I was mad keen on pleated pants - still am - and desperate to get the pleated look as seen on the cool pattern envelope.


It's a gorgeous package: recycled paper, cool graphics and photography, and a clearly drawn and instructed pattern. The pattern is described as "A pleated pant with a slim fit leg, wide shaped waistband, fly front opening, back darts and side pockets" and that's exactly what I wanted - I wanted pants just like the ones on the pattern envelope!

There was a problem. You know how the sizing of these pants is really huge, and everyone has to take the pants in by 2 sizes to get down to the size they intended to make? Yes? Well apparently that problem got fixed! I had no idea. Unfortunately pattern companies don't do version control, so when you buy a pattern you can't tell if you're getting the pattern that everyone reviewed last year or an improved version...

[Hmm, why don't pattern companies use version control? Wouldn't it make sense? And wouldn't it be great for the pattern buyers of the future to be able to tell whether they're getting the limited edition first print run, or the original release, or the revised and improved version?]


Anyway, suffice to say having read all the reviews I could find, and having checked out all related photos, I very deliberately cut the pants out 2 sizes smaller than my measured size. They looked small, but many had gone before me, so I was utterly confident I was on the right path.
Until I couldn't even get them on!


And so a design feature was born of necessity. 

I'd cut the pants out of my good denim (bought from Minerva fabrics last year - and boy was the delivery from the UK speedy!), and there was no back up plan (arghhh, I need to learn a few tricks from risk management). So I measured the extra width to grade UP 2 sizes at the hips, and upper inner thighs. I had enough length of fabric for 2 continuous rectangular strips for my outer leg seams (this is just the reverse side of the denim), and I pieced some smaller pieces of fabric to make continuous narrow rectangular strips for the inner leg seams (same side of the denim so as to keep this extra detail less noticeable).
I like how the contrast strips on the side seams bring the pockets in from the side; they feel like they're perfectly placed for my hands in this position.


But can you see why the design feature is also a problem of its own?

It's entirely my own fault - with that extra width, the pants have ended up too wide at the ankles. As I'm sure you know, legs are more of an upside down skittle shape than a rectangle, so if you're adding width to grade up a leg size, you shouldn't grade up by the same amount at the hip as you do at the ankle.

Overall the fit is pretty good for "out of the envelope" - the compensations I made took the pattern back from an XXS (!!) to about an S, which is the size that corresponds to my waist and hip measurements, and the excess lower leg width is largely (hehe) my own doing.  There is some pulling from the back - the fit on my backside feels too snug compared to the loose comfort of those pleats in the front - but then again I wasn't able to add width at the crotch seam to grade up this part of the pattern. The leg length is OK for my height (about 5'8" with a short body), though I don't have enough length for a deep cuff.


Oh and I used too long a fly zipper and my zip comes up onto the waistband, so the (3) hooks and eyes that go over it make for a very secure waistband, but I find this interesting and unusual rather than problematic. I don't have a photo of this, but I'll try to take one and add it for your interest and amusement :).


So what I have now is some really cool pants that I just don't love. I know these photos make the pants look good, but the pants do NOT look that good when I wear them in real life. I do like the pattern, and I'm thinking of making the pants again, this time in the correct size and without any extra ankle width, but this pair have ended up just a bit too wacky... 

 Hopefully some time in the magic wardrobe will make me love them more?


Thanks for reading and see you soon!

- Gabrielle x

PS A few of my Instagram friends have been waiting a long time for this blog post - thank you for your patience guys!


Related Posts Plugin for WordPress, Blogger...