Now probably more for my sake than anyone else's, here's a pictorial round-up from this blog - I've tried to include everything made in 2011 that I also blogged in 2011 (including a couple of not-quite-finisheds), but I may well have missed something. The pictures click through to a larger versions in Picasa but don't link back to the original posts.
Dresses
 |  |  |
 |  |  |
 |  |  |
 | ||
Jackets / Suits / Coordinates
 |  |  |
 |  | |
 |  |
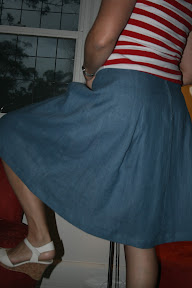
Skirts / Pants
 |  |  |
 |  |
Tops / T-shirts
 |  |  |
 |  |  |
 |  |  |
 |  |  |
 |
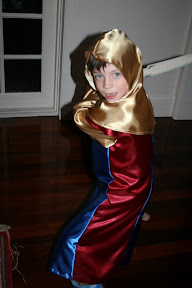
Kids Clothes / Costumes / Cushions
 |  |  |
 |  |  |
 |  |  |
 |  |
 |  |
It would be true to say I like a bit of colour!
---------------------------------------------------
Now for anyone interested in how I inserted the above tables of clickable images that doesn't already know how, it's all about the html code, and it's not hard. I hadn't ever had anything to do with html code before this evening, although I do the occasional bit of programming in other languages for work - but really, it seems easy to copy the structure of the html code.
Click the Edit HTML tab at the top of your draft post instead of the default COMPOSE tab, and you'll see your post as it looks in code.
The basic html structure you need to use for a 3 x 3 table is as follows - you type this when you're in the Edit HTML view:
<table>
<tr>
<td>Row 1 Col 1; </td>
<td>Row 1 Col 2; </td>
<tr>
<td>Row 1 Col 1; </td>
<td>Row 1 Col 2; </td>
<td>Row 1 Col 3 </td>
</tr>
<tr>
<td>Row 2 Col 1; </td>
<td>Row 2 Col 2; </td>
</tr>
<tr>
<td>Row 2 Col 1; </td>
<td>Row 2 Col 2; </td>
<td>Row 2 Col 3 </td>
</tr>
</table>
</table>
Try this in the Edit HTML view, and see what it gives when you click over to the Compose view - you should end up with this:
| Row 1 Col 1; | Row 1 Col 2; | Row 1 Col 3 |
| Row 2 Col 1; | Row 2 Col 2; | Row 2 Col 3 |
To insert clickable links instead of text, you need to type in html addresses for your photos. I'm not going to provide you with my photo addresses, but this example is the one I really learnt from...
My photos were in Picasa. For each photo I wanted to include I selected the photo, then clicked "link to this photo" in the RHS pane, then selected size (eg Small) and link properties, then copied the html code generated under "Embed image". For each photo you get a unique piece of code which looks like this:
<a href="https://picasaweb.google.com/lh/photo/XelQhjnbNmP-Nocx85XS2Z29sxFvL0bHS71vkIlVgXQ?feat=embedwebsite"><img src="https://blogger.googleusercontent.com/img/b/R29vZ2xl/AVvXsEifF4zThwLmPKNgiPwvymHJJwZH03BxypBzCjfzI1fV0xGwhG_vuBUI3JBa9XnP2WNI864qe4DoG-bnarsRxtvRJtf07ANocdJdIxbytKuqn6o5POAxrmSqf_lMkhtAgwLTHc5t7L9ykeo/s288/V1128_AnneKleinNY_top%252526pants.jpg" height="288" width="273" /></a>
To include the photos in the table, you just insert these crazy pieces of html code into the basic structure above. Done!

That's some fancy blogging:-)
ReplyDeleteYou sewed a load! Can't wait to see what you sew this year.
I needed these instructions when I was compiling my list. Love the photos. Definitely a productive year.
ReplyDeleteThat is such handy information - thanks!!! No longer will my photo's 'boringly' roam down the page into never-never land.
ReplyDeleteAs for you stunning wardrobe, well, you certainly accomplished a lot in 2011 - very talented and versatile indeed. Are your plans for 2012 under-way yet???
A beautiful recap of your sewing year! Thanks for the HTML lesson, and thanks for the nice comments about my jacket.
ReplyDelete