Showing posts with label Simplicity. Show all posts

Sunday, 7 February 2016

The Simple Things

You wouldn't know it because I've been a slack blogger, but this is my third S1366 top, and it was finished ages ago, before Christmas. The first was made from the pattern with no adjustments, and had to be given to my mum, who has wider shoulders than me.  Number two was a successful test of a narrower boatneck, but is made from such a boring fabric that I can't bring myself to wear it, let alone blog it.  Third time around, fabric AND fit came together happily.


As you can see, it's a simple shape - dropped shoulder, boat neck, loose elbow-length sleeves and a loose, dartless bodice, all of which mean a nice quick sew.  The pattern gives you a top which is longer than what I've made here, but this time around I wanted a cropped top that would sit outside of skirts and pants.   My hope is that this length will camouflage my short waist, which is located very close to the bottom of my rib cage. Whether or not that works, the shape seems to go with everything from jeans and shorts to pencil skirts and cigarette pants. 

In these photos I'm wearing RTW pants that I wear to work a lot - and guess what, they fit me worse than those Burda pants I was complaining about a couple of posts back!  I can't believe I've been confidently wearing these pants while decrying the mustard pants... ARGH!  Anyway, we're all still learning, right?


I sewed the top in a size 12, which is supposed to fit a 34" bust yet which has a finished bust measurement of 41.5".  That is such a lot of ease that I would suggest going down a size from your measurements. My bust size is currently about 37", halfway between the size 14 and the size 16, and the fit on the size 12 feels right on me.

The fabric is a cotton I bought from Tessuti Fabrics a while ago, a Ralph Lauren-esque classic in navy and cream stripes, though the stripes waver in a way that feels more interesting to me at the moment than a straight line stripe.


Because it's sheer, I also sewed up the camisole that comes with this pattern - but in these photos I'm wearing the top with an old RTW cami.  

I've finished the neckline with cream coloured cotton bias binding (a self fabric would have shown through), and I've french seamed the main seams and overlocked hem edges before turning them over and top stitching.   The stripes are matched up on the side seams (and the sleeve seams that you can't see) - with such a wide stripe there was no way I wouldn't!


OK, so the top is good, the pants not so much.  Onto the camisole.

I sewed the camisole up in a size 12, assuming it would be designed to fit under the matching top of the same size.

My fabric this time around was a mid-weight cream coloured satin that I picked up ages ago at one of my local second hand stores.


As with the top, the pattern for the cami was extremely simple - the front and back are identical, and the design relies on a bias cut to fit to whatever shape it needs to fit.  Even the rouleau straps proved easily done.


The pattern envelope says that the size 12 cami, for a person with a bust of 34", should have a finished bust measurement of 36.5" - and if you recall, the size 12 top has a finished bust measurement of 41.5".  In other words, the camisole is intended to provide a smaller fit than the top, and should have been snug (though it's bias cut, so not unpleasantly snug) on my 37" bust.


And yet it's too loose. I imagine fabric type plays a big part here; perhaps my fabric is too drapey, but I didn't expect the camisole to fit me like this.  Although by keeping my arms by my sides I can disguise the problem, there's excess fabric both at the sides of the camisole and in the front and back necklines and it just feels way too big.  I don't think taking it in at the side seams is a solution, as this will also pull the straps out - I need to make this another size smaller!


Since I have other camisoles that fit, it's not a huge problem - I can still wear my stripey top.  The one thing I hadn't thought about when I made the top was that IF it has to be worn with a camisole, unless the camisole is cotton it's going to be too hot for summer.  We've been having a humid summer, and I do a lot of walking on my way to and from work each day, so I don't like to wear extra layers that I can't easily remove and carry as I walk.  I might see whether a cotton voile camisole makes it more suited for summer, but if not, I'm sure this top will get lots of wear come autumn.


Thanks for reading!


See you soon
- Gabrielle x


Friday, 16 January 2015

Broderie Anglaise V-Neck

You'd be excused for assuming I don't learn from my mistakes...


In late November I blogged a boxy cropped hibiscus print top, and I think most of you agreed with me that it was a bit of a dog. The fabric itself was fine, the shape of the top was interesting, but the combination of fabric and shape wasn't that great, and it just looked "off" on me. Bearing all that in mind, yes, I've made another of those boxy tops!


The thing is, I made this top around the same time as the first, and the hibiscus print top was only ever intended as a muslin for this one, the one that had drawn itself into my brain as a "must sew". By the time I'd photographed and judged the hibiscus version, number two was nearly done - I loved the look of these quieter fabrics together, so I just finished it up and here it is!

Interestingly, this one seems to look a LOT better on. Or is that just my imagination? Is it just that I much, much prefer these fabrics? The shape is exactly the same - the only change I made to the shape was to lengthen it a couple of centimetres through the body.

I'll let you compare the two versions for yourself - same shoes, different skirt, and nearly the same camera angle...


Hmm. It's not just my imagination.  Those couple of centimetres did wonders for my waist! 

OK, a couple more of these dodgy photos from the back - sorry, but I find photographing white clothes quite a challenge - and then I'll tell you about the fabric and show you some close ups of the top laid flat:


Fabric
The broderie anglaise that's the main fabric for this top is a large leftover from a designer remnant that I originally used in the bodice of this dress (oh, I loved that dress!). The fabric came from The Fabric Store here in Sydney a couple of years back, but I think I've seen something similar there - albeit with a larger pattern - in the last few months.

Broderie anglaise having all those little holes in it, I thought I'd best underline the front bodice. For the underlining I used some cream coloured linen left over from this top (hmm, I didn't love this when I made it), and that linen is also used in the sleeve cuffs and in the neckline band. Leftover fabric scraps feel like they're free, don't they - the fabric costs have already been attributed to the projects that came before! - so I'm calling this 100% free fabric.


Here's a close up of the inside bodice, at a side seam so you can see the difference a layer of linen makes to the broderie anglaise. The extra layer of course makes the fabric more opaque, and a layer of linen is more pleasant than lining fabric when you're dealing with hot, sweaty summers....


Pattern
As you may recall, the pattern is the one pictured below, a classic 80s shape if ever I saw one (trust me, I've seen quite a few up close).  It's supposed to be loose fitting, and waist length - check, check! You don't have to make it in a white fabric unless you want the look of that pattern envelope girl, though to really get the look you also need to invest in large plastic accessories.... Maybe next time?

And this cheap pattern is of course another sunk cost. Making it a free top, right?

Simplicity 6742, a classic 1980s outfit pattern
I said it last time, but I really like the way this V-neck is constructed! I know my close-ups in the hibiscus print were headache inducing, but I think the way it's been put together will be easier to see in this fabric.

The first of these next two views shows you the v-neck from the outside of the top (ie fabric right side), and the second view shows you the v-neck finish on the inside:

V-neck from the outside
V-neck construction, on the inside

Fitting and Pattern Adjustments
No fitting required with these loose, that-looks-too-big style of patterns :).

As I mentioned above, there was one change I made to this pattern that made a noticeable difference - I just lengthened it a few centimetres to around hip length. The other less striking change I made was to cut the v-neck pieces on the grain rather than on the bias, and this vastly improves on the original; version two of this top sits nicely on my shoulders :). So I did learn from the hibiscuses! 


Likes / Dislikes
As before, I really like this V-neck :). I love the shape of the top, and I think I'll be wearing it with this knee length skirt as well as with the slightly longer pink skirt blogged here. I suspect what makes it work so much better is that this top covers my waist - when a top cuts off at your waist, I guess that's where people's eyes are drawn!

There's still one annoying flaw with this top: those linen sleeve bands are creasing up like crazy! I did consider interfacing them as I was sewing this top up, and decided that interfacing would have made them too heavy. That may have been the wrong call :0.

Don't worry, it doesn't have to be perfect! 
OK, I think that's enough rambling about this one - there's one more 2014 top I want to blog soon, and after that we can talk about colourful 2015 dresses!


See you soon

- Gabrielle xx

Tuesday, 25 November 2014

Boxy Hibiscus Top: Simplicity 6742

Sometimes my sewing ideas charge ahead without regard for the facts, the constraints - the stuff I should know by now! Does that happen to you too - or are you a fast learner?

This time around, my idea was to pair a summery boxy top with a flared skirt - essentially a square capping a triangle - theoretically, the idea seemed a cracker! But unfortunately the whole idea is predicated on the existence of a narrow waist, somewhere around the apex of that theoretical triangle, and I ain't got one of those no more.  So this combination doesn't look nearly as good as I'd hoped - I know the photos prove it.

A boxy top with a flared midi skirt
You've already seen the skirt (posted here, and thank you for your lovely comments, I haven't finished replying to you but I will!), so I'll tell you now about the top I whipped up to go with it.

I still thought it was a good sewing idea!
Pattern


I used a second hand sewing pattern - you can see it pictured below. I know it looks terribly '80s (and it's dated 1985), and I know many people hate '80s fashion, but if can you look past the flickback hairstyles and dated jewellery, there are gems out there in 80s fashion land!

This old sewing pattern is all about boxy 80s shapes, but I think they look fashionable again - the top looks quite modern, and I think the skirt could also be very appealing in an eyelet fabric (hmm yes, I *do* have one planned already, thank you for asking!). Actually the pants would probably look good too in a black crepe if you narrowed the leg width...

Simplicity 6742, a classic 1980s outfit pattern
The top is described succinctly as a "loose fitting waist length top". That's pretty accurate but doesn't tell you enough.

To me the top feels cropped - it is waist length, but because it's such a loose top there is a high potential for waist exposure. So it's not cropped but it might flash your midriff like a cropped top does. The pattern also has no bust darts, which helps keep it super boxy, but I think you'd need to add them if you were bigger than a B-cup and wanted the top to fall properly.

The sleeves look cut-on but are made from a separate pattern piece, and the neckline is not just a simple V-neck - it has two inset pieces that form the V and that attach to the V shape of the top as well as to the facings for the back neckline. Unfortunately these details don't come across on the pattern envelope. I've taken a couple of close-up photos of the front neckline, but I know it's hard to see details in this busy print - squinting at the hibisci (or is that hibiscuses?) reminds me of eye tests!

close up of the V-neck from the outside
close up of the V-neck, inside out

Fabric

The fabric is a lightweight cotton; I bought about 3 metres of it at Lincraft last year when I was planning to make a summery shirt dress for the "Fall for Cotton" challenge. My plans changed when I realised I didn't love the fabric enough to spend a serious amount of time on it (you know, buttons and top stitching) - FYI I ended up maing this cotton dress from a vintage Vogue pattern instead.

Anyway, back on topic! I guess this is a quilting cotton? The fabric is a bit stiff, but seems to soften up with heavy-handed ironing. I still don't know how much I like the fabric - enough for a top, obviously, but if I say I'm tempted to make what's left into a skirt please stop me!

Back view, boxy summer top

Fitting and Pattern Adjustments

Fitting? Say what? This top really is very loose, so I didn't need to do any fitting!

I sewed the pattern exactly as the instructions told me, and now I WISH I'd made it slightly longer, the better to hide my midriff.

There's that lesson about measuring stuff again, isn't it - you'd think I'd have learnt it making the skirt, wouldn't you!

Is it a crop top?
There is one other thing I should have adjusted and which I did adjust when I made this top again last week.  The pattern tells you to cut out the inserts for the V-neck on the bias, then interface them before attaching them to the neckline. The fabric wanted to stretch out on the bias, naturally, and a bit of interfacing was not enough to stop it.  Is there any reason why the neckline pattern piece would need to be bias cut? All I can come up with is that it might look good to have your fabric print or weave angled against the straight grain bodice. Again, it may be hard to see this in the photos, but my bias-cut neckline does not want to lay flat, and to my eyes looks slightly warped. 

Second time around with this pattern I cut these neckline inset pieces on the straight grain and they behaved so much better! That second top is not yet photographed - stay tuned.


Likes / Dislikes

That V-neck was fiddly to construct, but I really like it, and the neckline construction steps in the instructions were clear and even clever. So that's a couple of definite likes! I also really like the general shape of the top and in particular the wide airy sleeves.  I reckon this boxy shape would look amazing in a thick fabric (scuba fabric, anyone?) though it would be quite challenging to make a neat version of this neckline with a thick fabric.

The length of the top, however, is something I don't like - well not on me. I do think it would look amazing on someone with a tiny waist, maybe paired with a pencil skirt, but on me it just accentuates a short waist and a generally thick area :(. And I am not about to cut down on chocolate.

Side view, this is how the top wants to fall

OK then, so that's a wrap! I'll be back soon with more summer sewing - still nothing too challenging I'm afraid - I'm having too much fun with squares and triangles! 


See you soon

- Gabrielle xx

Monday, 31 December 2012

Vintage Outfit for the New Year

Back so soon!  And I've actually done what I said I would (congratulates self on improving time management skills) and completed a little outfit for my daughter. It took longer than expected (nothing new there) but I think it's pretty cute!


It's a button back dress with matching reversible kimono sleeve box jacket.

The buttonholes on the dress back are horizontal at neck and waist but vertical in between, reflecting the different amounts of stress I expect at these places.  I've used pale pink vintage hemispherical buttons which proved hard to photograph...


The dress and one side of the bolero are made from a light cotton voile which I figured would work well in our hot summer weather, and the coordinating fabric for the jacket is a midweight linen.


I pretty much used the pattern (Simplicity 4968 from the late 50s or early 60s) as is, with only a couple of small changes. After sewing the bodice up I got Miss UpSewLate to try it on and she advised me that it was too short. In her view, her waistline is below her belly (let's hope she grows out of this opinion and never gets too keen on beers), and she gets annoyed with all the dresses that put a waistline at her ... uh... waist. It was a bit short but not as short as she thought so I added a waistband - just a band of double layer, interfaced fabric to extend the bodice. In the end this was acceptable. She also didn't want the cute patch pockets shown on the pattern picture and in fact wanted NO pockets, because pockets always seem to get sand in them. And this is of course true for all those who like playing in a sandpit...


I think the result is really nice. Not my style, but very sweet for a young girl and quite dressy with the little summery jacket. I prefer the jacket linen side out, but Miss UpSewLate's preference is flowers on the outside - more, more, and more flowers, mum!, as you can see from her photos with flowers. Perhaps the floristry trade is calling?


Now if you've been reading this blog a while you'll know I haven't sewn much since around late October last year, and I've hardly blogged since then. It felt like there were too many "fails" amongst my last few projects, so I was hoping this project would help me regain my sewing skills so I could take on another adult project with a bit of hope for a decent result. Although I'm sure this pattern could not be regarded as complex, it did let me practice a few sewing skills that I have definitely not yet mastered - namely using the serger (I need to work out the correct way to serge corners; maybe I need to watch the boring educational DVD!) and hand sewing (for some of the edges of the reversible bolero and for the inside facings at the shoulder seams). For these personal challenge areas I took it very slowly; the results are not perfect but are decent enough for me. For a Simplicity pattern, the instructions weren't as detailed as I would have expected (eg no mention of interfacing - surely it was used in the 50s / 60s?), but the illustrations in the instructions were very clear. And I do like pre-cut pattern piece patterns; I traced around them to cut the fabric on my new (Christmas!) cutting mat and the cutting activity was a pleasure :-).


So, what do you think?  Can I move on up to selfish sewing now?

PS Because I managed to make this within December and it's for a child, it's eligible for the current "Sewing for Children" competition on Pattern Review. So I'm entering :-). The entry gallery is here, and there are some fabulous entries but if you particularly liked my outfit I wouldn't mind at all if you voted for it. Really!


Sewing For Children

Saturday, 16 June 2012

Sewing for the Kids

There was a long blurrr of sewing in this house last weekend, then another shorter mid-week late night blur. And there are some wearable winter clothes for the kids to show for it:

Birthday dress - 


This dress still needs hemming but it was getting late when I was finishing it off, and I wasn't feeling confident of my little girl's height. It's mostly around a size 6, but a mix of patterns and tweaks. I will explain, promise - but the mixing makes me wonder... at what point of mixing and tweaking patterns does a sewn garment stop being of those patterns and become something else?  I definitely see this dress as the sum of two patterns, and I'm not planning to start omitting pattern accreditations - which seems rude and sort of dishonest to me - but I think it's a theoretically interesting question... I guess I could be swayed by a strong argument.


I used Burda pattern 9979 (OOP I think), a top and pants pattern, for the top part of this dress. I extended sleeves from elbow to wrist length and swapped the turned over sleeve hem for separate little bands (LOVE sleeve bands - so classy!); sleeve shape was tweaked for more of a straight & narrow style. The bodice was lengthened, as the pattern is for a cropped top, but generally I was aiming for a size 6 length and a size 5 width. I also added a neck band - not sure if this was already in the pattern as by this point I wasn't paying it much attention. I used Simplicity 7211 (well and truly OOP) for the skirt part of this dress, graded out to about a size 4 in width and what I hoped was about a size 5 in length from my pattern's size 3. The skirt waist width was only a little bigger than the bodice waist so they just got eased together.


Final touch - a rosebud hand sewn onto centre front neckline. Of course this is the best part of the dress :-) (that's the recipient's perspective).
 
The birthday girl has been sick all week - not even able to contemplate birthday cake - and got herself thinner than usual, but I expect when she's back to normal she'll fill her dress out a bit better.

Leggings - 

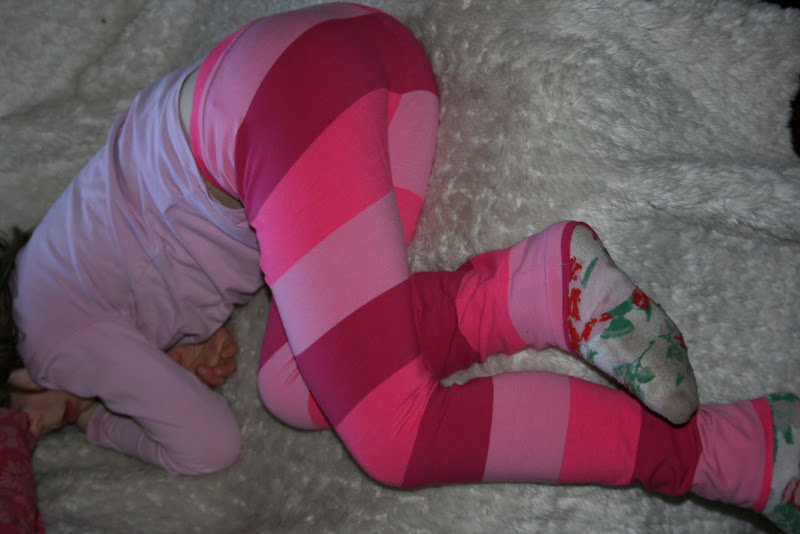
Leggings - such easy peasy sewing and they always get worn to death, starting at the knees - what did girls wear before these become so popular? I have a friend who will not allow her daughters to wear them. She thinks they look....ahh...I guess rude? They are definitely not banned in this house, but if they're too thin and clingy they get a skirt or dress on top. Problem solved.


No pattern required, just traced around a slightly too long pair onto butcher's paper, then had the joy of tipping stretch fabric scraps all over the living room to be selected from.  The stripey pair have joins at about knee length, and the stripe mismatch is intentional.


Interestingly for the same "pattern", cut out at the same time, the purple leggings look loose and the striped ones look tight. Obviously I forgot to think about stretch fabric type, stretch recovery and that sort of thing, but it's not affecting their popularity.  I should be making more of having a mini sewing fan in the family! :-)

Long sleeve T -


For most of the year my son seems to need few casual clothes - he seems to live in his school uniform, various sport clothes and PJs. Every now and then of course a lack of something or other becomes apparent. This winter his jumpers / warm long sleeve Ts looked to be lacking in length. He cautiously joined his sister in picking through the fabric scraps, and came up with some tentative choices including the blue merino I used for my own long sleeve T.

This top is made from Burda pattern 9614, style A, in a size 8, pretty much as is + with sleeve and neck bands. The fabric is left over from my own long sleeve T from the same fabric and there wasn't quite enough, so there's a join half way down one sleeve. 


Reluctant to try it on - "no, I'm sure it fits mummy" - then reluctant to take it off :-). 

I've now been asked if I can make a top with geometrical patterns on it; I've got some ideas (who amongst us doesn't???? Ideas isn't the problem!) and if I get to it I'll share it - of course.

See you!


Related Posts Plugin for WordPress, Blogger...