Showing posts with label wadder. Show all posts

Monday, 4 March 2013

My Yellow Dress is Just All Wrong

This week I finished a dress. Frankly, it's a disappointment!


This is a fake smile.


I made so many mistakes that I nearly made this post a "how not to" tutorial... but then I figured no, everyone makes mistakes.  But I made so many mistakes... OK, I accept I have puckering in my curved hem, but why do I even have puckering on the straight side seams - how did I do that????


Yes, that look expresses how I really feel about it. That's not a fake smile.

 There are a few details I'm happy with - like the nicely coordinated vintage metal invisible zip:


and the alignment of the side seams at the waist:


The top stitching isn't messy either.

But the mistakes!!!!!

Like fabric choice... oops. The stuff I bought is lovely but too heavy for a summery dress.


And considering the directional print, I didn't really buy enough for a dress!  Which leads to cutting out... oops again. What's grainline mean again?


I also mixed together two patterns without confirming their fit (my size has changed lately) or whether they would fit together. Double oops! Come ON, d'oh!

this skirt

this top, sleeves OFF, zip shifted to the side, peplum OFF
Vintage Vogue 8811 (a 1950s reissue, in vintage sizing) for the skirt + Vogue 8815 for the bodice (a current pattern, in modern-but-running-smaller-than-Vogue-designer-pattern sizing) - funnily enough they don't line up at the waist seam. So (oooooops) I added width to the bodice with narrow strips of fabric (have you ever heard of such a stupid idea?). And then the bodice was too big so I extended the front waist darts into princess seams to the shoulder - but it still doesn't fit nicely (can you believe it? after two clever ideas like that?).

***

So in the end it's a dress, but it's a let down. A dress that nearly became a skirt, then went back to being a dress - and that may yet become cushions.

Next up I'm working on a Sandra Betzina pencil skirt and one of the new Vogue pattern dresses. It's early days but I haven't done anything crazy with them yet :-).

Tuesday, 22 January 2013

Denim + Stripes

Sorry, that's not a compelling post title is it... but all I have to show tonight are basics, a basic denim skirt and a basic stripey t-shirt.

Very nice fabrics, but both garments are kind of loose and boring. And practical. Comfortable...

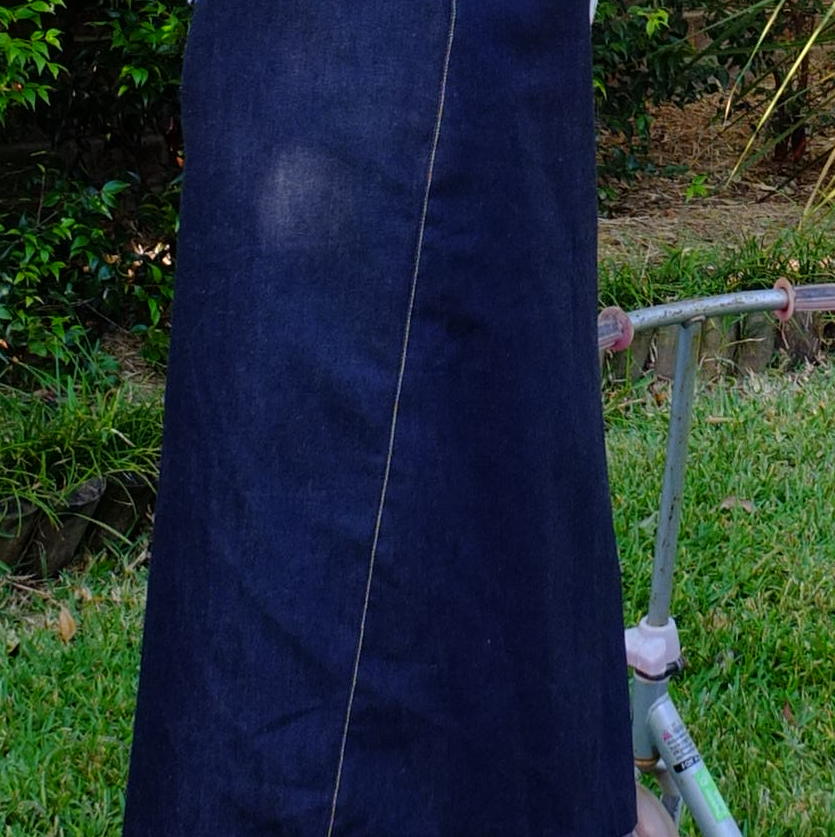
Straight skirt in a dark denim, from a modified Vogue 1093 by Donna Karan:

That yellow top stitching is THE skirt detail.
Loose fitting t-shirt in stripey double knit, from Vogue 1387 by John Anthony (very much OOP):

The neckband is the t-shirt's best feature.
Put them together and what do you get?

Something boring!  Even the shoes are boring, but that's because I broke a toe.


The most interesting question is whether or not there was superglue on my hand...  answer 1 below.


Answer 1: no, 10 points; yes, 0 points.


I do realise this skirt makes me look like I'm ensconced in a denim-covered refrigerator, but it is very comfortable and cool (wait, that's nothing to do with refrigeration) and it did look nice on the pattern envelope (how did they get the skirt to taper inwards? There's a vent in the back of the skirt that stops only centimetres away from the zipper! Answer 2 below.)

This skirt was a UFO from last year which I put aside when I grew outwards and didn't have enough seam allowance to cater for myself. Lately I seem to have shrunk back a bit past where I was back then, so now I have a sack skirt to wear. I suppose if I keep it for a while at some point it'll fit just right... but for now it's so comfortable it was worn all day Sunday and all evening today.

I made a few changes but am not sure why my skirt doesn't look right - I removed the waistband, replaced by a waist stay on the inside and hook and eye at the top of the zip, used a heavy duty metal zip instead of invisible zip, left off the side pockets to get rid of extra hip width, OH and used regular denim instead of stretch canvas or stretch denim. Now I understand!  This skirt would be a lot better with a bit of stretch.

Answer 2: stretch, 10 points; clothes pegs, 0 points.


OK, moving on then. T-shirt time.

Although no one is holding me to account I was going to try not to make t-shirts this year... oops.  Doesn't matter, right? I'm happy with this one. Quite voluminous (again), but this time it's supposed to be - it's an 80s pattern! Anyway voluminous is comfortable and works when you're too tired to check what size you are this week (as for something more fitted).

Stripe matching up the sides.

The very nice fabric from The Fabric Store, plus neckband.

Gratuitious blue sky and palm tree shot...

On this pattern I sewed a straight size 14 but enlarged the neckline and used a straight line of fabric rather than a bias strip for the edge - I didn't want lots of angled lines encircling my neck.


So - next up hopefully some frosting. I have some beautiful fabric that I am absolutely itching to sew into dresses...

See you!
Gabrielle x

Sunday, 18 November 2012

Lovely Award + Unwearable Swimmers

A few weeks ago the very lovely Karin gave me the Premio Primavera award for commenting on her blog. I'm sure you know already know Karin - she sews and knits lovely things for herself and her family, and she's such an active and supportive commenter that the award seems made for her!


I feel like a bit of a dud for taking this award as I'm really conscious of having been absent from blogging and commenting for a few weeks now, and I know the next few weeks will be similar. There has been an awful lot of life interrupting my sewing plans lately :-). Mostly the better sort of life interruptions like travel, parties and birthdays - though if you know me IRL you'll realise I'm trying to forget the weekends of minding up to 6 young kids on top of my own 2... and the scary evening where I lost 3 while looking after another 3!

I'm not sure of the exact rules or provenance of this award (I did look but couldn't find them), but basically it's a heartfelt thank you to the lovely people who support blogs with their comments. So it's with great pleasure that I pass this award on to the last commenters (yes, I know it's more than 9, but I really want to thank them all) on this blog:

Audrey of SewTawdry
kbenco of kbenco's projects

DeniseAngela of Sew Coco

Selective Fine Fabrics

MAD14kt
Fabric Epiphanies

HoffiCoffi
Karin (herself!) of Sew Here We Go Again!

Catherine Daze of cyberdaze

Robyn of Sew Love Red

Carolyn of Handmade by Carolyn
Kat of All the whimsical things
thecuriouskiwi

Thank you all, I appreciate your comments and support so much!


And for the unwearable swimmers of the post title let me show you my most recent fail (screams in frustration). I was in love with the idea of this one - lovely wide aqua and while stripes on a simple swimming costume.  I read up on loads of swimming construction reviews and posts, took careful measurements, etc etc etc. Sometimes winging it works better (it sure doesn't take as long).

Front view (in progress)
Back view (in progress)
It kind of looked OK in the flat... but it was too short. Well, let me correct that - it's not that it was too short, it's that the length was in the wrong places. There was too much length in the straps and not enough in the waist-bust section - ie too, too low cut (think that Baywatch look). I shortened the straps by 3 (!!) cm but then the body was really stretched. Maybe that sounds wearable in desperate circumstances, if I hadn't then also stuffed up the leg elastic. Oops. And with the swimmers stretching out lengthwise combined with narrow seam allowances, there wasn't any extra fabric around the legs for a fix. No picture of that, sorry.

Bust darts (did I need those???) are way too low on me


The pattern I used was KwikSew 3064, which I modified in a few ways. I changed the main view from a two-piece to a one-piece sans belt, and I fully lined it with extra lining at the bust - with all the effort I was going to I thought a thorough lining would make it last longer (ha!).


View of full lining PLUS bust lining, no cups as yet
Although I do think this a good basic pattern with quite a bit of detail in the instructions, I think it needs a few more changes next time around:
  • I'll remove the bust darts (it's lycra innit!).
  • I'll measure my body length in sections and add the length in the areas where it's needed rather than in the standard "lengthen here" place.
  • I'll do lots of practise in sewing in elastic first.
  • I'll try to work out the KwikSew formula of elastic length vs opening length for those areas where I need to use multiple sizes or where I've adjusted the shape of the opening. If I crack it I'll share.
  • I'll narrow the crotch to match my RTW swimmers (that's def. a measurement to check in private...).
  • I'll watch out for sneaky stripe tricks. Although this rear view looks OK in the flat it looks highly attention seeking when worn - NOT good!

That's a wide crotch!

Inappropriate

The good news is that I have heaps more of this fabric, so I'll be able to have another crack at it. Not for a few weeks though as there's a busy few weeks coming up...

Saturday, 25 February 2012

V1368 (OOP) - Ugly Bias Linen Dress

Me:  I've made another Donna Karan pattern dress... it's comfortable and loose...  

but not what you'd call stylish. 

   
You: Hmmm. It certainly doesn't look stylish like that. 
Can't you stand still for a second? 

Oh and just so you know - 
when you're daughter's in the picture I can't concentrate on the clothes!

Just saying... it's up to you, I know...


Me: OK, here's a boring standing still picture. 

And the back view.


Me: Satisfied? 

You: My God, what dreadful photos!!! 

Maybe those strange yellowy moving ones were better after all. 

Tell me though - that's not really a Donna Karan pattern, is it? 


Me: Yeah, it's this one - Vogue 1368. 

It's OOP so unless you have it in your stash it's pretty low risk...


You: Looks absolutely nothing like yours! 

Did you stuff it up or something?


Me: No! I didn't stuff it up, I swear! 

I did make a couple of changes but they were just to fix it!   

I even used a recommended fabric!

Look, this is what is was like when I made it "as instructed":


You: Geez - that IS ugly. 

So what did you do to "fix" it?


Me: I just added some darts and a big bow :-)

A bit better, n'est-ce pas?


You: Barely. 

It's still pretty dowdy.

Will you actually wear it?


Me: I don't think so... 

Boo hoo hoo (runs off to cry)


You (shouting): Hey - I just noticed something funny
- those red marks
- they look just like BLOOD! 

Weird huh?

But at least you didn't make shorts! 


Me: BOO HOO HOOOOOOOOOOOOOOOOO!


*******************************************************************

The Lowdown

Pattern Rating: Easy

Cost: $24
  • 2 metres x $12/metre linen from Material World
  • $0 stash zip (totally superfluous of course as the whole dress is bias cut)
  • $0 thread - using up some half spools
  • $0 binding - made by hand (no special tools, just bias cut strips sewn together and ironed in half)

Time: 4 hours = way too long given the finished object
  • approx 45 minutes cutting out due to lots of mucking about with placement on the fabric 
I recently had a cutting out question in the comments, and thought this example would illustrate nicely how I go about things

If I had cut this out on the true bias the dots would have been angled from the horizontal as well as from the vertical, so I cut it a little off the bias.  I started out with the front pattern piece and made a mental note of where the now horizontal dots sat with respect to the waistline marked on the front piece so I could be consistent with the back pieces. I placed the back piece for the right hand side first, but before I cut it I used my tape measure and ruler to make sure I was leaving enough room for the left hand back piece with the dots at the right level. Once I'd cut this piece out I flipped it over on the fabric to match up the dots before pinning and cutting the left hand back piece.

placing right back on fabric - using ruler
use right back piece to match up left back piece


  • 1/2 hour initial sewing and 3-step zig zagging of edges
  • 1/2 hour making bias binding
  • 1 1/2 hours sewing, checking fit and fixing
  • 45 minutes ironing, inserting zip and doing last of the 3 step zig zags in lieu of a hem

Adjustments:
  • Raised the front neckline just a little (an error! must have been confusing Vogue with Burda)


  • Cut all dress pieces slightly off the angle so as to get the dots in a straight horizontal across my waist
  • Lengthened about 3 inches
  • Added darts
  • Added a distraction bow

Pattern Review: Avoid this one. It makes a sack - and who needs another of those?

Related Posts Plugin for WordPress, Blogger...