No matter; I spent the day sewing, and finally managed to finish off a pair of pants started ages ago and very nearly finished in December.
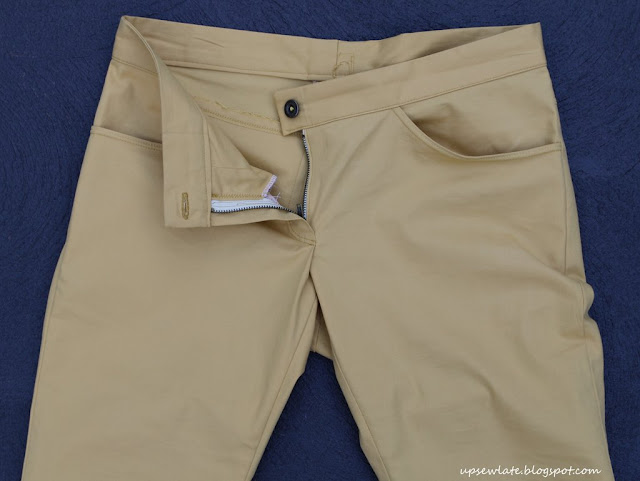
This is how they were looking in December - so, so, SO close to done! All that remained to do was the buttonhole and button:
The pants are now finished, and I'm pleased they're done, but putting them on again reminded me why I hadn't finished them earlier - I don't like them. The colour is not doing me any favours, and the fit on my backside is not good at all.
The fit seems to have got worse since December - it could be that I've changed weight (probably) but it could also be that ironing the pants stretched out the fabric in the backside.
Let me show you how they were looking yesterday afternoon:
In these front / side views you can see the front crotch curve is too long; that's why I get a fold of fabric on my upper thigh when I move:
There's also a lot of wrinkling on the side seams. The wrinkling alongside my knees is fine, but the wrinkling at top of my thighs unfortunately relates to the problem at the back of the pants:
There's a lot of extra fabric there - my backside is flatter than the pattern :(.
I know what to do to fix these issues; I had to work on exactly the same problems when I did a pants fitting class using a Vogue pattern. I wish I'd compared the Burda pattern pieces to the Vogue ones I'd adjusted to fit, but I was too lazy! Next time...
Although I'm not very happy with the fit of these pants on me, I think this is a terrific pattern, and I've seen it look great on many others. I really like the proportions of the waistband and yoke (I hate a long yoke!), and the order of construction is very sensible, allowing you to take the pants in to fit at the CB seam rather than just the side seams.
Speaking of taking in, I should mention the adjustments I made to view A of this pattern. I started with a size 40 (EUR)/ 14 (US), corresponding to my measurements, and then I:
- lengthened the legs (I don't recall how much, but it would have been at least 5 cm for my 174 cm height);
- omitted the knee patches;
- omitted the zips on the lower leg side seams;
- omitted the zips just below the front pockets;
- omitted the belt carriers because I wasn't liking the pants enough to bother - though if I'd ended up liking these, a belt would have been useful, as the pants sit at the low waist;
- took in the pants at the side seams by 1 cm for the full length of the pants, suggesting I should have gone down a size;
- took in the pants at CB by another 1 cm, tapering to nothing at the junction with the CF seam; and
- removed 3.5 cm in the height of the pockets after pinning the originals in place, ready to top stitch. On fitted pants, my preference is for the back pockets to finish ON the backside, and not encroach into thigh territory. For someone with more curve in their backside than me the original pockets should have been fine.
There's one other part of the pattern I'd change if I made these again, and that's the front pockets. The pocket bags are deep and their outlines show through the front legs in my stretch cotton, so next time around I'd make the pocket bags from a much lighter fabric and perhaps also make the pants themselves from a heavier fabric. I'd also change the shape of the pocket opening, as I find it quite low and very wide - I prefer a smaller opening to that pocket.
I'll leave you now with some "in the flat" photos so you can see the details properly, including my dodgy repair to the inside of the waistband at CB where I'd accidentally snipped away fabric, and the place where I left the seam finishing too late:
Happy sewing!
- Gabrielle x


No comments:
Post a Comment