Showing posts with label fitting. Show all posts

Sunday, 10 December 2017

Vogue 8945 with Lace Sleeves


Back when the weather was still cold, I stumbled upon a remnant of purple lace at Tessuti fabrics. Below I've got a close up of the fabric drying on the line alongside the coordinating stretch viscose I paired it with, and you can see the pretty patterns in the lace, but what you can't see is the straight edged selvedges on the lace.


The lace remnant was too small for a dress, large enough for a small top perhaps, but the perfect amount for a pair of bell sleeves with the selvedges in place of sleeve hems, woohoo! Aren't those selvedges cool!! 


Vogue 8945 is a semi-fitted dress with two views: view A (this one) with bell sleeves, and view B with layered sleeve flounces.  I made view B of this dress for Melbourne frocktails a few years ago (see dress post here, and post for the related cape here), and I'd been keen to give view A with its simpler bell sleeves a go ever since.  V8945 is a good pattern for a statement sleeve - the dress itself is very plain, so the sleeves really get to star.

Speaking of sleeves that star, I entered these very sleeves in Helen and Diane's sleevefest2017  competition back in August (before I'd tried the dress on though!) and won a prize courtesy of Ryliss Bod - I won a copy of The Minott Method Total Pattern Fit. Have you heard of it? I hadn't, but it's basically a very comprehensive fitting manual.  I've skimmed through the book (so time poor these days!) and it also has fitting tips in the form of handy wrinkle diagrams telling you what the various wrinkles mean - I will definitely be using those diagrams. 


Hmm. And unfortunately, although this dress is one I adored on the hanger, on taking these photos I discovered it was a sausage casing dress. Isn't photography a killjoy! And it turns out the prize is very apt for a dress that fits this badly :(. 

I've deleted most of the sausage photos, but I'm willing to share one piece of proof with you:


This pattern is recommended to be sewn in a faille, crepe, challis or linen - so a woven fabric with some drape I guess? but both times I've made it I've used something quite different, and to do the pattern justice the dress really needs a drapey fabric OR a looser fit.

First time around I used a bonded polyester for the sheath dress and a combination of merino wool, more of the bonded polyester and silk organza for the sleeves - that version was a much more successful incarnation of the pattern, most likely because this dress size was a looser fit on me back then:


The two dresses are the same size (12 top half, 14 bottom half), but those couple of years apparently resulted in a couple of extra kilos, so even though I'm crazy about the sleeves, this dress hasn't had a single wear since being made (hangs head in shame).

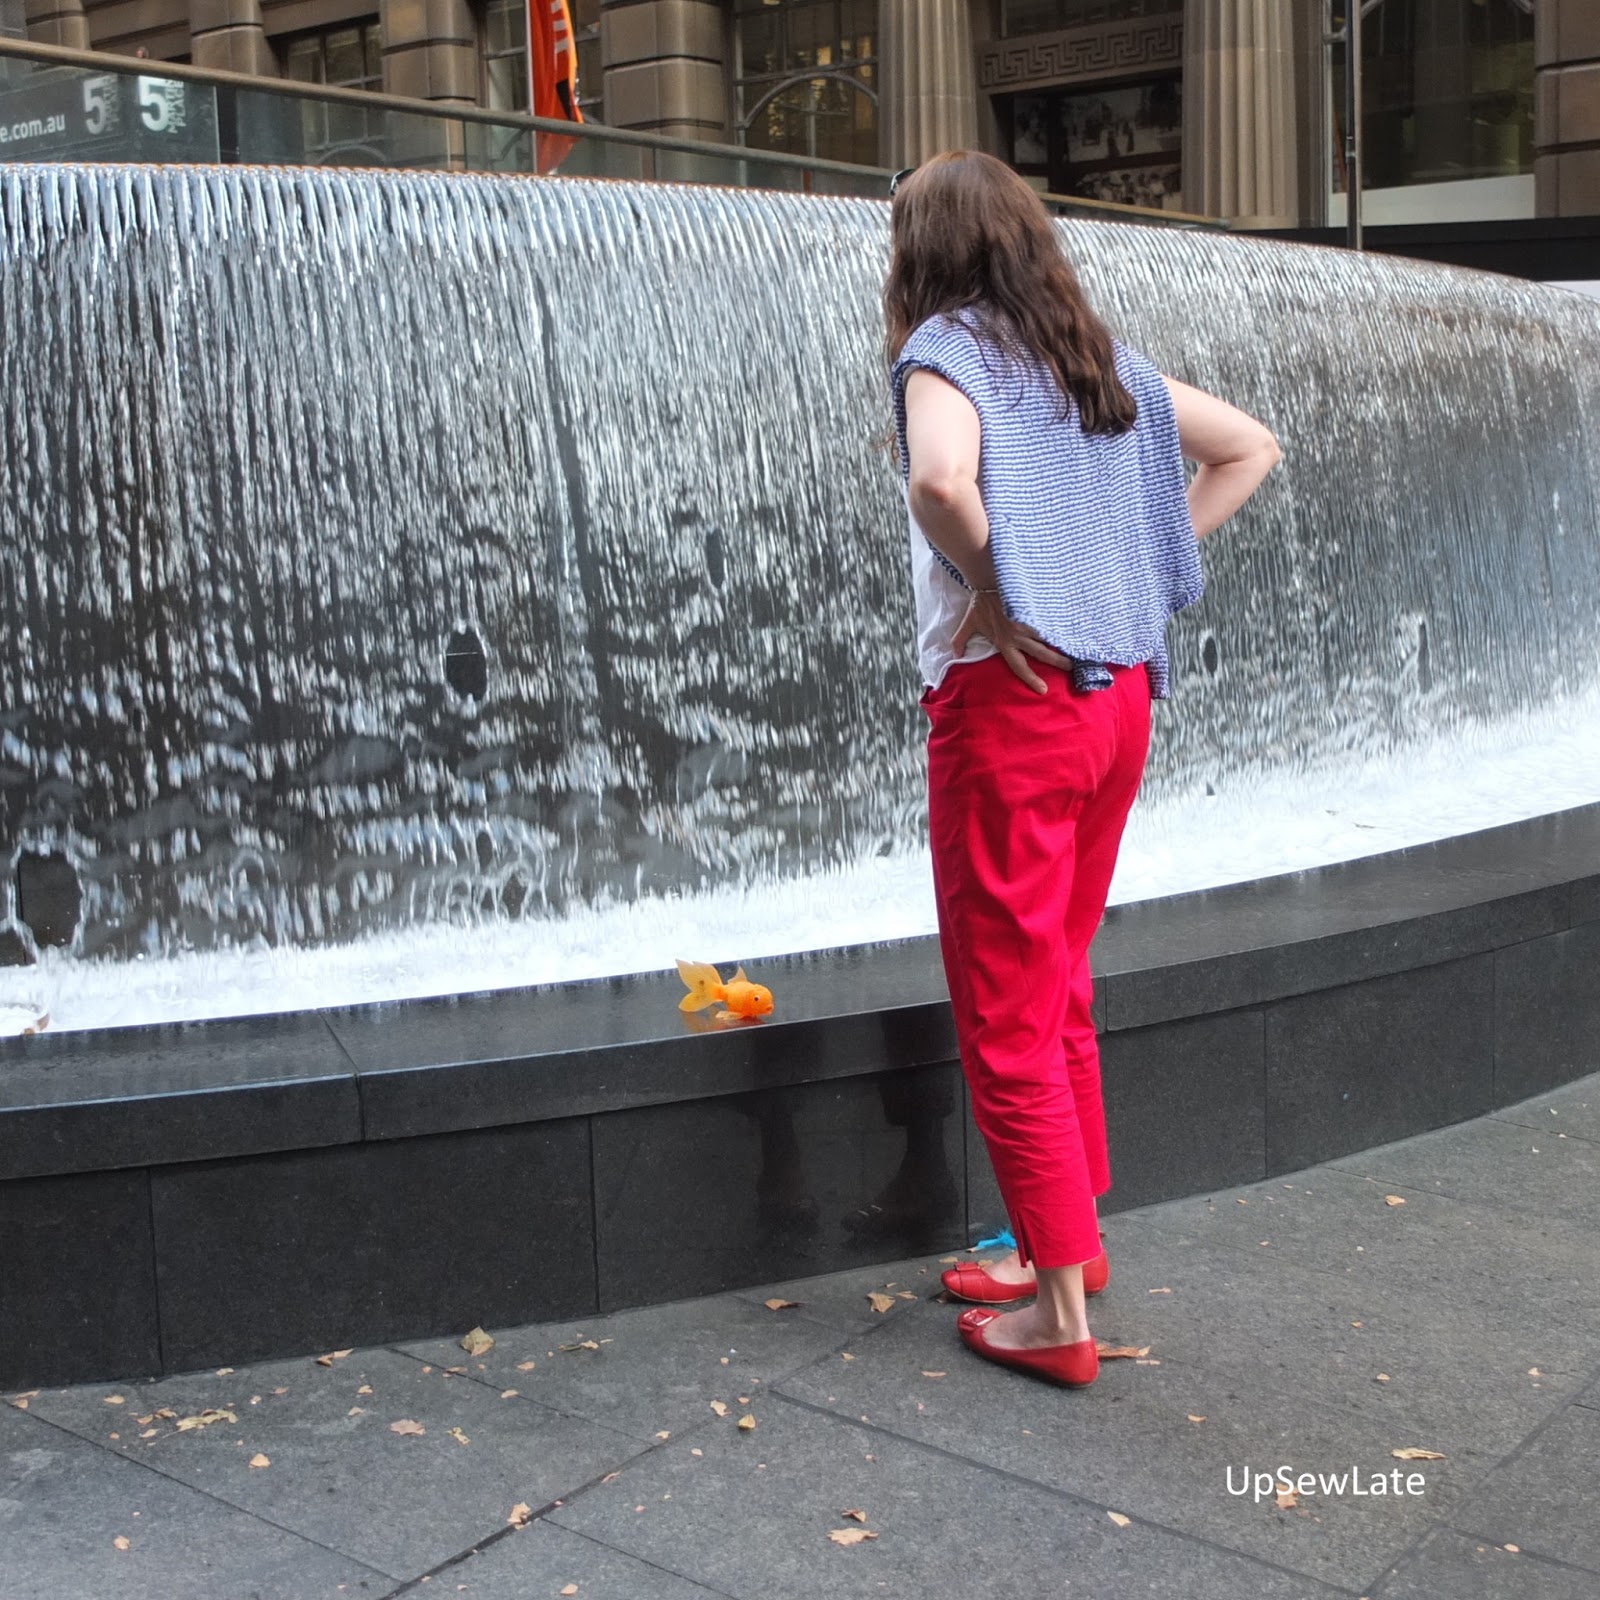
The sausage casing factor is not so obvious in the shade, but shade isn't something you can rely on here in Sydney. It looks fine in these next two photos, right?


Gah I do wish I'd checked my measurements before cutting into the fabric! 


I'm keeping this dress for next winter - just in case I shrink a little or the dress grows a little - but next time I sew I'm definitely getting out the measuring tape first!


Happy sewing and see you soon


- Gabrielle xx 

Wednesday, 8 July 2015

A Winter's Tale

It started with the fabric - I wasn't sure the colours would suit me, but the warm autumnal tones of the sateen really appealed to me. And it was stretchy, which I love, and the price was good, and the yardage perfect, so I bought it.


My first thought was a midi length wiggle skirt, but somehow I find dresses easier to fit than skirts (though how can that be logical?).  Anyway, there was enough fabric for a dress, and then I got fixated on the idea of making something like my Out of Darkness dress, but fully lined and and without the waist pleats. I couldn't be bothered to make small changes to a pattern (a pattern that fits me, mind you) so I went hunting though my stash and came up with Vogue 8766.


I'm pretty sure I got V8766 as part of the deal when I bought a Craftsy dress fitting class that I haven't yet used - the pattern envelope doesn't appeal to me - but if that's the case, oh the irony! For this dress took a lot of adjustment and effort to get to the point you see in these photos, and even with a lot more work than usual it's probably the worst fitting Vogue dress I've made to date (I can cope with the front, but just wait till you see the back!). Yes, I would need lessons to make this dress fit.


Now normally I only make very minor tweaks to Vogue patterns to get them to fit me reasonably well - and yes, either that makes me very lucky or very tolerant of fitting flaws, probably the latter - so I'm wondering if the difference in fit between this and other patterns reflects a difference in the slopers used for the different pattern lines? I guess that would make sense - Donna Karan New York patterns are likely quite different to Vogue Options patterns, aren't they?


I cut the dress out in my lovely autumnal fabric in a size 14 overall, but "graded" down to a size 12 at the shoulders and up to a 16 at the waist. This is a size larger all over than I'd normally sew in a Vogue pattern, but I was trying to be cautious while avoiding making a muslin :).  I cut the same size from black lining fabric, but I added width at centre back, centre front and waist side seams to account for the main fabric having some stretch. The dress pattern tells you to cut out the dress pieces on the cross grain, but I assume that's only necessary for the lace fabrics the pattern is intended for, so I cut my dress on the straight grain (see this excellent straightforward post on grainlines over at The Cutting Class if you'd like a refresher).


And then I raced ahead; no need for instructions! I sewed the shoulder seams and basted the side seams in place. I tried it on. The fit was shocking! There was excess fabric above my bust, the shoulder line was wrong, the shoulders were massively wide, the entire neckline gaped front and back, and there were other mystery drag lines through the bodice despite extra fabric in the side seams. I basted the sleeves in place to check how they affected the shoulder fit, and got myself a strange drop pleated shoulder effect, and no improvements anywhere.

To fix the problems I could see, here's what I did - in stages, with lots of trying on:
  • removed fabric above the bust by raising the shoulder seam several centimetres
  • changed the slope of the shoulder seam
  • trimmed the shoulder size down to fit (I marked my shoulder pivot points with pins in the fabric and added a seam allowance) 
  • added darts in the back neckline
  • took in the side seams  
  • took in the sleeves
  • removed a wedge in the back bodice for a slight sway back
I am not any kind of expert in fitting, but I'm happy with the way this improved the front of the dress, and I THOUGHT I'd conquered all the fitting issues until I saw my photos.


Very nice photos they are too (thank you mum!), except that I discovered that the BACK of the dress just looks disastrous. I was standing with my shoulders back more than normal for these photos, so I wore the dress to work yesterday to test the fit when I'm in office worker slouch mode - and the back fit is definitely a bit better when I slouch.  I guess the squirm and squint over your shoulder approach to back fitting works best for very poor posture - lesson learnt!


I had a look at Pattern Review, hoping for comradeship in the reviews of this pattern, but there were loads of glowing reviews, and evidently I'm in the minority.  Thankfully a blog search helped me re-discover Janelle's posts on the pattern (here and here, though she had a wonderful dress result here).


There are a few sewing details I wanted to show you on the dress, but they're hard to spot on the dress in person. I tried to take some close ups of those little details after wearing the dress to work yesterday, but the days are short and my photos are not good, so I've put them together in a collage with some labels I hope are legible:


And these little details are a few of the things I like about this dress: bra strap holders (why on earth had I never tried these before?), a lovely hard to see invisible zip (yay, I love invisible zips!), darts that align properly between the skirt and bodice (thank goodness for decent pattern drafting!), a darted sleeve cap that would look terrific in a more structured fabric or supported by a shoulder pad or sleeve head, a full lining that doesn't come to the edge of the sleeves (but that one was me and not the pattern), and... oh, one not so impressive feature where the skirt lining hits the outer fabric (that was me again).


In retrospect, I probably should have been suspicious of a dress pattern with this many variations - how can one pattern take so many shapes and fabrics and hope to be good at all of them? I will wear this dress to work because it feels really good on, even if the back fit is shocking, but next time I want this general shape of dress I'm either going to go with a pattern I know or a pattern line that fits me.


Final thoughts?

  • It's got to be easier to remove pleats from one side of the skirt in a pattern that fits than to fit a whole new dress pattern....  
  • A full lining makes a dress lovely and warm in winter
  • Extra width in the lining + ease = lots of comfort
  • Extra width in the lining isn't noticeable from the outside
  • A full lining helps restrain rumples in the outer fabric, but sateen just rumples like mad
  • Bra strap retainers are THE best invention in necklines
  • Shoulder darts rule!


See you soon

- Gabrielle xx

Sunday, 14 December 2014

StyleArc Philippa: Camera, I Beg to Differ

If the camera never lies then it's certainly true that mirrors lie. But maybe both do?

I've got a top to share with you today that proves that mirrors and cameras disagree - though in my opinion, cameras have happy days (everything is beautiful - that includes YOU!) and grouchy days (everything sucks, I hate you!). This particular top looked terrifyingly bad in the mirror, but looks a lot better through the camera lens.

UpSewLate: this top looks better through the lens than in the mirror! 

After a couple of StyleArc successes (mind you, just the one pattern - two Danni dresses blogged here and here) my confidence was strong. The style of the Philippa peplum top really appealed to me - slim line, attractive seam lines, understated peplum, and a sleek V-neck. Yes please!

StyleArc's Philippa Peplum Top

I had a beautiful soft pink ponte lined up, and I was on the verge of cutting it out when a nervous little voice in my head pleaded with me to make a muslin. [OK, OK, I'm sure it isn't necessary, but I'll humour you this time.]  Hence this cheap red ponte version of the top...

I sewed Philippa in the same size I'd used for those Danni dresses, and it looked small... a quick try on at the "nearly constructed" stage confirmed it - it FELT too small! I was going to scrap the top then and there, but in the interests of my own sewing education and the general documentation of sewing fails on the internet I thought I should finish the top and share it here.


So here you go.  At first glance I thought the top *looked* OK in these photos, so let me explicitly point out the fitting and sewing problems.


First of all, the whole top is too tight - I must need the next size up! The pattern is designed for ponte fabrics, but this top is so fitted on me that even a jellybean in my belly would be visible (these photos were taken many, many hours after lunch). It's fitted both above and within the peplum; clinging to rather than skimming over my hips. I envisaged this as a work top, but it's too fitted for the office - all my lumps and bumps would be on display; hello, mutton dressed as lamb! On the plus side, the shoulders feel like a good fit, so I guess they're a size smaller than the rest of me in StyleArc patterns (just like they are in Big 4 patterns).

UpSewLate: I need to go up a size or more for my waist! 
The bust darts are too high. The darts look to end a few centimetres too high on me, so either my sewing was very inaccurate or my bust is lower set than StyleArc's standard - or a combination of the two.

UpSewLate: A classic case of bust darts that are too high
The V-neck gapes. The V-neck is too deep for me. The gaping means I risk flashing my bra cups with the slightest movement, but if I pull the neckline taut the low apex of the V overlaps my bra strap - and I mean the strap that goes UNDER my bust! Given the height of the bust darts, it looks like the pattern is imtended to be very low cut - probably that looks fine if you've got some bust cleavage? but I hate the way it looks on me.

UpSewLate: Yup, that's what a gaping neckline looks like!
UpSewLate: so long as I leave a hand on my hip whenever I bend forward I'll be fine... but is that practical?
The back is too long on me - it desperately needs a big wedge removed. I guess this might be less noticeable if the top weren't so tight...

UpSewLate: A back bodice that needs a swayback adjustment
The sewing is sub-standard. My invisible zip is rubbish, with the fabric not lining up properly on either side of CB, and with the zip not really invisible. And my sewing is probably responsible for the facings popping out of the neckline - I don't think I was accurate enough in following the CF stitch line at the bottom of the facings. I have to say though that it's hard to do your best on something you already know you're getting rid of. 

UpSewLate: The blinding red hue hides the flaws! 

There are obvious solutions though, aren't there? Yes...
  • I could go up a size or more through the body - either by having a crack at grading, or by using smaller seam allowances - and that would make the top a lot less fitted.
  • I could lower the bist darts.
  • I could raise the V, pinching out a dart from each side, though I'm not confident I'd get the upper bust CF line right...
  • I could make a massive swayback adjustment.
  • I could take a bit more care with my sewing :-P.
UpSewLate: it's too late for this Philippa! 

Yes, I could do all that, but this particular top has already been donated to charity, and for now I don't think I'll have another go.  Philippa is a winter top, and it's now summer, but more importantly, my mind has already wandered off to other patterns.

I hope your sewing is going well!


See you soon
- Gabrielle x


Wednesday, 26 February 2014

Birthday Blue Linen Shirt (Marathon Edition)

About two weeks before my dad's recent 75th birthday, I decided a homemade linen shirt would make a special gift.

I thought I had some men's shirt patterns in my stash, but all I could find was a vintage short sleeved number that I thought would look too old fashioned on him and two copies of a pattern (V2209) that looked like a shirt pattern but was actually a trouser pattern (Vogue, that was a very misleading picture! And why do I have two copies?).

I tried to get something other than a Vogue pattern for a change, but when I rushed in to Lincraft in my lunch break they didn't have the Burda shirt patterns I liked in stock. It's fine though, I like the pattern I got - Vogue 8889 - and it has potential to make many different flavours of shirt.  If I ever have the energy, that is.

What I wanted was a hybrid: the long sleeves of version C (picture below on the left) and the no tucks casual look of version A (picture below on the right). But with a regular button front rather than the plackets shown. And made to fit a 75 year old...

version C, V8889
version A, V8889

tech drawings, V8889

Shirts can be a lot of work even straight out of the pattern envelope, but I knew it would be a better birthday present if it actually fitted him :).  Lincraft only had V8889 in the too small size (34 - 40, whereas I think my dad should start as a 42-44 before adjustments), perfect for learning more about fitting!

My dad's partner measured him and emailed me the numbers, and then I went looking for information on fitting shirts. If you ever make a shirt and want to know how to make it really fit and how to sew all the details beautifully, I found an amazing resource - the shirt making tutorials on Pamela Erny's blog! I used this tutorial to adjust the pattern to fit dad's abdomen, and I read many other tutorials here that I didn't put into practice - sadly I just felt too pressed for time to master new tricks.

Before I go too much further, let me show you the finished shirt on dad:


Some things are good - I love this colour on my dad (behind the glasses there are blue eyes), I'm happy with my fit adjustments over the abdomen and around the neck, and my replacement of the front button placket worked. I'm also really glad that there's no weird crumples or pulling between the buttons on the shirt front - my buttons and button holes seem pretty well aligned. And negatives? Of course, always! The shoulders are a little wide, the sleeves are a LOT long, the collar points aren't pointy enough, and probably there are other fitting issues I'm not even aware of!  My dad was pretty happy with it though, and of course that's the main thing.


Oh and this is how dad's RTW shirts usually seem to fit.  I kind of like that he looks sad here (the "before" picture, of course) then happy in the shirt I made!


And now it's time for the long waffly section about the adjusting and the sewing...

If you'd like to skip the waffle and see a beautiful version of this shirt, head over to kbenco's blog, but otherwise please read on :)

The process started way before I got near the sewing machine, of course. First up I shopped my stash. The fabric I chose  is a recent purchase from The Fabric Store, and it's a medium weight linen. I'd pre-washed it as soon as I'd bought it, so it was ready to go.  

The next step was to review the pattern size against dad's measurements. My results don't always show it (I often run out of time at the end), but I tend to be an over-analyser: 
  • I read Vogue's information on what size to choose for men...
  • I checked the stated measurements on the pattern instructions for the size I was using as a starting point (size 40 - allegedly two sizes too small)
  • I reviewed Vogue's ease chart to understand how loose they meant by "loose-fitting"  (although this is the ease chart for women - I haven't found similar for men)
  • For a more accurate assessment of ease, I measured pattern pieces and added up the numbers to get the actual circumference measurements for the shirt around the chest, waist and hips as well as the neck, and compared these to the measurements in the size chart (15 cm ease in the waist - wow!)
  • I scribbled out a matrix of all these numbers against my dad's measurements so I could work out how much I needed to add where
And then it was time to think about fitting, to think about my dad' shape, and to decide where to adjust the pattern. I drafted new collar (9), collar band (10) and under collar band (11) pieces because I wanted the collar to be 9 cm longer than drafted: 7.5cm extra length and 1.5cm ease. I  widened the back and yoke by 3cm, and in retrospect I shouldn't have made this adjustment as dad doesn't have particularly wide shoulders, and doesn't have a particularly wide back (d'oh).  I modified the side back (7) and side front (8) pieces substantially, adding 2.5cm to each on the side seams at waist level, tapering to 0.5 cm under the arm and 1.5cm at the hem. I  widened and lowered the front neckline to fit the collar, and omitted the button placket (and piece (11)). And then I used this very exciting tutorial  for a 'portly' adjustment :), with the front (1) sliced parallel to the grainline, up to about chest level, then rotated to create about 5cm extra width on the hemline.

Phew! Two weeks had nearly passed - time was running out! So I quickly sewed the shirt together sans collar and sleeves, and dad got to try on this very incomplete, unfinished shirt thing on his birthday. It was a bit snug across the chest, and some of my flat fell seams and top stitching didn't look too good, so it was unpicked and sewn back together with smaller front seams and a new edge stitching sewing machine foot. 

Much better. New deadline? Dad's birthday lunch, 10 days hence.

Off to work, home to play with the kids, suggest homework, make dinner, supervise baths, put them to bed, AND collapse on the sofa... Time flew past and I didn't pick up the shirt until the Thursday night before the Sunday lunch. Everything took longer than expected, and I skipped checking the sleeve lengths :( and just sewed like a sewing maniac. On the morning of the lunch I sewed even more frantically, and learnt how to get the machine to do the buttons for me - placement per one of Mr UpSewLate's business shirts - and yay! I got to the lunch late, but the shirt was finished and even ironed.

And I'll leave you with just a couple of detail pics. The collar, where you can see that a machine sewn button looks alright:


And a sleeve placket and cuff.  I think I last sewed a sleeve placket over 20 years ago!


I'm so tired!

My current sewing project is a pleated pair of pants, and it's not going well at all! I think I chose the wrong fabric to start with - it's thick and has no drape - and I'm not really sure how pleated pants are supposed to fit, though I do suspect that the dropped front crotch, tight back crotch, and puffy hips I've currently achieved are probably not quite right... I might have to morph these pants into something else!

Anyway, thanks for reading and I hope your projects are working well :)


See you soon


- Gabrielle xxx

Wednesday, 17 July 2013

Beating Cold Weather with Cool Pants

School holidays have just ended here in Sydney, and we took the opportunity to take our kids on a proper winter holiday - they'd never seen snow before! 

We decided to travel to Mt Hutt, near Christchurch on the South Island of New Zealand. I'd been keeping tabs on Andrea's blog through late May and June - and she was talking about really cold weather and even snow :).  

Two days before we left I mentally reviewed our clothes for cold weather.  Mr UpSewLate has an internal heating system that keeps him toasty even at ridiculously cold temperatures, so he was fine. We were all OK for ski clothes, but I wasn't sure about the non-skiing days...  how cold would it be? Would my jeans be cosy enough?  I didn't think so...


The threat of cold weather was a great excuse - I'd been planning these pants for months, even before I saw Rachel make the same pants from the same fabric! (What can I say, great minds think alike??).

The fit on my earlier Anita pants turned out to be quite wrinkly under the butt area (oh really, I didn't show you that photo?) - as usual (grrrr), should've expected it - so two nights before we were due to leave I switched to study mode and cut myself off from normal household conversations.  I studied Ruth's fitting comment on my red pants, scanned the pants pages of Sarah Veblen's "Complete Photo Guide to Perfect Fitting", and logged onto Craftsy to fast forward/rewind/fast forward my way through Sandra Betzina's pants fitting tips. And all swotted up, next morning I whipped these pants into a better shape :).


Doesn't look too cold in these photos, does it... but look past the trees, to the right. There's snow!!!


This spot is just somewhere we pulled over for photos on our way to a walk at Rakaia Gorge - to me it's a typical, gorgeous Canterbury Plains view. It was so much colder than it looks - you get a better feel for the temperature in this next photo, taken about an hour later (but excuse my ridiculous boots):


OK, OK, enough with the tourist shots, talk about the pants.

Some close ups now, and I'll describe the fitting changes I made:

Just a few small under-butt lines, + pattern matching over side seam
As I mentioned above, my earlier version of these pants suffered from under-butt wrinkles.  I always have this problem with RTW pants, and the last jeans I bought that fit reasonably well were described as a "curvy" fit.  To paraphrase Ruth's comment on my red pants, wrinkles under the bum say "you need a prominent rear adjustment" (and when you combine this with a swayback Ruth says you get the much more charming sounding "pert bum adjustment"). Translated to a ponti, I figured I could just add a bit of extra length in the curvy area of my bum.

To do this I scooped out the bum curve just a little and extended it about 2cm for a deeper crotch. The inner thigh seam had to join up to this new deeper crotch, so I did a rough bit of grading to adjust the inner thigh line. Scooping out the bum curve also removed a bit of fabric at centre bum (perhaps in the under bum area really?), and I was worried this could remove necessary fabric width across my bum, so I added 0.5cm width to the sides around hip level.

I don't seem to have clear photos to show how well this worked: there is still a little bit of wrinkling under my bum, but it's absolutely inconsequential compared to the amount of wrinkling I normally have in leggings or pants. Very small changes in the crotch curve or length seem to have a big impact on fit!


With a much thicker ponti than first time around, I went up a size from the size my snug measurements indicated for the full length of the front leg pattern pieces and from the hips up on the back leg pattern pieces. The muscles in my front thighs get bigger when I run, but the muscles in my back thighs seem to stay kind of inconspicuous...

I also removed the tapering from around knee level down, and because I wanted cosy ankles (and don't we all?) I added about 10cm in length to the legs... not quite enough as it turns out, so I didn't hem them.

I cut the pattern pieces individually as they would wrap around my body so I could pattern match going around my body, starting at the back left side seam. The fabric matches pretty well on the centre back, right side seam, and centre front, and reasonably well on the inner leg seams, but mismatches on the left side seam:

Reasonable pattern matching over inner leg seams


When you've finally finished taking all your blog photos, then and only then can you sit down and relax!

Longer legs to cover ankles

Phew!

And in brief, the kids also each scored a last minute NZ merino wool top that they could layer over a thermal top for skiing days:


My son's top was drafted using a too-small size 6-8 RTW top for the sleeve and body widths (to make it really snug) and a too-big size 9 RTW top for the sleeve and body lengths, and uses slightly smaller bands around the wrists and neck (twin needle stitched at the neck). My daughter's top used a Burda pattern (which I am feeling too lazy to dig out), simple folded over fabric rather than bands at the wrists, and a band around the neck which is not twin needle stitched down.

Although I find Burda patterns to fit my kids really well, interestingly in this case I prefer the fit of the top that was made without a pattern - looks like my kids' shoulders are narrow - and I like the separate wrist bands on my son's top.

Both of these tops got worn on the coldest skiing day (the one where I had a skiing accident and hit my head on icy snow and may have had concussion, but that's a separate story), but apparently they're itchy and can't possibly be worn without thermals underneath. 

And so concludes the ski holiday sewing!  


See you soon,
  Gabrielle x

Tuesday, 18 June 2013

Reddy, Steady, Go!

Is there anyone out there who really has pants fitting sussed?*

* If so please, please, please chip in and tell me how to fix these pants!  


These red pants were made in time for Me Made May, but by the end of May the pants were feeling a little less than awesome (sorry pants, not your fault. If I need to eat more chips to fill you out I will, promise).

Although the pants looked OK to me from the front, my photos showed me there was some excess fabric in the back. And now that I've noticed, it's really bugging me :(


I have made three pairs of pants that fit well (here, here and here)... but all three were all made from the same pattern. And now that I'm using a new pattern, I'm thinking those pants fitting 'skills' were pure luck :). 
 

My new-ish red pants, made just in time for Me Made May, use Vogue 1293, an Anne Klein pattern for "Semi-fitted, tapered pants ...[with] contour waistband, carriers, side front pockets, fly front zipper, hem slit, and narrow hem."  The suggested fabrics are Linen, Crepe, and Dupioni, but I used a lovely stretch cotton from Tessuti fabrics (bought last year). Oops!


I muslined the pants in a vile pale blue shiny stretch fabric (no, there are no appalling photos). There was a truckload of excess fabric in the front (perhaps necessary for non-stretch fabric) so I removed a triangular wedge, widest at CF and tapering to nothing at the sides.  I adjusted the pocket pieces to take out this wedge too. I removed a smidgen of length from the waist at the centre back to make the waistband stay level all the way around, and removed some width from the side seams to make them taper. 


Then I sewed them up in my lovely red fabric, with organza strips stabilising the pocket openings. The pocket bags are cute polka dot rayon, but I've misplaced the photos. I love how neat the fly looks, even if I do say so myself...


When I wore these new pants in early May I thought they fitted me really well, and I was really pleased to be part of the red pants trend. The photos make it very clear there's still work to be done, but interestingly (and GOOD news) the fit is a million times better than that of my two favourite pairs of RTW pants:

Exhibit A - look at those folds of fabric!!


and Exhibit B - look at the unintentional harem effect!
 

With all this room for extra luggage, do I even need a handbag?  

Hmm, but seriously, I would like to improve my pants fitting skills - I want to make this pattern again in an even louder fabric, but I'm holding off till I know how to correct the problems. If you have some advice - nothing nasty, mind - I would really appreciate hearing from you!

Thank you!

- Gabrielle x
Related Posts Plugin for WordPress, Blogger...