Showing posts with label 2017. Show all posts

Sunday, 10 December 2017

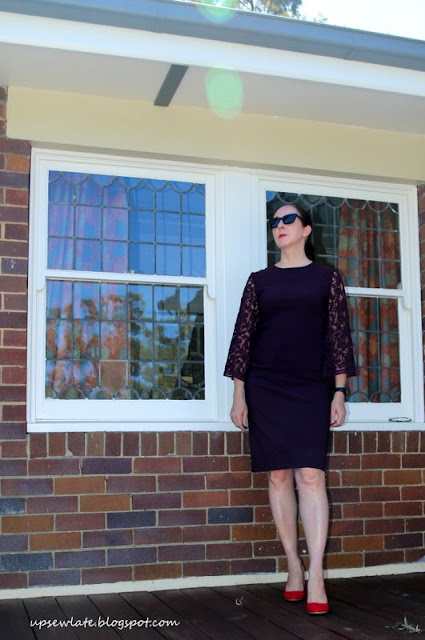
Vogue 8945 with Lace Sleeves


Back when the weather was still cold, I stumbled upon a remnant of purple lace at Tessuti fabrics. Below I've got a close up of the fabric drying on the line alongside the coordinating stretch viscose I paired it with, and you can see the pretty patterns in the lace, but what you can't see is the straight edged selvedges on the lace.


The lace remnant was too small for a dress, large enough for a small top perhaps, but the perfect amount for a pair of bell sleeves with the selvedges in place of sleeve hems, woohoo! Aren't those selvedges cool!! 


Vogue 8945 is a semi-fitted dress with two views: view A (this one) with bell sleeves, and view B with layered sleeve flounces.  I made view B of this dress for Melbourne frocktails a few years ago (see dress post here, and post for the related cape here), and I'd been keen to give view A with its simpler bell sleeves a go ever since.  V8945 is a good pattern for a statement sleeve - the dress itself is very plain, so the sleeves really get to star.

Speaking of sleeves that star, I entered these very sleeves in Helen and Diane's sleevefest2017  competition back in August (before I'd tried the dress on though!) and won a prize courtesy of Ryliss Bod - I won a copy of The Minott Method Total Pattern Fit. Have you heard of it? I hadn't, but it's basically a very comprehensive fitting manual.  I've skimmed through the book (so time poor these days!) and it also has fitting tips in the form of handy wrinkle diagrams telling you what the various wrinkles mean - I will definitely be using those diagrams. 


Hmm. And unfortunately, although this dress is one I adored on the hanger, on taking these photos I discovered it was a sausage casing dress. Isn't photography a killjoy! And it turns out the prize is very apt for a dress that fits this badly :(. 

I've deleted most of the sausage photos, but I'm willing to share one piece of proof with you:


This pattern is recommended to be sewn in a faille, crepe, challis or linen - so a woven fabric with some drape I guess? but both times I've made it I've used something quite different, and to do the pattern justice the dress really needs a drapey fabric OR a looser fit.

First time around I used a bonded polyester for the sheath dress and a combination of merino wool, more of the bonded polyester and silk organza for the sleeves - that version was a much more successful incarnation of the pattern, most likely because this dress size was a looser fit on me back then:


The two dresses are the same size (12 top half, 14 bottom half), but those couple of years apparently resulted in a couple of extra kilos, so even though I'm crazy about the sleeves, this dress hasn't had a single wear since being made (hangs head in shame).

The sausage casing factor is not so obvious in the shade, but shade isn't something you can rely on here in Sydney. It looks fine in these next two photos, right?


Gah I do wish I'd checked my measurements before cutting into the fabric! 


I'm keeping this dress for next winter - just in case I shrink a little or the dress grows a little - but next time I sew I'm definitely getting out the measuring tape first!


Happy sewing and see you soon


- Gabrielle xx 

Saturday, 9 December 2017

StyleArc Tully Pants

I only meant to step away from the blog for a week or two while work was insane, but somehow that turned into a few months - oops!

Anyway, I'm back now, and I've got a backlog of sewing to share.  I'm keen to get everything blogged by the end of the year, so please excuse my too quickly edited writing and photos - and let's start with these Style Arc Tully pants:


This fabric BTW came from Jen's glorious stash - she has an amazing eye for op shop fabric! It's shirting weight with a bit of stretch, and I suspect its composition is a blend as it didn't respond well to a hot iron. 

The balloons in all these photos are left over from my recent birthday party - seemed a shame to pop them all, so although I've taken them down I'm leaving them around the house for now :). They also make good props for people who've forgotten how to take blog photos...


I liked the look of this pattern when I saw it as a new release on Instagram, but I was a bit concerned that the paper bag waist and bow on the tummy might not look great on my rectangular shape. And to be honest this is not the most flattering style of pants I've ever worn, but I like that they're different to all the other pants in my wardrobe.  Actually I think a few frills on the shoulders or bust might help - or alternatively a strong sleeve could do the trick (I'll try that next time!). 


The pattern is a straightforward one to make because the pants have no closures: no zips or buttons whatsoever! Basically you need the pants to be wide enough at the waist to get on over your hips, and then you bring in that extra width with elastic - easy. The distinctive ties on the front are decorative, and slot neatly into pleats.


The elastic is only supposed to be set in around the sides and back of the pants (ie not over the tummy) but I set it in all the way around, stitching the elastic in place under the ties so it doesn't gather on the tummy.  

Oh - and I should mention the pockets! The pockets are very comfortable:


I believe Style Arc drafts for a women 168 cm tall and I'm about 5 cm taller than that, but my body is a little short for my height and my limbs a little long, so these pants feel a bit short :(.  I sewed a rather narrow hem on the cuff, but it I'd still like another 5 cm or so in length, and preferably added higher in the leg, so next time I make these I'll be chopping up the main leg pattern piece and inserting about 7cm of length there. 


OK, one back view for my sewing friends:


I've seen a few fashionable women wearing this style lately in the CBD, in both stripes and block colours, and if I can find the time I'd really like to make these pants again in a block colour.  The style is also really comfortable to wear, and the pants are a much easier sew than they might look. 

That's it for now! 

I'll be back soon with another quick post - till then, happy sewing!


- Gabrielle xx


Monday, 24 July 2017

Vogue 8877 in an Unnatural Animal Print

This print is not the sort of print I would normally wear, and these are not the sort of colours I'd normally wear either, but when I came across the fabric in the remnant bin of The Fabric Store on a visit with Nic, I found it strangely irresistible.  I may be making a heinous style error (who cares!) but I love it, and I think it's going to "go"- or at least "pop" in a way I find appealing - with lots and lots of the duller characters in my wardrobe :). 


Speaking of the duller characters, in these photos I'm wearing my new top with a grey merino dress (Vogue 1338, blogged here), and I'd just taken off an aubergine boiled wool jacket (Vogue 8930, blogged here) - Vogue trifecta for the win!  I feel too self conscious in the grey merino dress by itself, but I realised today I'd be perfectly comfortable and cosy wearing it with an extra layer. 

Here's Vogue 1338, photographed a few years ago:


and Vogue 8930 looks like this on:


What's with the hands on hips all the time, hey?


This top is view C of the Vogue 8877 sewn from a single fabric, sewn in a size Medium (12-14) and with a narrowed neckline. As I've mentioned before, this pattern is intended for wovens but can also be sewn with stretch fabrics.  The dropped shoulders and curved bust seam are potential fitting challenges, and the first time I sewed the top (from a cotton lawn, never blogged) I thought the fit was a disaster.  Version number two was a t-shirt (loved it, and the fit was of course more forgiving in a stretch fabric), version three was made from linen - no fit issues that time around for some reason, and version four was a merino wool jumper. 

Version two, the crazy bunnies t-shirt:


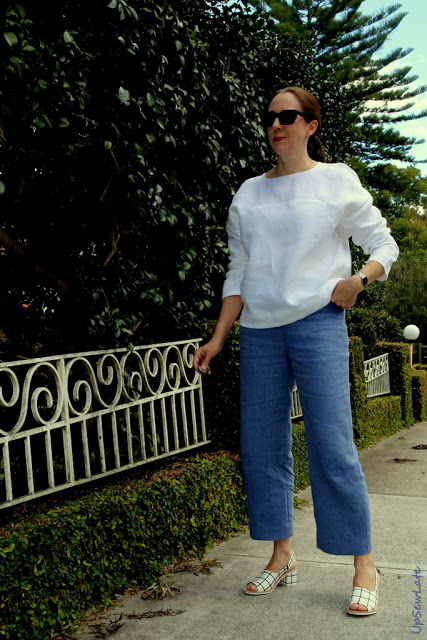
Version three in white linen:


Version four as a merino travel jumper:


This time around my fabric is a white cotton waffle weave with purple, yellow and grey splotches printed on one side. The fabric doesn't really drape, so Vogue 8877 wasn't the ideal pattern - but I wanted to make something oversized and sweatshirt-related and V8877 seemed like a decent representation of that idea. 

To be honest the only hint of sweatshirt I've really managed is that ribbed neckband!  It's a bit subtle, isn't it! 


And speaking of unnoticeable, that curved bust seam isn't even visible in this print, is it - it would have been a good idea to pick it out with some piping, but the idea didn't occur to me till I saw these photos.  


So this is version 5. Apart from the rib neckline, the only change I made this time was to play around with the hemline.  Again, I don't think you can really see it, but I cut into the length of the front bodice and curved the sides down to the (original length) back. I included a really deep hem this time too with what I thought might be noticeable black top stitching but it just blends into the print. Who'd have thought? Turns out subtle doesn't work with fake animal print


I'll leave you with a couple more photos of the new top - I can't think of anything more to say about it! 


Happy sewing, and see you soon!


- Gabrielle x

Saturday, 15 July 2017

I Will Follow (McCall's 7542)

Well I won't usually.  Usually I'll apply my utmost self-discipline to avoid following the social media trends, because I reckon I'm usually tempted to follow only because everyone else is (peer pressure, yes, the force is strong), and that's not a good enough reason really :).


However, this time around the trend was a pattern (McCall's 7542) that looked to tick a lot of boxes for me:
  • Great sleeves: tick
  • More than one variation I'd like to wear: tick
  • Easy without looking like fast fashion: tick
  • Mashable with other patterns: tick
  • Different from other patterns I own: tick


This time around (I'll definitely use this pattern again, even if only for the sleeves) I sewed a variant on option E, which is the option with lower bubble sleeves gathered into the upper sleeve with an exposed seam (no idea of the correct terminology, sorry!). In my version the border between upper and lower sleeves is a regular seam, and that lower sleeve isn't a bubble but a single layer of fabric.

As you'll see I used a couple of fabrics for this top.  I had small and rather lovely piece of geometric wool from The Fabric Store, and it wasn't quite enough for the top, so I coupled it with a small remnant of black ponti for the back of the top.  I love this geometric fabric so much - and it reminds me of a beloved geometric silk from The Fabric Store that I sewed into a summer top a couple of year sago (post here).  The top only needs a single button, so the small purple button comes from my button stash. I think this particular button was inherited from my mother-in-law, who used to wear quite a bit of purple.


I sewed this top in a size 14 - a size bigger than I'd sew in a Vogue designer pattern - because I suspected the McCall's sizing might be more consistent with the Vogue basics line, and I'm more of a 14 than a 12 there.  It's still looking a little tight in these photos, but I expect the fit will be looser when my thyroid levels get back to normal. 


A few people have mentioned the top length in their reviews, and this is something to be aware of before you cut your top out: as well as being quite fitted, it's short!  My version of the top is cut out in the longer of two lengths, but it's not that long. Before whipping this up from a special fabric I'd really recommend measuring the bodice and sleeve widths and lengths. The fact that I've used a stretchy fabric for the back of my top effectively gives me more width, but my lower sleeve is nearly twice the drafted length of the bubble - the original would have hit me at just below elbow length. 


All up, this one's a fun and versatile pattern - highly recommended, and I look forward to trying the trumpet or tulip sleeves soon.  For more examples of this pattern sewn up have a look at Alex's striped viscose version here, Kabunta's blue and pink versions here, Carmen's teal tulip-sleeved version here, and Erika's pale pink accordion pleat sleeved version here.  And there are loads more on Pattern Review of course :).


Ahhh I love geometric fabric...  


See you soon!

- Gabrielle x

PS apparently it's become just about impossible to comment on my blog lately - I'm so sorry if you've been trying to do so.  I do have Disqus installed, so this should be working, but apparently it's become twitchy. Short of uninstalling Disqus and losing lots of lovely interactions, do you know of a good solution for Blogger?  For now, I'm contactable via email (corbettgabrielle .at. gmail .dot. com) and through the bloglovin comments system. Thanks in advance! 

PPS I just went over to the Disqus site and had another go at fixing things - and for now it seems to be working. If you're having similar issues, I logged in to the Disqus site and then under the Settings menu selected Installation.  My Disqus widget looked OK, so I moved on to step 2 (import Blogger comments to Disqus) and then cicked on the button for a one-time import followed by clicking to sync comments. Can you please let me know if things go pear-shaped again? Thanks!


Friday, 26 May 2017

Frocktails Sydney: Dark Floral Vogue 1228

Frocktails always feels to me like an opportunity - and close to an obligation even - to make a new dress. So although I'd made a formal dress (not blogged, barely worn) late last year for Melbourne Frocktails, Sydney Frocktails called for something new.

Plan A was another formal dress in a divine duchesse satin layered with tulle and boning and organza and lining (hmm sounding a bit like my Melbourne frocktails dress...), but the pattern I had lined up for all these materials was the wrong size. Cold feet and procrastination ensued - I will make this dress another time though. 

Plan B was to make something quick, with fabric from the stash, and using a pattern I'd used before - learning from Blogless Anna, who always rocks up to the Melbourne Frocktails in simple, elegant garments made impeccably from beautiful fabrics. 


Here it is then: Vogue 1228 (previously blogged here, in what I admit was NOT a particularly useful review), sewn from a small length of gorgeous fabric from The Fabric Store that I'd previously earmarked for a mildly flared midi skirt:


Apologies for blending into the background in so many of these pictures (but that's introverts for you, right?) - I don't know when I'm going to have the free time to re-take them, so I hope they're good enough for you to see where the dress starts and ends.


Pattern:
This Vena Cava pattern is rated easy in the Vogue rating system, and is definitely rated correctly. Mind you, Vogue's "easy" is not the same as Simplicity's "easy" - there are still some interesting techniques going on! This pattern is described as follows on the envelope:

"Close-fitting (through bustline), above mid-knee length dress has front and back stitched pleats, kimono sleeves with sleeve band and narrow tabs, stitched facing at neckline, invisible side zipper, very narrow hem at lower edge."


Between making the dress way back when and now I misplaced a crucial page of instructions (yes, the page that tells you how to make the front and back stitched pleats and how to then finish the front neckline without showing the pleat), but luckily for me another blogger had documented these exact steps in her review

I found the fit to be consistent with other Vogue patterns I've made before, but if you do sew this up, as usual, I'd recommend measuring the pattern pieces. On me the dress is a little close fitting through the hips because I just assumed I could still wear the size I'd cut out last time :(.

Sadly the pattern is way, way OOP, but there look to be lots available on eBay and etsy. 


Fabric:
This heavenly fabric is from The Fabric Store, though they don't have it in stock anymore. It has a lot of body, which I love in the sleeves of this dress. Although the right side of the fabric is very dark with a lovely sheen, the underside is a pale grey and matte. I don't recall the fabric composition but perhaps it's a viscose-silk blend?  It's beautiful up close but the right side is quite fragile; I ended up snagging the dress on the sequins of my handbag while we were out.


The handbag - which I didn't make, though it'd be an easy sew - is another story.  Those big sequins show different colours when you flip them, which made for lots of fun with certain cheeky people writing messages on my bag while I wasn't looking :). Let's just say I wouldn't be surprised if Christy made a bag just like this one day...


Modifications:
Having made the dress before I knew I could skip the side zipper (one benefit of being slightly pear shaped!). 

I also knew the neckline was a problem - as drafted, the neckline is quite low. This is a problem on me because the square shape is also quite wide, and the corners of the neckline end up showing a triangle of bra cup on each side. Obviously this is not going to be an issue for people with a lower set bust, but I needed to either raise or change the shape of the neckline to remedy this issue. If I'd raised the neckline, this would have raised the point where the bust pleats release, and I felt those pleats need to be quite high to do their job. So my solution was to narrow the neckline by a centimetre all the way around (back and front) and then also to taper the sides of the square inwards from the shoulder line to the lowest point on the bust, changing the shape from square to isosceles trapezoidal (I love a bit of geometry in sewing!).


Fabric limitations brought the hemline up several inches, but I was then able to make up some of this length with a hem band sewn from fabric cut on the cross grain (and it doesn't hang quite right, but since this dress is generally worn in the evenings I don't think this is very noticeable). 


And instead of making tabs to hold the sleeve bands folded over I used small, invisible hand stitching to hold the bands in a permanent fold.


Yay or Nay?
This dress is definitely a "yay" dress!

Give the fancy fabric I thought this dress would end up languishing in my wardrobe with all the other fancy dresses, but it's had heaps of wear - I don't go out much, but this dress has still managed about half a dozen outings over the last couple of months!  I'll have to remember this for future dresses: a simple design makes for a more adaptable dress than a complex one.

This particular dress shape is also perfect for running down the street, catching the train, playing with the pup... it's not voluminous, but there's enough width in the skirt for lots of motion. Alternatively you can pretend you're running for a train while your pup lies around in the grass:


And the frocktails event itself? Well, it was every bit as fabulous as you might imagine :).  The venue was cool, the cocktails and snacks were delicious, there was a surfeit of frock inspiration, and too TOO many people to chat with - locals, Queenslanders, Canberrans, Melbournites - these events always go too quickly!  You can see lots of portraits from the night on Caroline's Instagram feed (thank you Mr Usefulbox for this lovely photo of me!), and you can read Caz's wrap-up blog post here.


I'm already looking forward to the next frocktails, and if you're even slightly tempted, I'd encourage you to come along too! see you soon

- Gabrielle xx
Related Posts Plugin for WordPress, Blogger...